

You finally have the backyard you’ve been dreaming about — and then you look up and realize every neighbor has a perfect view right into it. Sound familiar? A DIY privacy fence on a budget is one of those projects that sounds complicated until you actually get into it, and then it turns out to be surprisingly doable for most homeowners.
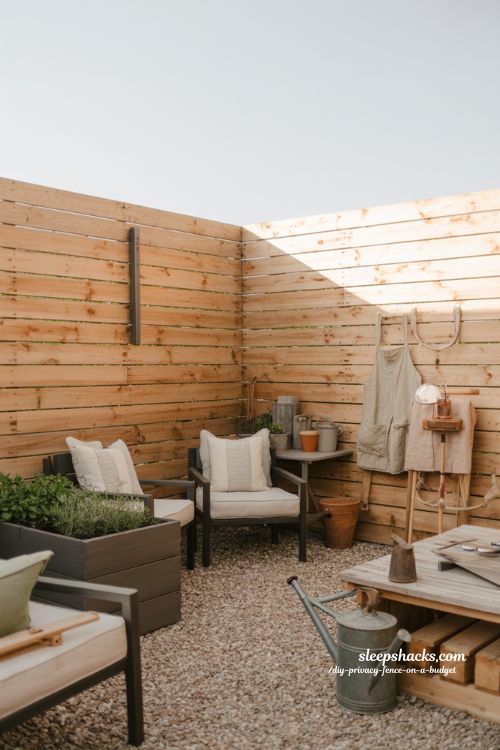
The good news is you don’t need to hire a crew or spend thousands to get real, solid privacy.
- A board-and-stringer cedar fence costs as little as $175 per 8-foot section when you build it yourself.
- Staining your boards before installation saves time and gives you a much more even finish.
- Always call 811 before digging — buried utility lines are a real hazard even in residential yards.
Why a DIY Privacy Fence Is Worth Building Right Now
Outdoor living has taken off in a serious way across the USA. More homeowners are treating their backyards as real extensions of their living space — decks, patios, fire pits, garden corners. But all of that investment stops feeling worth it the moment you realize you don’t actually have any privacy. Hiring a fencing company to install a 6-foot cedar fence runs $25 to $35 per linear foot installed, which means a modest 50-foot run easily hits $1,500 or more just for labor and materials. Building it yourself cuts that cost dramatically, often by 50% or more.
The timing matters too. Cedar is readily available at The Home Depot and Lowe’s year-round, and panel-style pre-fabricated sections are easier to install than ever. Whether you’re working with a raised deck, a flat yard, or a chain link fence you want to upgrade, there’s a DIY approach that fits your situation and your budget.
| Fence Type | Approx. Cost / 8 ft Section | Skill Level | Best For |
|---|---|---|---|
| Board-and-Stringer Cedar | ~$175 | Intermediate | Long runs, ground-level builds |
| Pre-Fabricated Panel | ~$230 | Beginner-Friendly | Fast installs, even terrain |
| Pallet Fence | $0–$50 | Beginner | Temporary or rustic looks |
| Bamboo Roll | $30–$80 | Beginner | Chain link upgrades |
| Deck-Mounted Privacy Screen | $100–$200 | Intermediate | Elevated decks, targeted privacy |
[IMAGE: Alt text — diy privacy fence types comparison cedar pallet bamboo panel backyard]
12 DIY Privacy Fence Ideas for Every Backyard and Budget
1. The Classic Black-Stained Cedar Board Fence
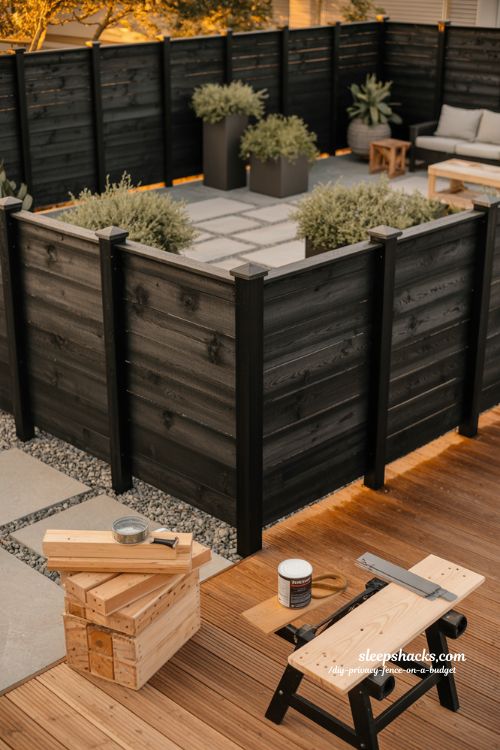
There’s a reason this style keeps showing up on Pinterest boards and home decor blogs — it looks expensive and clean, but it’s completely buildable on a DIY budget. The secret is the stain. Painting or staining cedar boards black before installation (rather than after) gives you a consistent, rich finish with no bleed-through gaps at the seams. The result is a sharp, modern privacy fence that feels like it belongs in an architectural digest feature, not a Saturday afternoon project. It pairs especially well with warm-toned decking and greenery.
For the build itself, you’re working with 6-inch cedar boards attached to horizontal stringers between 4×4 posts. Leave a half-inch gap between boards to allow for natural wood expansion. Two coats of an all-in-one exterior stain and sealant — something like Olympic Maximum in Mystic Black — gives you waterproofing, UV protection, and fungal resistance in a single product. Cedar is naturally rot-resistant, so this fence can last 15 to 25 years with minimal upkeep.
- Stain boards flat on sawhorses before you cut them to length — it saves serious time.
- Use a consistent spacer (a scrap of ½-inch plywood works) to keep board gaps even all the way up.
- Finish vertical edges with 1×4 cedar trim boards nailed over the screws for a cleaner, more finished look.
For the staining step, you need a product that can handle real weather — below-freezing temps, summer heat, and heavy rain. This one is built for exactly that:
2. The Pre-Fabricated Panel Fence for Fast Installs
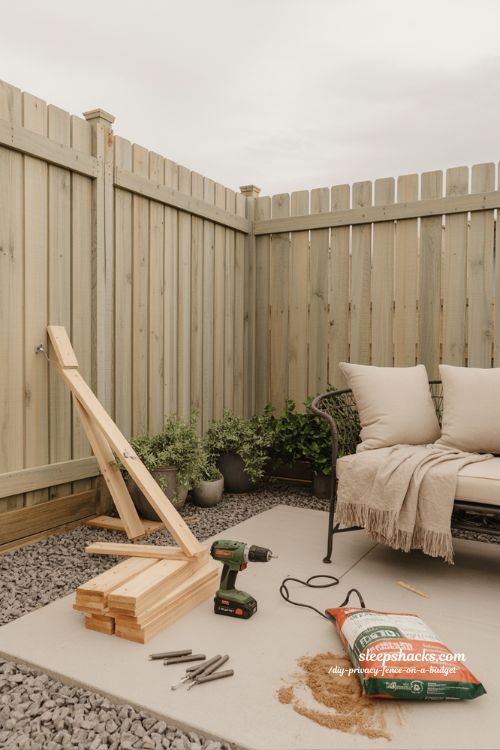
If you want to get your fence up in a weekend without cutting dozens of individual boards, pre-fabricated 6×8-foot panels are the move. These come ready to drop between your posts, which cuts installation time dramatically compared to a board-and-stringer build from scratch. The Severe Weather dog-ear pressure-treated pine panels from Lowe’s are a popular choice — they’re $40 to $80 per panel depending on your region, and they’re designed to take paint or stain after install. The trade-off is that they cost a bit more than building from raw lumber, but for a beginner or someone with limited free time, that trade-off is usually worth it.
The key to a clean panel fence is precise post spacing. Panels are exactly 96 inches wide, which means your post centers need to be exactly 92.5 inches apart to get a flush fit. This is less forgiving than a board-and-stringer fence where stringers can be trimmed to fit. Set your posts with temporary bracing before pouring concrete so you can dial in that spacing exactly — once the concrete cures, you don’t get a second chance.
- Use ground spacers (two stacked 2×4 scraps) to hold panels off the soil — direct ground contact leads to faster rot.
- Have a helper on standby — panels can weigh up to 100 lbs and need two people to position safely.
- Drive at least four screws per side per panel for a connection that doesn’t rack over time.
3. The Post Base Deck Mount for Raised Decks
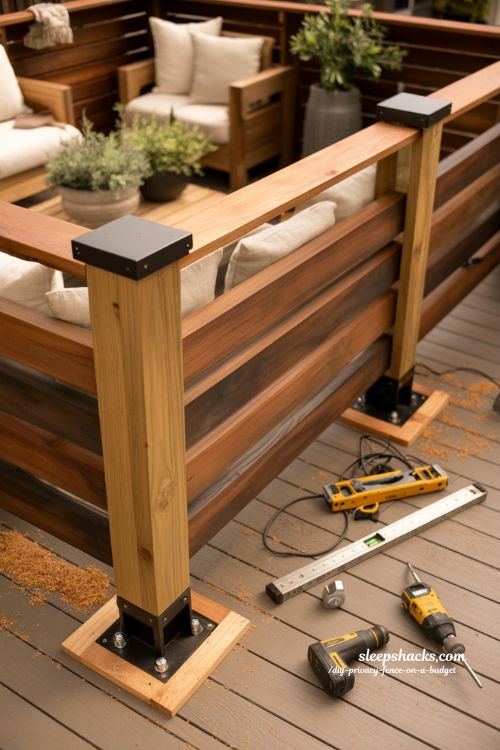
If your deck is elevated — even by a foot or two — you’ve got a specific problem that a standard in-ground fence doesn’t solve. The approach used by many DIYers in this situation is a surface-mount post base: a metal bracket that bolts directly to your deck framing or a cedar blocking pad, so the fence posts sit on the deck structure rather than going into the ground. This is exactly how the CityGirl Meets FarmBoy build was done — bolt a cedar blocking pad to the deck framing below, screw a post base bracket on top, drop in the 4×4 post, and level everything before tightening down. It’s clean, sturdy, and totally reversible if your needs change later.
Post base brackets also give you a visible anchor point that doesn’t require breaking through concrete or dealing with frost-line concerns. For a deck-mounted privacy screen that’s 6 feet tall, you want post bases rated for at least 4×4 lumber, and you’ll want to make sure the brackets are galvanized or powder-coated to handle outdoor exposure without rusting through in two seasons. Adjustable-base models are worth the slight extra cost because they let you fine-tune the post angle after installation.
- Attach blocking pads to deck joists, not just to decking boards — joists give you real structural support.
- Level each post in two directions before tightening — a plumb fence is much easier to nail boards to.
- Black powder-coated post bases blend into dark-stained cedar for a seamless look.
A heavy-duty adjustable post base makes this whole setup possible without any concrete work. Here’s a reliable one to check out:
4. The Bamboo Roll Screen for Chain Link Upgrades
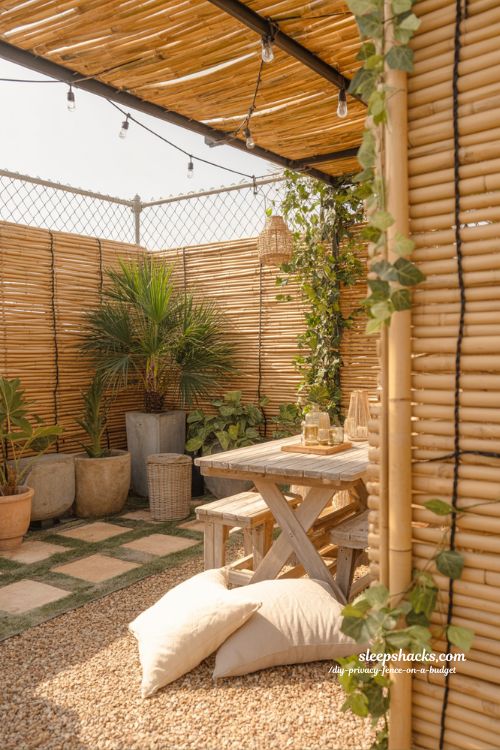
If you already have a chain link fence and just need to add privacy fast, bamboo roll fencing is one of the cheapest and most satisfying upgrades you can make. You’re not replacing anything — you’re zip-tying rolls of natural bamboo or reed directly to the existing chain link frame, which takes maybe an hour for a 20-foot run. The result shifts the whole vibe of the yard from “industrial rental property” to “relaxed tropical patio.” It’s not permanent, but for renters or homeowners who want something fast and reversible, it works really well.
The main thing to watch for with bamboo rolls is the density of the weave — thinner rolls have visible gaps that reduce the privacy factor significantly. Look for at least ¾-inch diameter bamboo poles woven closely together, and make sure the roll is at least 6 feet tall to actually block sightlines at eye level. Zip ties work fine for attachment, but stainless steel wire is more durable if you’re in a high-wind area. Expect to replace the rolls every 3 to 5 years as the bamboo weathers.
- Start at a fence corner and work outward to keep the roll tight and even as you attach it.
- Overlap roll sections by a few inches where they meet to eliminate gaps at seams.
- Pre-treat bamboo rolls with a UV-resistant outdoor sealant to extend their life significantly.
5. The Foam-Set No-Dig Post Method
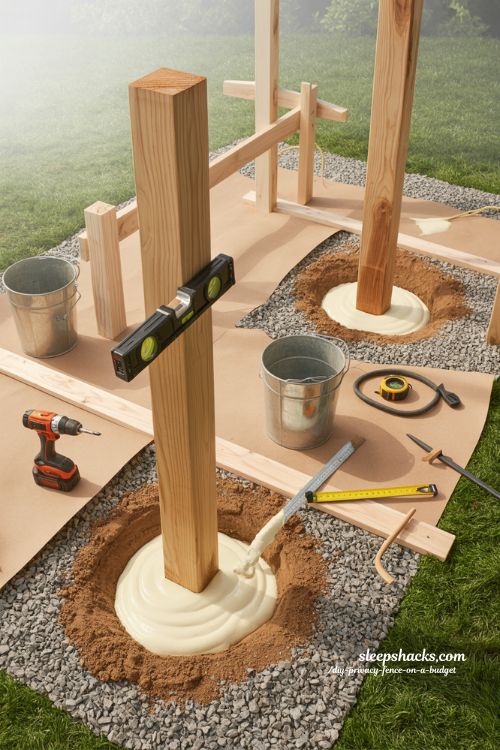
Setting fence posts in concrete sounds right until you’re standing in your backyard mixing 80-pound bags in a wheelbarrow in July heat. There’s a much easier option now: expanding post-setting foam. Products like Fast 2K replace the entire concrete-mixing process — you pour two components into the post hole, they expand and cure into a waterproof, stronger-than-concrete footing in about 15 minutes. That’s not an exaggeration. The same technology is used by utility companies to set poles in the field, and it works just as well for residential fence posts at a fraction of the effort.
One 2.5-pound bag handles a single post hole, so it’s easy to budget. The big advantage beyond speed is that you’re not committed forever — if you ever need to reposition a post, the foam can be cut with a hand saw without the jackhammer situation concrete creates. For a first-time fence builder who’s nervous about post setting, this product alone removes one of the biggest intimidation factors from the whole project.
- Make sure the post is plumb before you pour — you have about 30 seconds to adjust once mixing starts.
- Pour 6 inches of gravel into the hole before the foam for drainage and long-term stability.
- One bag expands to fill roughly a 10-inch diameter hole at 24 inches deep — check your hole dimensions before ordering.
The Fast 2K expanding foam post mix is one of those products that makes the whole project feel manageable, even if you’ve never set a post in your life:
6. The Board-on-Board Style for Zero-Gap Privacy
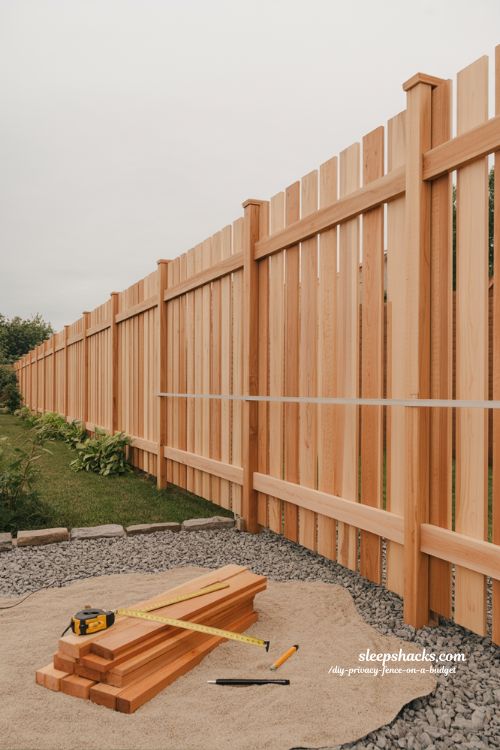
Standard board fences have small gaps between pickets that let in light — and let in sightlines. Board-on-board fencing eliminates this entirely. The design staggers boards so that each board overlaps the gap between the two beside it, creating a true visual barrier with no gaps even as the wood naturally expands and contracts through the seasons. It’s the most thorough privacy option in the cedar fence family, and it looks great from both sides of the fence — which matters if you have a HOA or just a neighbor you want to stay on good terms with.
The build process is similar to a standard fence but requires about 20% more lumber since the boards overlap. Western red cedar in board-on-board style is a top choice among pros for longevity — the natural oils in cedar resist rot and insects without chemical treatment, and with a good stain it’ll look sharp for 15 to 20 years. The style works well in both traditional and modern yard designs depending on the stain color you choose.
- Keep boards at least 2 inches off the soil at the base to prevent moisture wicking upward into the wood.
- Use a story pole (a marked stick) to keep each board at a consistent height as you work down the run.
- Leave the top of boards at a consistent height — a chalk line snapped across all posts before nailing makes this easy.
7. The Lattice-Top Extension for Extra Height
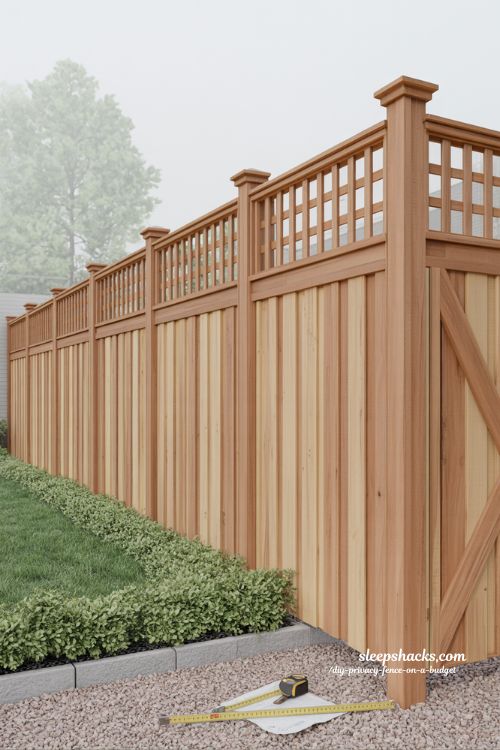
A lot of local codes cap fence height at 6 feet for solid panels, but allow architectural features above that. This is where lattice comes in. A 6-foot solid cedar privacy fence with a 2-foot lattice section on top gives you 8 feet of effective privacy screening while staying within code in most areas. The lattice portion lets light through while still blocking direct sightlines — it’s not see-through in a meaningful way, but it passes code as an “open” architectural feature in many jurisdictions. It also looks genuinely nice, adding visual interest to what would otherwise be a flat wall of wood.
You can buy cedar lattice panels pre-cut at most home improvement stores for under $30 per panel. Attach them to a framed extension above your solid fence section using the same 4×4 post structure. It’s one of the best cost-to-benefit upgrades you can add to a standard fence without a major rebuild.
- Check your local fence height code before building — rules vary by city and HOA, and they do get enforced.
- Match the lattice stain color to your main fence boards for a cohesive look from the yard.
- Frame the lattice section with 2×4 borders to keep it from bowing over time.
8. The Pallet Privacy Fence — Near-Zero Cost
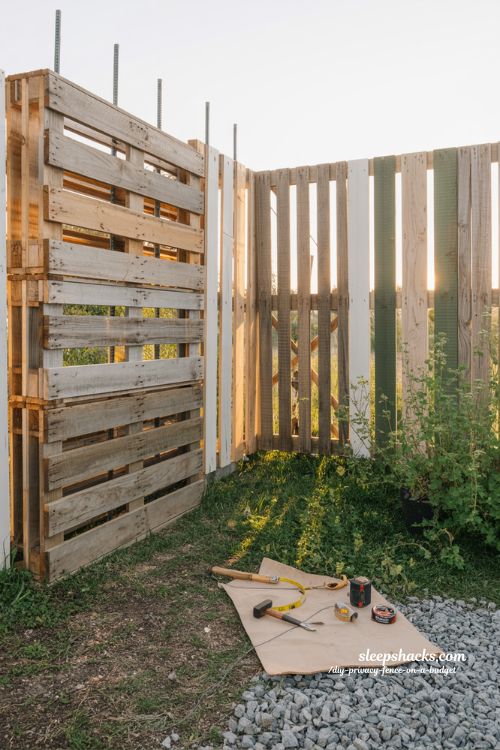
Free or almost-free lumber exists everywhere in the form of wooden pallets, and plenty of DIYers have turned them into surprisingly solid privacy fences. The approach is simple: source pallets from local warehouses, hardware stores, or shipping companies (many give them away for free), then anchor them vertically using rebar pounded into the ground inside the pallet frame. You’re essentially creating fence sections without any lumber cost at all. Stained or painted, a pallet fence can look genuinely intentional — rustic modern is a real design aesthetic, and pallets fit it perfectly.
The main caveat is selectivity — not all pallets are equal. Look for HT-stamped pallets (heat treated, not chemically treated) for any build that will be in a food garden or near kids’ play areas. Avoid pallets stamped MB (methyl bromide) for any outdoor use. Beyond that, check each pallet for structural integrity before installing it — broken slats mean a gappy fence that won’t hold up long.
- Search “free pallets near me” on Facebook Marketplace or Craigslist — this is genuinely how most people find them.
- Sand or wire-brush rough pallet edges before use — splinters are real, especially if kids or pets are involved.
- A coat of solid-color exterior paint pulls the whole look together and significantly extends the pallet’s life outdoors.
9. The Solar Light Fence Topper for Evening Privacy
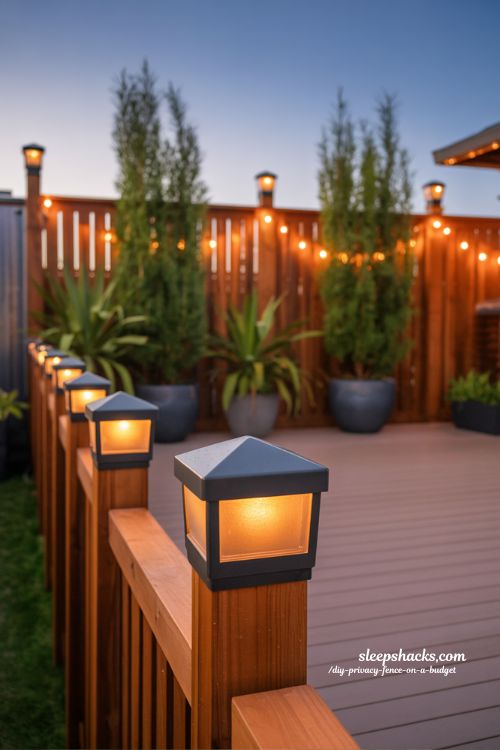
Privacy isn’t just a daytime concern. In the evenings, outdoor lighting actually helps privacy by making the interior of your yard feel cozier and less like you’re lit up on a stage. Solar-powered fence post lights are a great budget-friendly finishing touch — they charge during the day and automatically turn on at dusk, creating a warm amber glow along the top of your fence line. Combined with string lights and a few plants along the base, this transforms a functional fence into an actual backyard destination.
Solar fence cap lights are widely available and easy to install — most just sit on top of a 4×4 post cap with no wiring at all. The best ones have a frosted lens that diffuses the light softly rather than creating a harsh spotlight effect. Look for units with at least 8 hours of run time and a warm white (2700K to 3000K) color temperature for that evening-glow feel rather than the cool bluish light of cheaper models.
- Position solar caps on south-facing fence posts where they’ll get the most direct sun during the day.
- Black post caps with integrated solar lights look sharp against dark-stained cedar and cost under $10 each.
- Add a few tall potted plants along the fence interior to create layered privacy that works even before sunset.
10. The Evergreen Planter Screen — No Digging at All
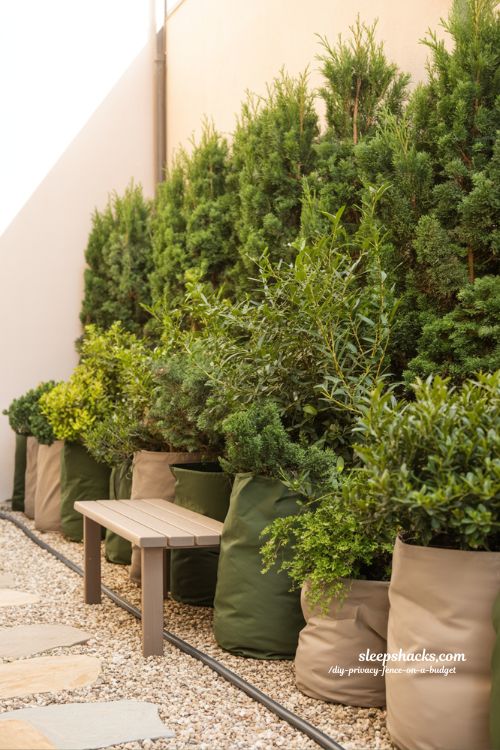
This approach skips fence construction entirely and works surprisingly well for targeted privacy needs. Large evergreen shrubs in tall planters — arborvitae, boxwood, or Italian cypress depending on your climate — can reach 6 to 8 feet when mature and create a dense, year-round green wall. The advantage here is that planters are portable and don’t require permits, digging, or HOA approval in most cases. It’s also the most renter-friendly privacy solution on this list.
For fast results, start with plants that are already 3 to 4 feet tall rather than tiny nursery plugs. A row of tall arborvitae in 20-gallon fabric planters can create meaningful privacy in the first season and dense coverage within two years. The ongoing cost is watering, which is manageable if you set up a simple drip line. Compared to the cost of fence materials, this approach is often cheaper for small spaces, especially if you’re only trying to block one specific sightline.
- Space arborvitae about 3 feet apart for the fastest visual fill between plants.
- Fabric pots are better than hard planters for evergreens — the air pruning keeps roots healthy in containers.
- Group planters in clusters of odd numbers (3 or 5) for a more natural, designed look.
11. The Wire Mesh + Climbing Vine Fence
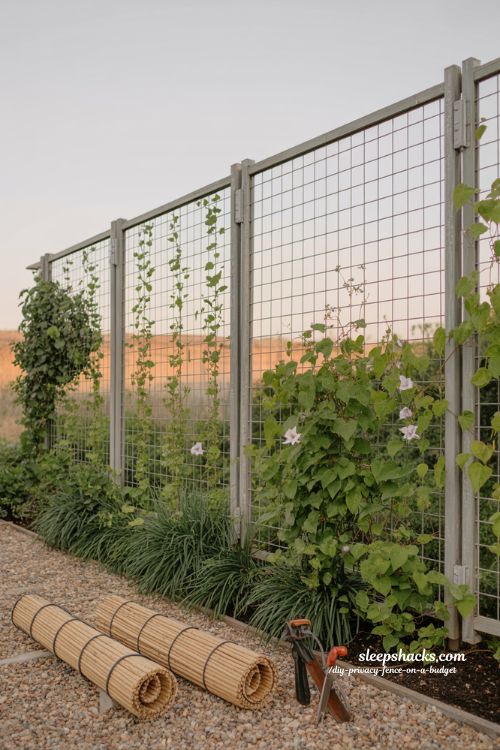
One of the most beautiful long-term privacy solutions is also one of the most budget-friendly to start: metal fence posts with wire mesh or cattle panel, planted with fast-growing climbing vines. Clematis, hops, Virginia creeper, and climbing roses all cover a wire framework quickly and create living walls that shift with the seasons. The up-front cost is just posts, wire, and plants — often under $100 for a 10-foot section — but the result after one or two growing seasons is genuinely stunning.
The downside is time — this isn’t instant privacy. But if you pair it with temporary bamboo rolls on the same framework, you get immediate screening that the vines will eventually replace. Wire mesh also works as a support structure for tall ornamental grasses planted at its base, which fill in dense and low-maintenance. It’s a living privacy solution that gets better every year.
- Anchor metal T-posts with a fence post driver rather than a sledgehammer — it’s much faster and keeps posts straight.
- Plant climbing vines in the spring so they get a full growing season to establish before winter.
- Combine fast-growing annual vines (like morning glory) with perennial climbers so you have coverage while the perennials mature.
If you’re using metal T-posts and wire mesh, the right fence staples and wire clips hold everything together without tools. Here’s a solid staple gun made for this job:
12. The Vinyl Post Mount for Permanent Installations
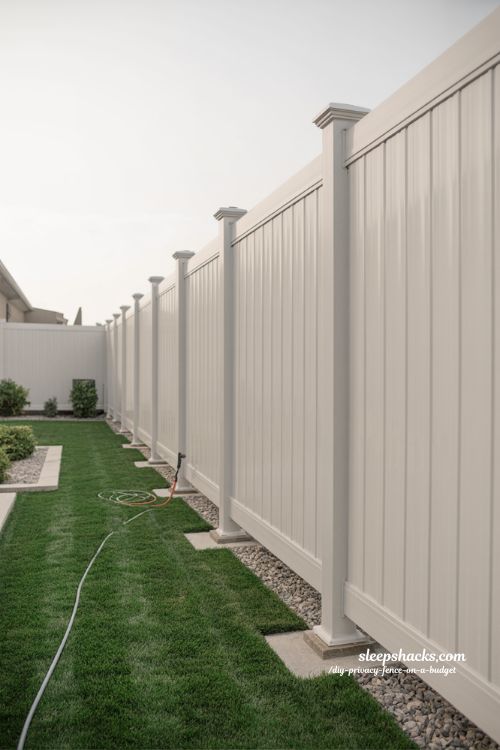
Vinyl fencing has gotten a bad reputation for looking cheap, but that’s mostly a function of the style — a solid-panel vinyl fence in a clean white or tan color looks polished, requires absolutely zero maintenance, and won’t rot, split, warp, or need restaining ever. For budget-conscious homeowners who don’t want to deal with ongoing upkeep, vinyl panels are worth a serious look. They cost a bit more upfront than cedar — around $130 to $150 per 8-foot section — but over a 10-year window they often come out cheaper than wood when you factor in zero staining costs.
The post mount towers for vinyl fencing are specifically designed to anchor into concrete or to wood deck framing, and they’re engineered for the expansion and contraction that vinyl goes through with temperature changes. A 4×4×36-inch post tower is the standard for 6-foot residential panels, and most kits include mounting hardware for both concrete and wood applications. If you know you want a forever fence that you won’t touch again for 20 years, vinyl is worth the extra per-panel cost upfront.
- Space vinyl fence post centers at exactly 92.5 inches — panels are precision-cut and won’t forgive sloppy post placement.
- White vinyl shows dirt, so consider tan or gray panels for lower-maintenance appearance between cleanings.
- Hose down vinyl panels annually — that’s literally the only maintenance required.
Quick Comparison: Which Budget Fence Is Right for You?
Each of these approaches serves a different need. Here’s a clear snapshot to help you decide which direction fits your yard, budget, and time:
| Idea | Cost Range | Permanence | Best For | Maintenance |
|---|---|---|---|---|
| Black Stained Cedar | $175/section | Permanent | Modern backyard aesthetic | Restain every 2–3 years |
| Pre-Fab Panel | $230/section | Permanent | Fast builds, beginners | Stain, check boards annually |
| Post Base Deck Mount | $100–$200 | Reversible | Raised decks, targeted screens | Low — check bolts annually |
| Bamboo Roll | $30–$80 | Temporary | Chain link upgrades, renters | Replace every 3–5 years |
| Pallet Fence | $0–$50 | Semi-permanent | Rustic aesthetic, zero budget | Paint every 2 years |
| Evergreen Planters | $150–$300 | Portable | Renters, HOA restrictions | Watering, shaping annually |
| Vinyl Panel | $130–$150/panel | Permanent | Zero-maintenance priority | Annual rinse only |
For most USA homeowners who want a beautiful, durable fence without hiring a contractor, the black-stained board-and-stringer cedar build is the best all-around choice. It’s the most cost-effective per linear foot, it ages beautifully, and the skills you need are genuinely achievable in a weekend with basic tools. If you want something faster and don’t mind paying a bit more, pre-fab panels are the right call.
One product that makes the whole project smoother — no matter which fence style you choose — is a reliable set of galvanized deck screws. These hold better than nails in outdoor use and won’t rust through over time the way standard screws do:
FAQ: DIY Privacy Fence on a Budget
What is the cheapest way to build a privacy fence yourself?
A pallet fence anchored with rebar is the absolute cheapest route — pallets are often free and rebar costs just a few dollars per post. If you want something more polished, a board-and-stringer cedar fence runs about $175 per 8-foot section in materials, which works out to roughly $22 per linear foot — significantly less than the $25 to $35 per linear foot you’d pay a contractor. Building a DIY privacy fence on a budget is absolutely achievable with basic carpentry skills and a free weekend.
Do I need a permit to build a privacy fence?
It depends on your city and HOA rules. Most areas cap solid privacy fences at 6 feet without a permit, but some jurisdictions require permits for any permanent structure. Call 811 before you dig anything — buried utility lines are a real hazard in residential yards. Check your local zoning office or city website for exact rules before you buy a single board.
How long does a DIY cedar privacy fence last?
A well-built cedar fence with a quality stain and sealant applied at installation will typically last 15 to 25 years. Cedar has natural oils that resist rot and insects without chemical treatment, which is part of why it’s the top choice for privacy fencing. Restaining every 2 to 3 years and clearing dirt from the base of the boards extends that lifespan significantly. Two years after installation with Olympic Maximum stain, many homeowners report no need to restain yet.
What’s the best stain for an outdoor privacy fence?
Look for an exterior stain that combines stain and sealer in a single product — it saves time and gives you better overall protection than two separate products. Olympic Maximum is a popular choice because it can be applied in cold temperatures (down to 35°F), includes mildew and fungal resistance, and holds up through freeze-thaw cycles. Apply two coats on raw cedar before installation for the most even finish.
Can I build a privacy fence on a deck without digging?
Yes — surface-mount post base brackets are designed exactly for this. They bolt into your deck framing or a cedar blocking pad and hold 4×4 posts firmly without any post holes or concrete. It’s a cleaner look, it’s reversible, and it’s actually faster than an in-ground fence for a deck-mounted application. Just make sure to anchor into joists rather than decking boards for real structural holding power.
How do I keep the bottom of my fence boards from rotting?
Keep fence boards at least 2 inches off the soil surface. Direct ground contact traps moisture and accelerates decay significantly. Use ground spacers during installation to maintain that clearance, and clear any mulch or soil that builds up against the base of the fence over time. For boards that are already close to grade, a coat of end-grain sealer on the cut bottoms helps dramatically.
Is vinyl fencing actually cheaper than wood in the long run?
Over a 10-year window, vinyl often wins on total cost. A standard 6-foot cedar fence costs $25 to $35 per linear foot installed and requires staining every 2 to 3 years at $3 to $5 per linear foot each time. Vinyl costs more upfront — around $130 to $150 per 8-foot section — but has zero maintenance cost beyond an annual rinse. After 5 to 7 years, the ongoing maintenance costs on a cedar fence typically exceed the premium you paid for vinyl.