

Paper Christmas ornaments have a reputation for looking way harder to make than they actually are, and that’s honestly the trickiest part about them.

You see a delicate honeycomb bulb or a tiny quilled snowflake hanging on someone’s tree and assume it took hours of specialty training to pull off. In reality, most of these designs come down to a handful of simple folds, cuts, and a bit of glue, which makes paper one of the most forgiving and budget-friendly materials for holiday crafting. Whether you’re working with scrapbook paper, old sheet music, or leftover wrapping paper, there’s a style here that fits your skill level and your tree’s color scheme. Here are 15 paper Christmas ornament ideas worth trying this year.
1. Honeycomb Paper Ornaments
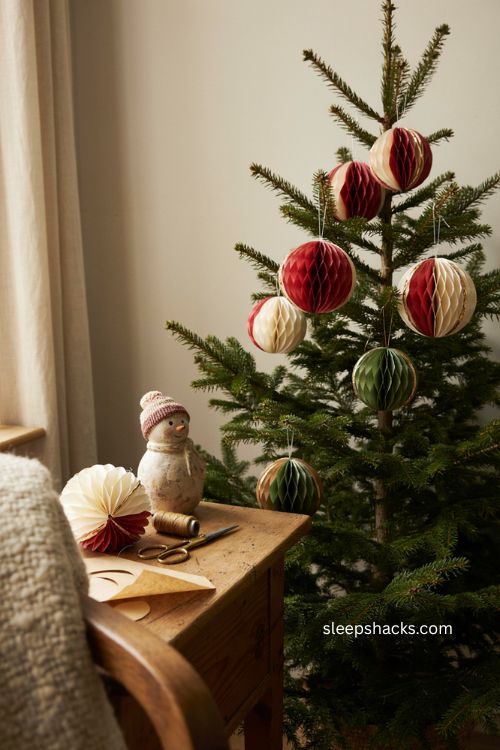
Honeycomb ornaments have that nostalgic, almost vintage charm, and the trick behind them is simpler than it looks. Layer sixteen identical cutouts, glue them together at alternating points, then open the stack into a full three-dimensional shape once the glue dries. Double-sided scrapbook paper gives you color on both the front and back, which matters since the folds show both sides as the ornament opens. A painted gold edge along the rim adds a nice finishing touch that makes the whole thing look more polished than the actual effort required.
2. Quilled Paper Snowflakes
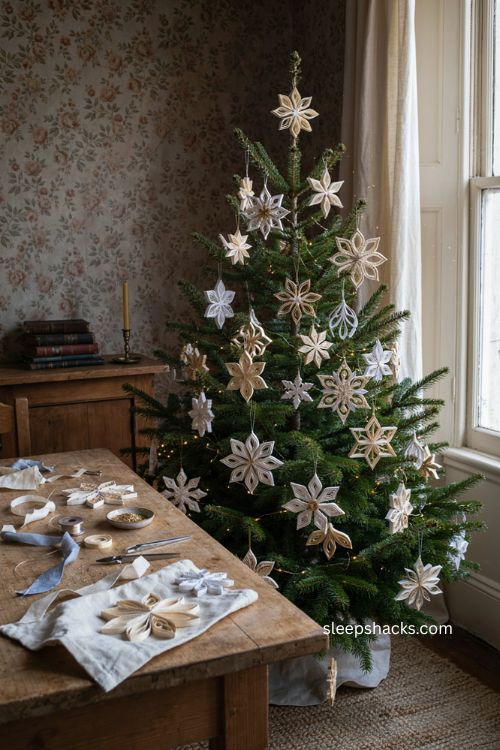
Quilling turns thin strips of paper into tight coils and teardrop shapes that snap together into intricate, lace-like designs. A snowflake is one of the most natural shapes to try this technique on, since its symmetry makes the coiling pattern easy to repeat around a center point. A dusting of fine glitter along the edges catches the light beautifully once it’s hanging on the tree. It’s a slower, more meditative kind of craft, so it’s a nice one to work on over a few evenings rather than rushing through in one sitting.
3. Miniature Book Ornaments

A tiny hand-bound book ornament brings a literary, keepsake quality that most other paper ornaments don’t have. Fold a small stack of paper pages, stitch them with waxed thread along the spine, then wrap the whole thing in a decorative or textured paper cover. Leave the pages blank so you can fill them in later with a favorite memory or holiday tradition from that particular year. It’s a lovely project if you’re making ornaments as gifts, since each one can be personalized in a way a store-bought piece never could be.
4. Sheet Music Pinecone Ornaments
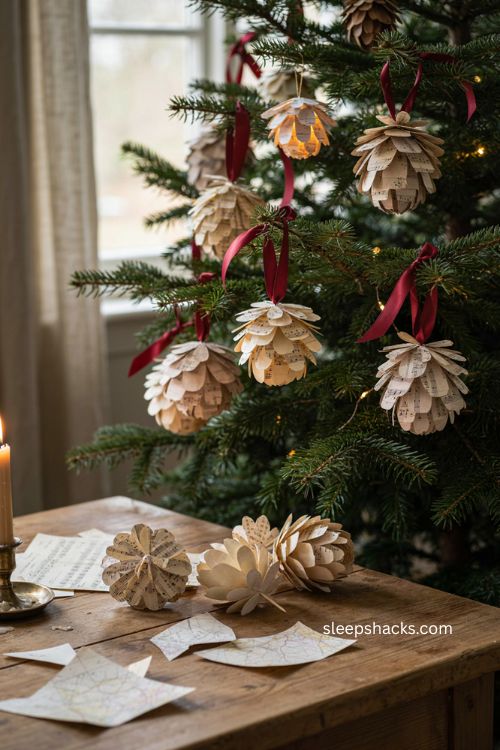
Old sheet music, book pages, or even maps make a surprisingly beautiful pinecone-shaped ornament once you start layering the pieces. Cut small strips or petal shapes from the paper, then glue them in overlapping rows around a cone-shaped base, working from the bottom up just like real pinecone scales. The printed text adds visual texture without needing any paint or embellishment at all. Hang a few from a red ribbon for a look that feels both rustic and a little bit literary.
5. Folded Dala Horse Ornaments

A rolled and folded paper Dala horse brings a colorful, Scandinavian-inspired touch to a tree that might otherwise lean toward the traditional red-and-gold palette. The shape comes together through careful rolling and folding rather than cutting, which makes it a satisfying, low-mess project for an afternoon. Bright reds, blues, or florals work especially well here, echoing the painted wooden originals this design is based on. It’s an easy one to make in a batch since the repetitive folding gets faster the more you practice it.
6. Origami Geometric Ornaments
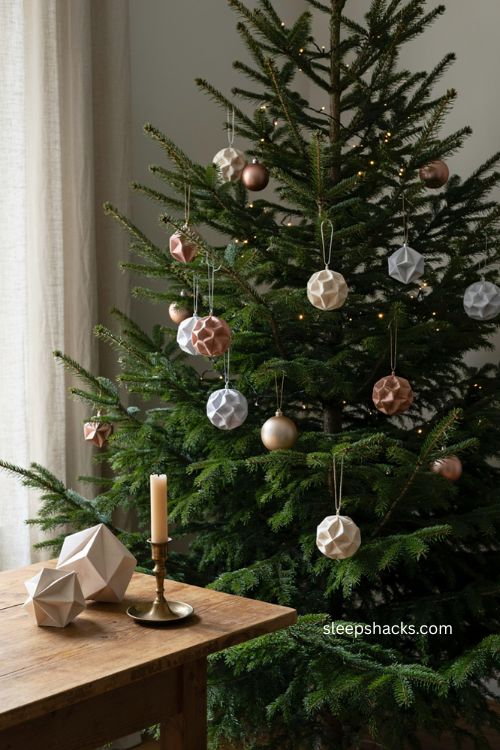
Origami geo balls made from metallic paper bring a modern, almost architectural look to a tree full of more traditional shapes. The folds are more advanced than a basic paper crane, so it helps to follow a diagrammed pattern closely the first few times through. Metallic silver, bronze, or ivory paper gives the finished shape a subtle shine without needing any paint. Once you get the fold sequence down, these come together fairly quickly and look genuinely impressive hanging in a group.
7. Quilled Character Ornaments

Beyond snowflakes, quilling can be shaped into small figures like a Santa, a reindeer, or even a tiny snowman, giving your tree a playful, handcrafted set of characters. Build the body from tightly coiled paper in a rounded shape, then add smaller coiled pieces for hats, arms, and other details. Crimson red, white, and touches of black work well for a classic Santa look. These take a bit more patience than a flat snowflake, but a set of three or four makes a charming little display together.
8. Origami Peace Crane Ornaments
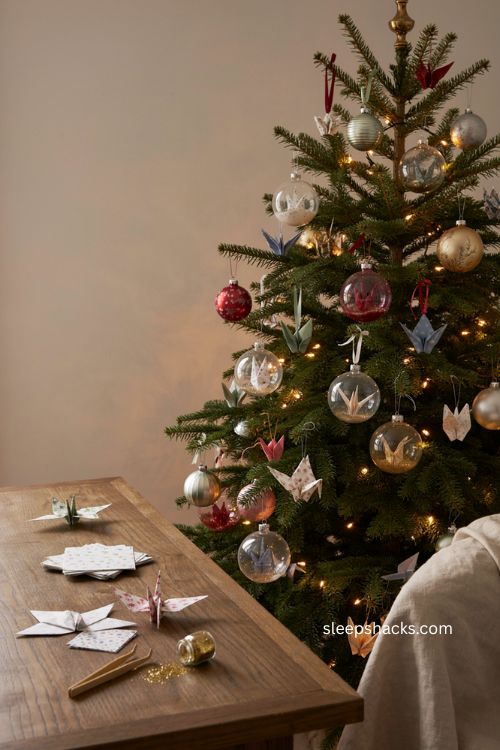
Origami cranes tucked inside a clear glass ball ornament combine two crafts into one striking piece. Fold a small paper crane using lightweight, patterned paper, then carefully slide it inside a fillable glass ornament before adding a bit of glitter around it. The glass magnifies the fold lines and color, giving the crane more presence than it would have on its own. This idea works especially well if you want ornaments with a bit of movement, since the crane shifts slightly every time the ornament turns.
9. Paper Mache Santa Figures

Paper mache lets you sculpt fuller, more dimensional shapes than folding or quilling ever could, which makes it a great technique for a classic Santa figure. Build up thin layers of paper pulp or strips over a simple base shape, let it dry completely, then paint in bright reds and whites once it’s solid. A set of two Santas in slightly different poses adds variety without much extra effort. This method takes longer overall because of drying time, but the result feels more like a small sculpture than a typical paper craft.
10. Folded Star Ornaments
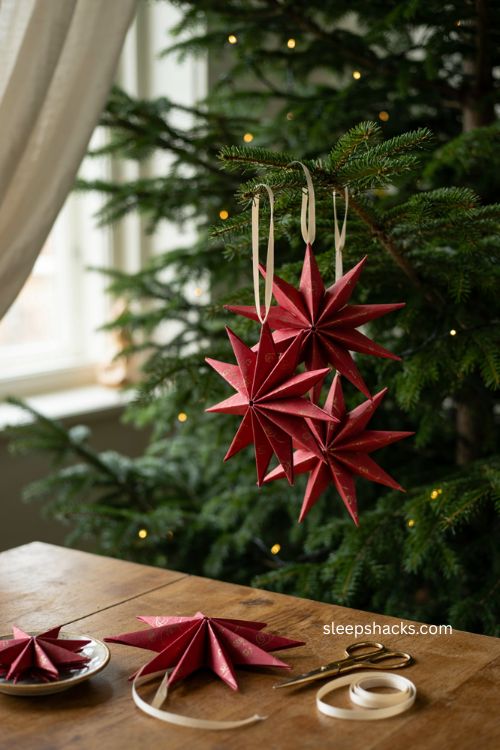
Folded paper stars, sometimes called Danish or Polish stars depending on the technique, are made by weaving several folded paper strips or cones together into a symmetrical, radiating shape. Deep red paper with a gold decorative pattern gives the star a rich, formal look that works well on a more traditional tree. The construction takes a bit of trial and error at first, but once you understand how the pieces interlock, repeat stars come together much faster. Hanging a few together on a branch creates a cluster effect that catches plenty of attention.
11. Gingerbread Paper Ornaments
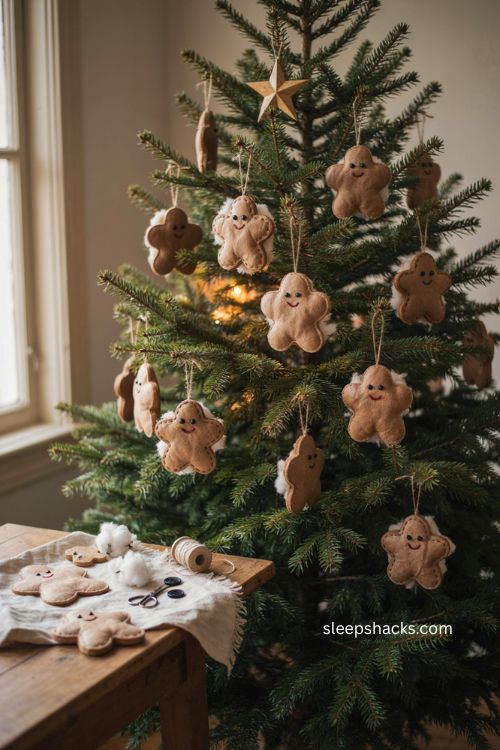
A gingerbread-shaped paper ornament brings a cozy, cookie-jar kind of charm without any actual baking involved. Cut two matching gingerbread person shapes from brown kraft paper, glue around the edges leaving a small gap, then stuff with cotton balls before sealing it shut for a slightly puffed, dimensional look. Add button eyes, a stitched smile, and simple seam details with a marker or paint pen. These are an especially good project to make with kids, since the shapes are forgiving and the decorating step is genuinely fun.
12. Woven Paper Pinwheel Ornaments

A pinwheel ornament made from two-sided scrapbook paper brings movement and color into a design that’s surprisingly simple to construct. Cut a square, make diagonal slits from each corner toward the center, then fold every other point inward and secure them together with a brad or a dab of glue. Because both sides of the paper show, the pinwheel reads as two-toned even though it’s made from a single sheet. A cluster of these in coordinating colors adds a playful, almost retro energy to a tree.
13. Vintage Postcard Ornaments
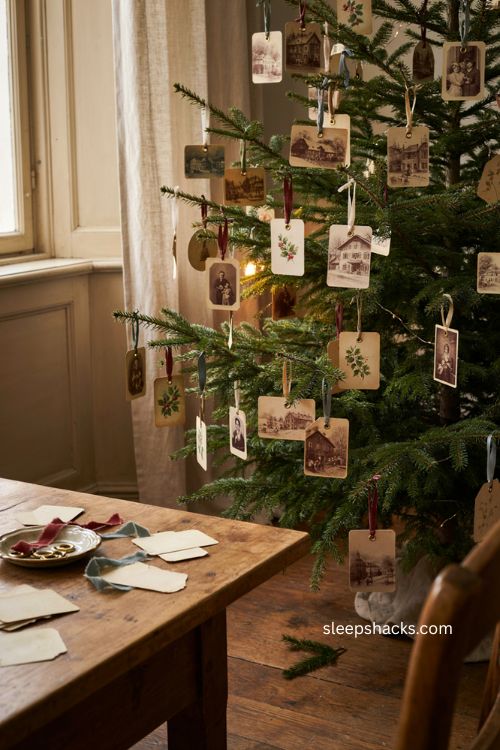
A vintage-style postcard makes one of the easiest paper ornaments on this list, requiring little more than a hole punch and a length of ribbon. If you don’t want to risk damaging an actual antique postcard, a color photocopy works just as well and keeps the original intact. Backing the postcard with coordinating cardstock adds a bit of structure so it doesn’t bend or curl over time. This is a wonderful way to work sentimental or nostalgic imagery into your tree without any real crafting skill required.
14. Rosette Paper Ornaments
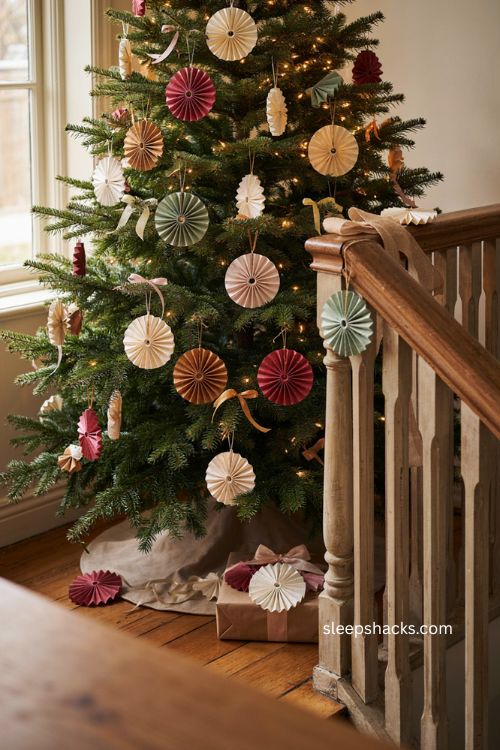
Rosette ornaments have a fuller, more textured look thanks to the accordion-folded paper rectangles bent into a circular shape and sandwiched between two cardstock backings. Heavier scrapbook paper holds its shape better here than something thin or flimsy. Adding a small adhesive letter or initial to the front turns a simple rosette into a personalized keepsake or gift topper. These work equally well hung on the tree, tied onto a wrapped gift, or strung along a banister for extra holiday touches.
15. Sheet Music Sphere Ornaments
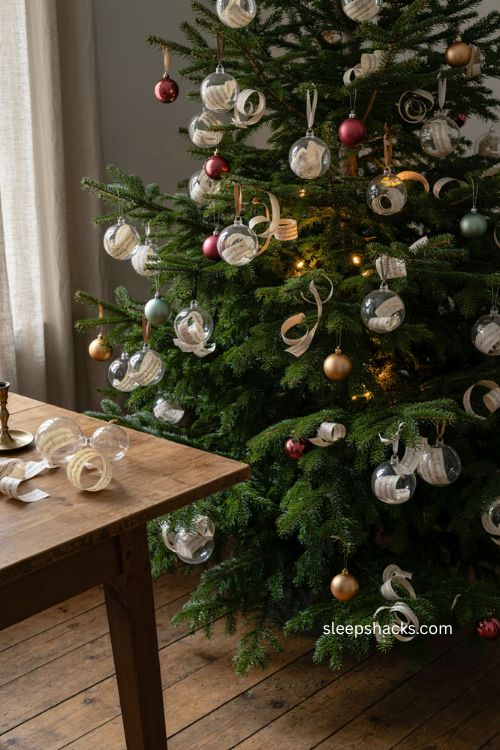
Clear, fillable ornament balls stuffed with strips of sheet music make one of the simplest paper projects on this list, and they still manage to look intentional and pulled-together. Cut thin strips from an old hymnal or sheet music, twist or curl them slightly, then loosely fill the clear ball so the paper is visible from every angle. Holiday carols make an especially nice choice if you want a subtle thematic detail hiding inside. These come together in just a few minutes but add a surprising amount of texture next to smoother, solid-colored ornaments.
Final Thoughts
Well, if there’s one thing all fifteen of these ideas have in common, it’s that paper is a lot more versatile than people usually give it credit for. You don’t need a big craft budget or years of experience to make something that looks genuinely special hanging on your tree. Start with whichever technique feels the most approachable to you, whether that’s a simple postcard ornament or a more involved quilled design, and build your collection one piece at a time. By next Christmas, you might just have a whole tree full of ornaments nobody else has.
Frequently Asked Questions
Q: What type of paper works best for Christmas ornaments?
Double-sided scrapbook paper, cardstock, and even old book or sheet music pages all work well, depending on whether you need the paper to fold, curl, or hold a stiff shape.
Q: Are paper ornaments durable enough to reuse every year?
Yes, as long as they’re stored flat or in a padded box between seasons, paper ornaments can easily last for many years without tearing or fading.
Q: What’s the easiest paper ornament for a beginner to try first?
A vintage postcard ornament or a simple folded pinwheel is a great starting point, since both require minimal cutting and no advanced folding technique.