

There’s something about a kitchen shelf lined with old Santa mugs or a mantel dressed in dried orange slices that feels warmer than anything from a store display.
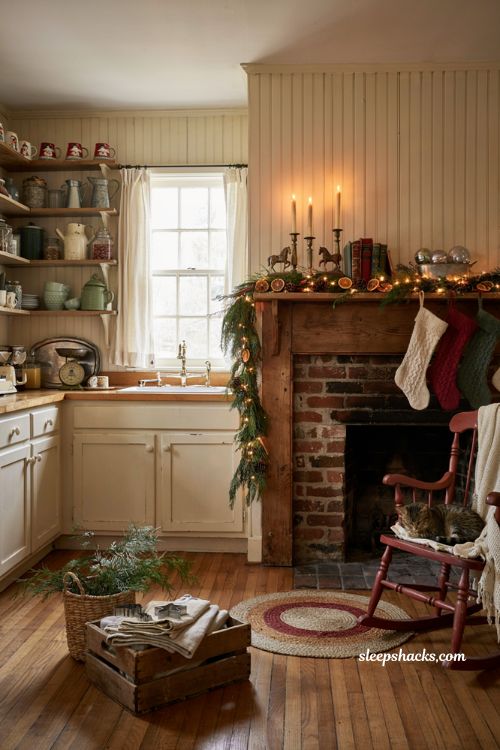
Vintage Christmas decor has that effect — it carries a little bit of memory in it, whether it’s a thrifted find or something passed down from a grandparent’s hutch. The best part is how affordable and doable this style really is. You don’t need a decorating background or a big budget, just an eye for old pieces and a willingness to repurpose what you already have. These fifteen ideas will help you build a Christmas look that feels collected over time, not bought in one trip.
1. Dry Oranges for a Vintage Garland
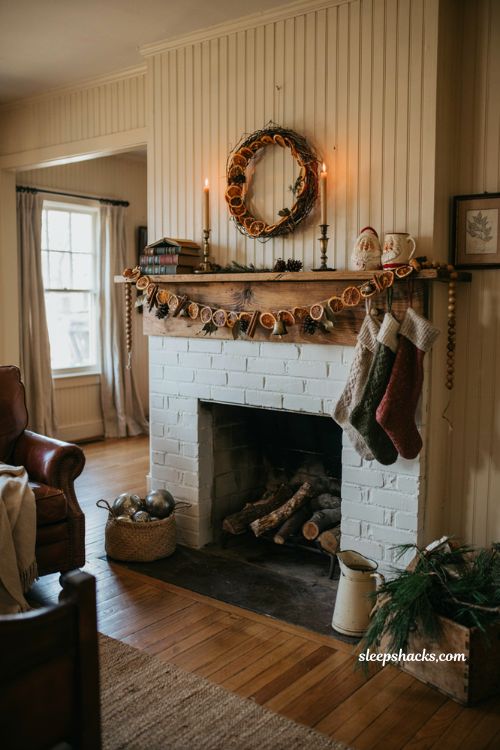
Slice oranges thin, lay them on a low-heat baking sheet for a few hours, and string the dried rounds together with twine once they’ve cooled. Tuck in a few cinnamon sticks or mini bells between slices for texture and a little jingle when the garland moves. Drape it along a staircase railing, across a mantel, or around a doorway for that old-fashioned, hand-crafted look. The scent alone makes this one worth doing every year, and leftover slices work beautifully scattered into bowls or tucked into a wreath.
2. Turn Sheet Music Into Christmas Art
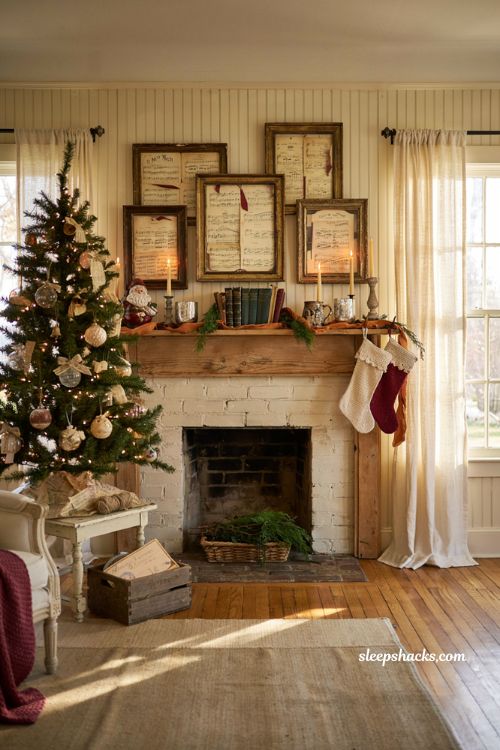
A secondhand book of Christmas sheet music is one of the cheapest ways to fill a gallery wall with holiday charm. Rip the pages out carefully, slide them into frames you already own, and hang them alongside your usual art for a subtle, sheet-music-meets-vintage look. You can also decoupage torn pieces onto plain glass ball ornaments using Mod Podge for a set of one-of-a-kind tree decorations. Either way, a single dollar-bin book can stretch across an entire wall or a whole box of ornaments.
3. Fill a Thrifted Bowl With Ornaments
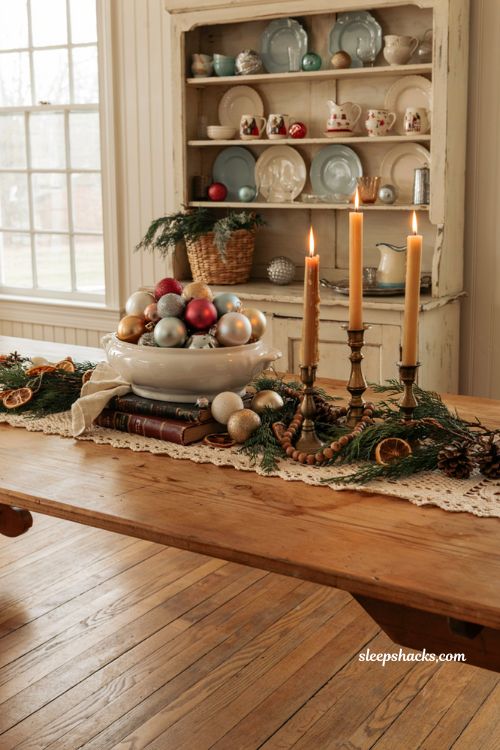
A soup tureen, cake stand, or wide ceramic bowl from a thrift shop becomes an instant centerpiece once it’s piled with mismatched glass ornaments. Choose pieces in varying sizes so the display has some height and movement instead of sitting flat. This is the kind of decor idea that costs almost nothing if you already have extra ornaments tucked away in storage bins. Set it in the middle of the dining table, on a coffee table, or on a kitchen island where guests will actually notice it.
4. Bundt Pan Wreaths With Shiny Brite Ornaments
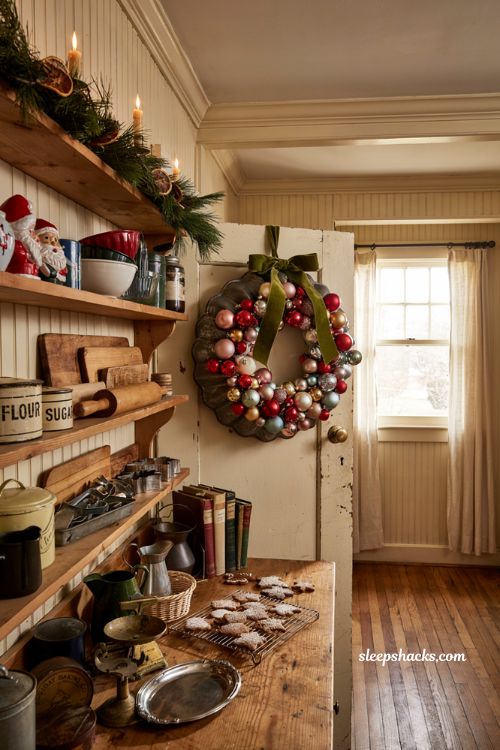
An old Bundt-style baking pan makes a surprisingly good wreath base once you line it with Styrofoam and hot-glue a mix of vintage or reproduction Shiny Brite ornaments across the surface. The scalloped shape gives the finished wreath a fuller, more dimensional look than a standard foam ring. Finish with a wide ribbon bow at the top to hide any visible glue or foam edges. Hang it on a kitchen cabinet, a pantry door, or above the stove for a decoration that fits the room it’s made from.
5. Stack Mason Jars Into a Tabletop Tree
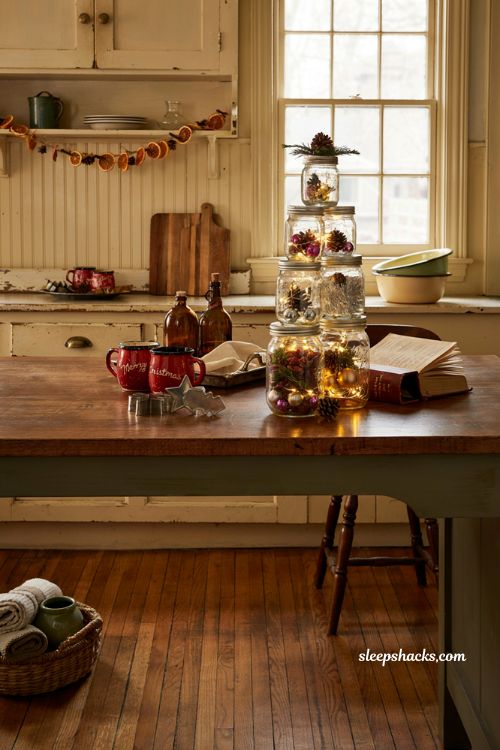
Six mason jars stacked from largest to smallest form a sweet little tree shape that works especially well on a kitchen counter or windowsill. Fill each jar with tiny ornaments, a strand of battery-powered fairy lights, or shredded tinsel for extra sparkle once the sun goes down. Because mason jars are already a kitchen staple, this idea usually costs nothing beyond what you’ve got in the cabinet. It’s also one of the easiest projects to pull together with kids, since there’s no glue or cutting involved.
6. Hang Vintage Aprons as Wall Decor
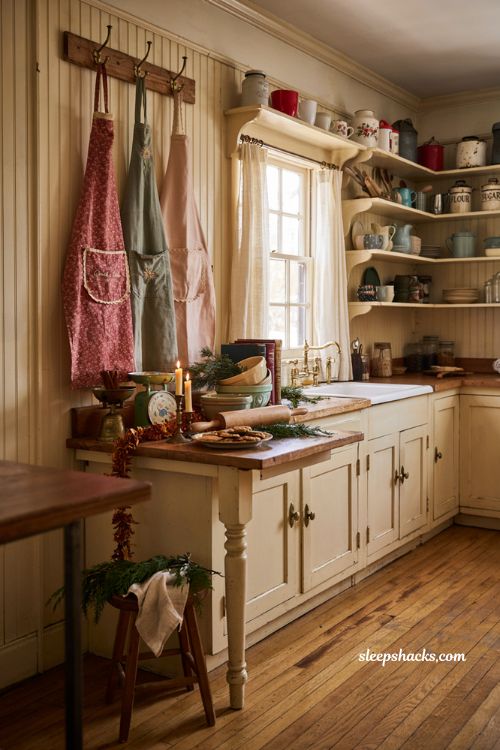
Old half-aprons with rick-rack trim or sweet appliqué details look just as good hung on a peg rail as they do tied on. Look for pieces from the ’50s and ’60s at estate sales or thrift shops, usually priced between fifteen and thirty dollars. Group two or three together near the kitchen entrance for a cheerful, lived-in holiday touch that also happens to be useful come baking day. The faded floral prints and stitched details add a softness that newer decor rarely has.
7. Stack Tart Tins Into a Tiny Tree
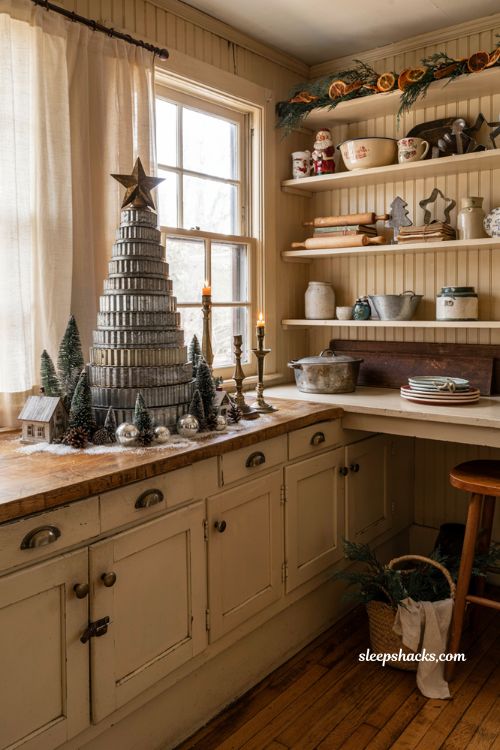
Round up vintage tart pans in a range of sizes, from about two inches up to twelve, and stack them largest to smallest on a countertop or shelf. Top the stack with a star-shaped baking mold or a simple cookie cutter to finish the tree shape. This project takes minutes and uses pieces that were probably already sitting unused in a cabinet. A small faux snow scene tucked at the base adds a nice finishing touch if you want a bit more detail.
8. Plant Greenery in Santa Mug Planters
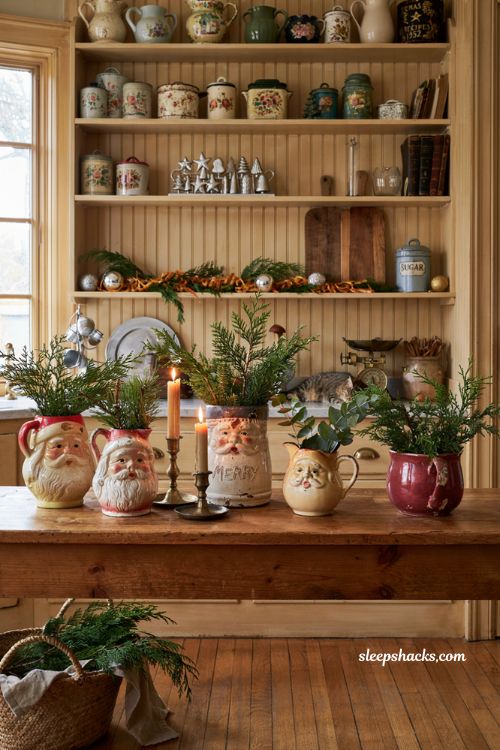
Those grinning vintage Santa mugs from the thrift store aisle don’t have to sit empty between cocoa season. Fill them with small faux or fresh evergreen sprigs and line them up along a windowsill or open shelf for an unexpected planter moment. The contrast between the cheerful ceramic face and the greenery gives the display personality that a plain pot just can’t match. Mix in a couple of different Santa styles — some with rosy cheeks, some more retro — for variety.
9. Build a Cookie Cutter Wreath
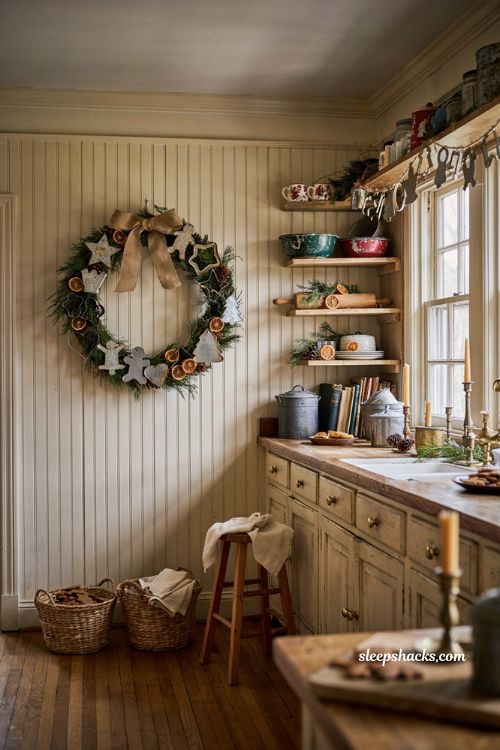
Gather a handful of vintage metal cookie cutters in different shapes, arrange them into a rough circle, and join them together using a two-part epoxy like J-B Weld. Once the shapes are secure, add a jute ribbon bow at the top and hang the whole thing on a kitchen wall or cabinet front. The mismatched shapes and slightly rusted edges are part of the charm, so there’s no need to hunt for a matching set. Loose cookie cutters also make a fun, low-effort garland strung on twine.
10. Use an Antique Bowl as a Tree Stand
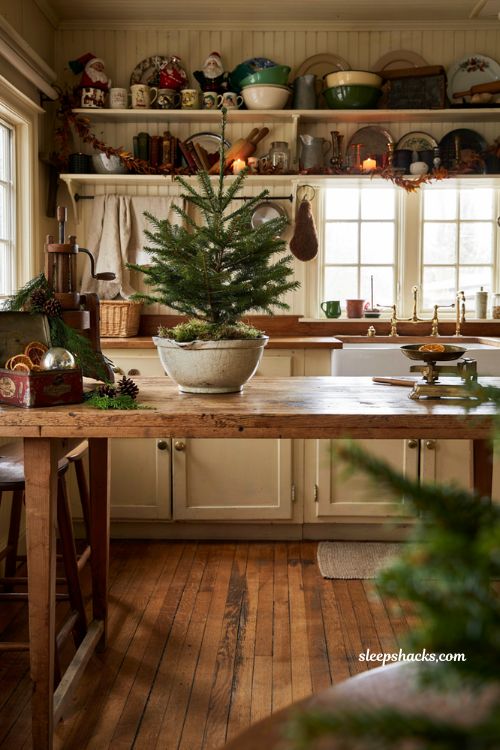
Skip the plastic tree stand and set your small tabletop tree inside an antique mixing bowl, an old butter churn, or a large vintage tin instead. The unexpected base gives even a modest tabletop tree a collected, kitchen-inspired feel that fits right in with the rest of your vintage decor. This works especially well for a smaller countertop tree rather than a full-sized one, since the container needs to actually hold its weight. A little floral moss tucked around the base hides any gaps.
11. Stack Candy Tins Into a Tree Shape
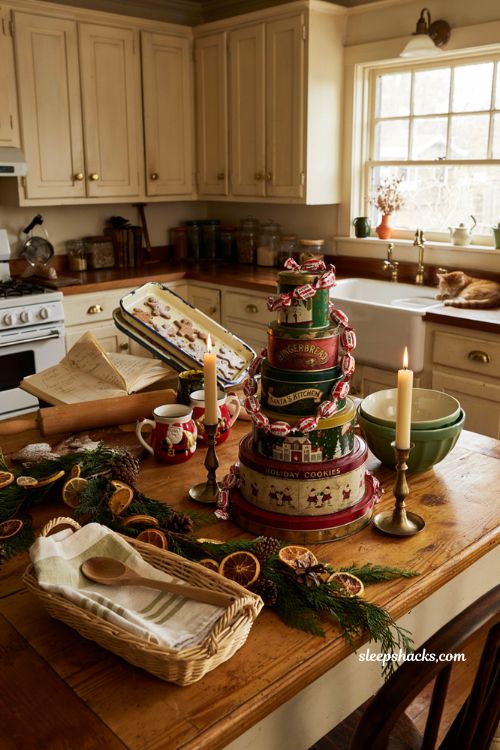
Old holiday candy and cookie tins, especially the colorful round ones, stack up nicely from largest to smallest to form a playful tree silhouette. Look for tins with classic red and green prints or old-fashioned Santa graphics for the most authentic look. Once stacked, wrap a garland made of wrapped candy around the outside for a little extra sweetness and color. This is a great one to build with kids since there’s no glue, no tools, and nothing fragile to worry about breaking.
12. Hang a Jadeite Plate Wall
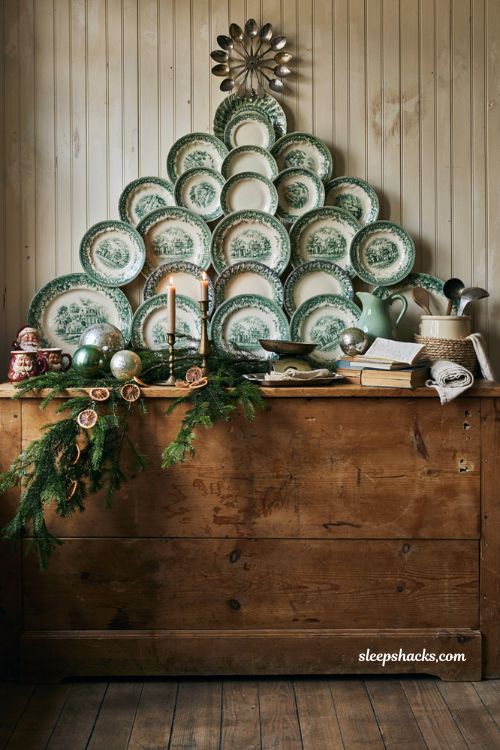
Vintage jadeite or green-and-white transferware plates hung in a pyramid shape using adhesive plate hangers make a striking holiday display above a sideboard or in a kitchen nook. Add a few smaller saucers near the top for extra dimension, and finish the arrangement with a starburst of demitasse spoons as a topper. This idea works because it doubles as year-round decor — you can simply add or remove a few festive pieces depending on the season. It’s a great way to put a beloved dish collection to actual use.
13. Wrap Styrofoam Cones in Baker’s Twine
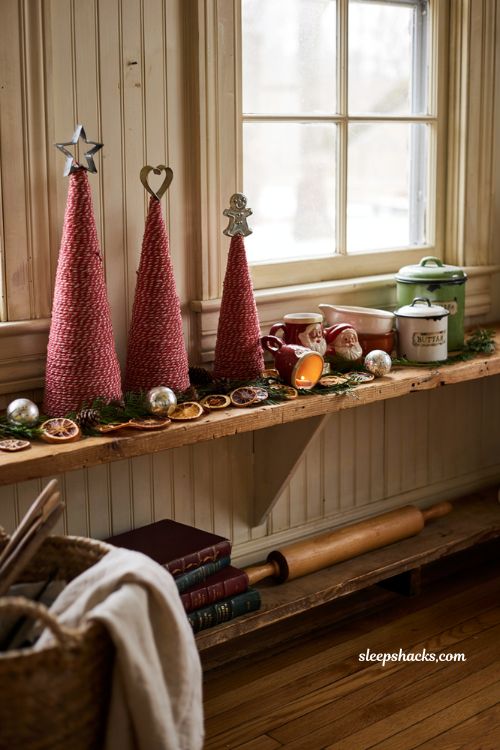
Classic red-and-white baker’s twine wrapped tightly around a Styrofoam cone creates a rustic little tree that costs just a few dollars to make. Top each cone with a small metal cookie cutter for a finishing detail that ties the whole thing back to the kitchen theme. Group three or four cones in different heights for a cluster that looks intentional rather than store-bought. They’re light enough to sit on a narrow shelf or windowsill without needing much space at all.
14. Set the Table With Thrifted Dishes
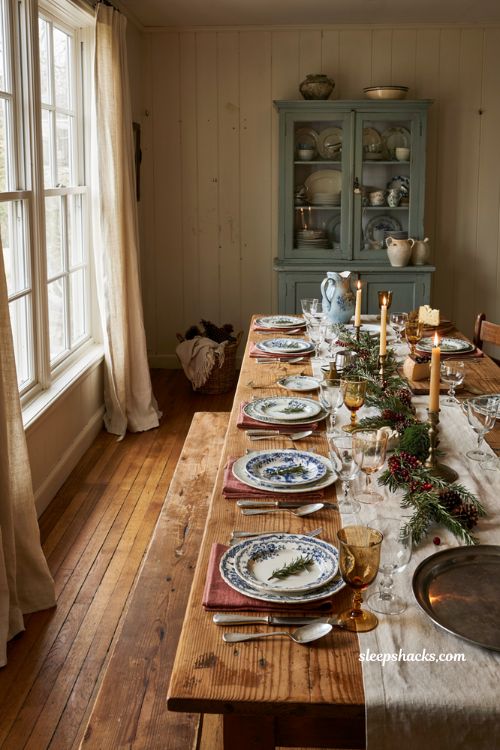
You don’t need a matching set of Christmas china to make a holiday table feel special — vintage dinnerware in blue and white, or any pattern with a bit of age to it, works just as well. Mix patterns slightly for a table that feels gathered rather than purchased all at once. Add a runner of fresh rosemary and scattered cranberries down the center for color and a fresh, herbal scent. This approach almost always costs less than buying new Christmas-specific place settings.
15. Layer Ribbon Across Picture Frames
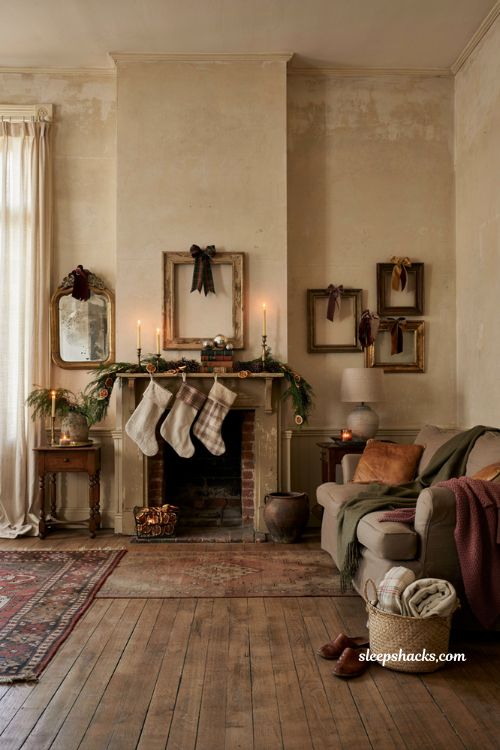
One of the fastest ways to bring a Christmas feel into a room without touching the walls is tying a length of plaid or velvet ribbon around an existing picture frame or mirror. Choose a tartan or buffalo check for a classic look, or a soft velvet for something a bit more elegant. This idea barely counts as a project, but it adds just enough color and texture to make a room feel dressed for the season. Swap the ribbon style each year for an easy refresh.
Final Thoughts
The nice thing about decorating this way is that nothing here requires a trip to a big box store or a credit card you’ll regret using in January. A stack of tart tins, a bowl of ornaments, a few yards of ribbon — these small, thrifted touches add up to something that feels far more personal than anything mass-produced. Start with just one or two ideas from this list, maybe the ones that use pieces already sitting in your cabinets, and build from there each season. Vintage Christmas decor isn’t about perfection; it’s about collecting pieces that mean something and finding new ways to let them shine each December.
Frequently Asked Questions
Q: What is considered vintage Christmas decor?
Vintage Christmas decor generally refers to holiday pieces from past decades — think Shiny Brite ornaments, ceramic Santa figures, ribbon candy, and ceramic villages — often sourced from thrift stores, estate sales, or family collections.
Q: How can I decorate for Christmas on a small budget?
Focus on thrifted finds, repurposed items you already own, and natural elements like dried oranges or fresh greenery, which cost little to nothing compared to store-bought decor.
Q: Where can I find vintage Christmas decorations?
Thrift stores, estate sales, antique malls, and online marketplaces like Etsy and eBay are the most reliable places to find authentic vintage Christmas pieces.