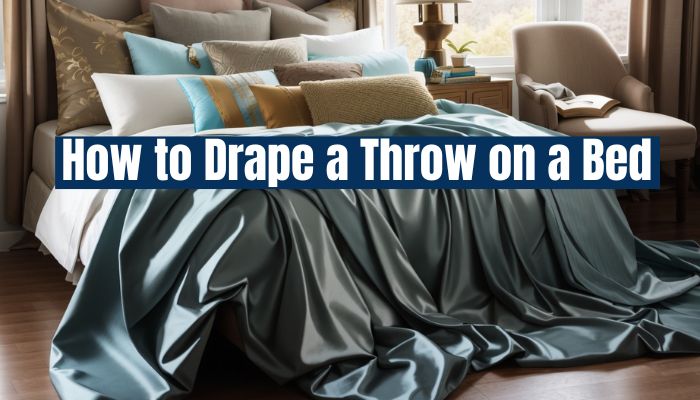
Unlock the secrets of interior design! Learn the art of draping a throw on a bed, enhancing aesthetics & comfort. Dive in for step-by-step guidance.
Introduction: The Importance of Draping a Throw
Draping a throw isn’t just about keeping cozy on a chilly evening. It’s an art, a statement, and a touch of style for your living space. Ever wondered why your living room lacks that magazine-cover look even when you’ve got all the right furniture? The answer might be as simple as a well-draped throw. Still, trying to convince? Let’s dive in!
Materials You’ll Need
Choosing the Perfect Throw
The first step to mastering the drape is picking the right throw. It’s a mix of texture, color, and material. Want to evoke luxury? Go for velvet. For coziness? Fuzzy wool is your friend. Remember, a throw isn’t just functional; it’s decorative.
Essential Tools for Seamless Draping
While your hands are your primary tools, a few additional items can smooth the draping process. Consider non-slip pads or decorative pins for tricky fabrics. Sometimes, all you need is a bit of creativity and the right tool!
Steps to Drape Your Throw
Preparing the Space
Before you start, ensure that your couch or chair is clean. A neat surface helps the throw sit better. Adjust the cushions, clear any clutter, and you’re all set!
Techniques for Draping
Classic Drape
This is the neat, orderly drape. Fold your throw in half or thirds and lay it over the couch’s back or arm. Simple, classic, and evergreen.
Diagonal Drape
Add a bit of flair! Fold the throw diagonally and let it cascade down the couch’s side. This look adds depth and an edgy touch to your space.
Casual Toss
Who said it has to be neat? Sometimes, a casual, carefree toss on the couch or bed works wonders. It gives a lived-in, welcoming vibe to your space.
Maintaining Your Throw
Cleaning and Caring
Throws, like any fabric, need love. Always follow the cleaning instructions. Some might be machine washable, while others might need a gentle hand wash. Regular care keeps your throw looking new and plush.
Storing the Throw
If you’ve got a collection or are changing throws seasonally, store them well. Use fabric bags or bins, keep them dry, and ensure they’re clean before storing.

Tips for Aesthetic Appeal
Color Coordinating
A throw can either complement or contrast. Dark furniture? Go for a pop of color. Neutral shades? Play with patterns. The throw is like the cherry on top; make it count!
Layering Techniques
One throw is great. Two? Even better! Layering throws add depth, texture, and warmth. Mix colors, patterns, and textures for a trendy, plush look.
Step-by-Step Guide: Draping Your Throw
Tossing a blanket on a sofa may appear straightforward on the surface, yet there’s a hidden craft to nailing it perfectly. How you position and fold your throw can significantly enhance the visual appeal of your space. Whether you want to create a cozy nook or a bold style statement, this step-by-step guide will perfectly guide you through draping your throw.
Positioning for Optimal Aesthetics
You might have the most luxurious throw in the world, but if it’s draped without care, it can look out of place or messy. Placing your throw blanket correctly can be a game-changer. Let’s get the placement spot-on:
Start by Scoping Out the Area: Before you casually toss that blanket, pause and study the piece of furniture you’re working with. Is it a sofa, an armchair, or perhaps a bed? The type of furniture will dictate the best way to position your throw.
- Center or Side?: If you’re working with a large sofa, draping the throw in the center can provide symmetry. For a more relaxed look or smaller furniture pieces like chairs, drape the throw on one side.
- Length Matters: Consider the length of your throw. Longer throws work best cascading down the side of a piece of furniture, while shorter ones can be draped over the back or armrest.
- Anchor Point: Once you’ve decided on positioning, identify an anchor point. This could be a couch arm, a chair back, or the foot of a bed. Your throw will be draped around this point.
Read more about How To Style A Throw Blanket On A Bed? 9 Creative Ways
Creating the Perfect Folds
The beauty of a throw comes out in its folds. A well-folded throw gives a sense of order amidst the casual look.
- The Basic Fold: For a neat appearance, fold your throw in half or thirds. Hold it by the two top corners, and let it drape down naturally. Then, place it on your anchor point, allowing the throw to cascade gracefully.
- The Diagonal Drape: Fold the throw diagonally, forming a triangle. This technique works wonders for square or nearly square throws. Place the large triangle’s point toward the seat and let the throw’s sides fall naturally.
- The Roll and Tuck: Roll your throw into a loose tube, then drape it across your furniture. Tuck one end under the other for a snug look.
- The Casual Toss: Sometimes, less is more. Aiming for a relaxed, ‘lived-in’ look, toss the throw onto the desired spot. Adjust slightly to ensure it looks unintentionally perfect.
Remember, while these are guidelines, there’s no strict rulebook for draping a throw. Your home, your rules! Feel free to experiment and see what works best for your space and style.

Styling Tips for Different Bed Sizes
Throws aren’t just for couches and armchairs. They can transform the look and feel of a bedroom, providing warmth, texture, and a touch of luxury. However, it’s essential to style them correctly based on the bed size. A throw that looks fabulous on a king bed might not have the same effect on a twin. Ready to elevate your bedroom décor game?
Draping Throws on Single & Twin Beds
Single and twin beds are typically used in smaller, kids’, or guest spaces. The aim is to keep it cozy without overwhelming the bed.
- Center Drape: Fold the throw in half and place it across the center of the bed. This technique adds a layer of texture without dominating the bed.
- The foot of the Bed: Consider draping the throw at the foot of the bed. Fold it neatly or bunch it up for a more relaxed feel.
- Diagonal Corner Toss: Add a playful touch by draping the throw diagonally at a bed corner. It’s a fun, asymmetrical look that fits kids’ rooms.
Accenting Queen & King Beds with Throws
Larger beds offer more space and opportunities to play around with styling.
- Layered Look: Use multiple throws of varying textures or colors. Start with a large one at the foot and layer a smaller one over it, letting both cascade over the side.
- Side Draping: For a modern, chic look, drape the throw over one side of the bed. It adds asymmetry and interest to the room.
- Full Spread: If you have an oversized throw, spread it across the entire bed. Fold it, ensuring a portion of your beautiful bedspread or duvet still shows.

Maintenance: Keeping Your Throw Fresh and Stylish
Beauty isn’t just skin deep; your throw needs to feel as good as it looks.
- Regular Cleaning: Follow care instructions on the throw label. Some may be machine-washable, while others might require a gentle hand wash.
- Avoid Sunlight: Direct sunlight can fade the vibrant colors of your throw. When drying after a wash, choose a shaded area.
- Storage: Rotate throws based on seasons or moods. When not in use, fold them neatly and store them in a dry place, preferably in fabric bags, to avoid dust.
Final Thoughts: Enhancing Bedroom Elegance with Throws
Throws are more than just pieces of fabric; they’re style statements, mood enhancers, and providers of cozy comfort. By choosing the right throw and draping it appropriately based on bed size, you can change the ambiance of a room. So, the next time you want to spruce up your bedroom, remember: sometimes, all it takes is a well-styled throw to make the space feel fresh and luxurious.
