

Store-bought Halloween decor is fine, but it always ends up looking a little like everyone else’s — same plastic pumpkins, same mass-produced banners.
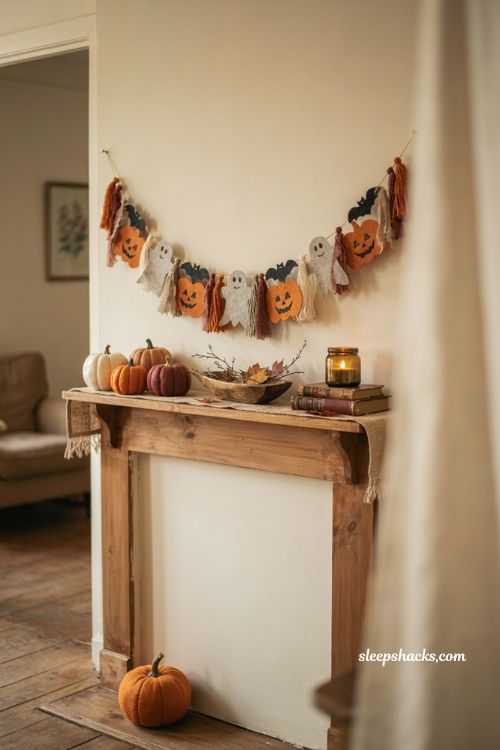
If you’ve ever wished your Halloween decorating felt more personal, a handmade garland is the fastest way to get there without committing to a huge project. Most of these ideas use supplies you can grab in one trip, whether that’s felt, cardstock, yarn, or leftover ribbon scraps. Here are fifteen DIY garland ideas that bring real character to your Halloween decorating, no crafting expertise required.
1. Blanket-Stitched Felt Character Garland
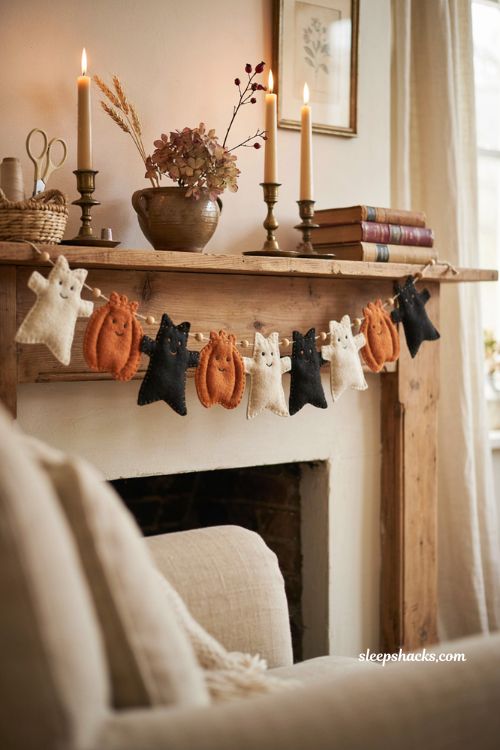
Felt garlands have a soft, handmade quality that plastic decor just can’t fake, especially when the characters are stitched with a visible or hidden blanket stitch along the edges. Cutting a simple ghost, pumpkin, and cat shape from wool felt, then embroidering on faces with a single strand of floss, gives each piece a slightly different personality. String them onto perle cotton spaced about half an inch apart, and you end up with a garland sturdy enough to reuse for years instead of tossing after one season.
2. Cardstock Cutout Garland for Kids
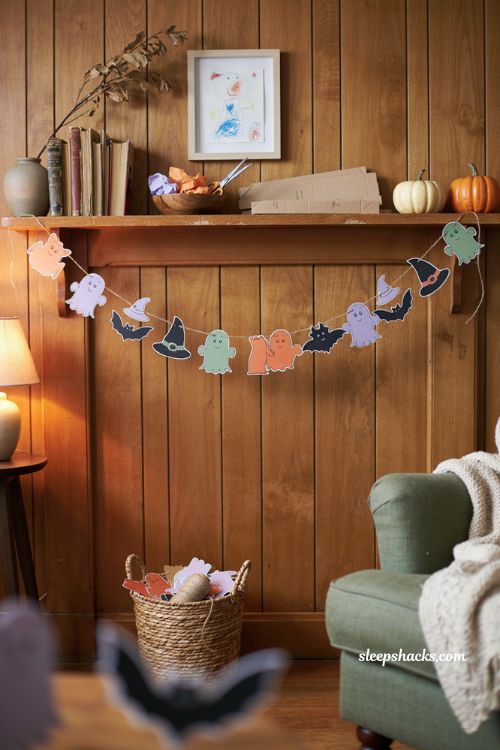
This one is the easiest entry point if you’re crafting with kids, since it only needs cardstock, scissors, and a cardboard template cut from an old cereal box. Trace a bat, witch hat, or ghost shape onto a few different colors of paper, cut them out, and tape each one to a length of baker’s twine. Letting kids draw their own version of the template turns this from a simple decoration into something that actually feels like theirs, wobbly lines and all.
3. Yarn Tassel Ghost Garland
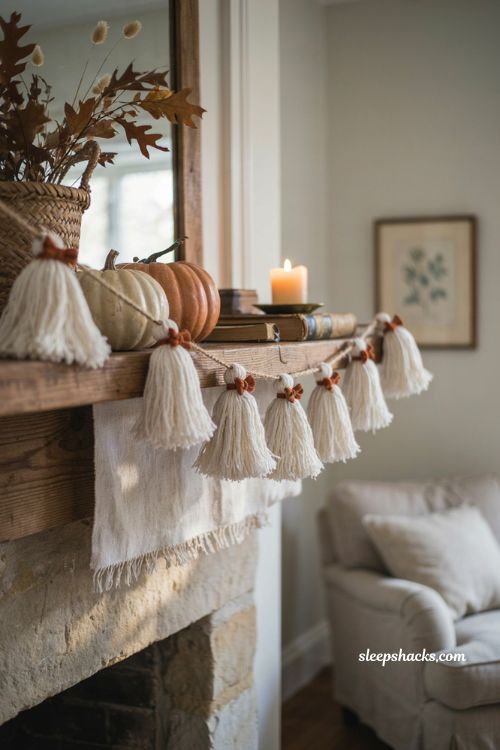
A tassel is really just yarn wrapped around your fingers and tied off, which makes this one of the fastest DIY shapes to master. Wrap white yarn around four fingers about twenty times, tie it off at the top with a smaller piece of string, then trim the bottom into a rounded ghost shape. Adding a tiny orange bow at the neck dresses each ghost up just enough without making the project feel fussy or overly precious.
4. Yarn Pom-Pom Pumpkin Garland
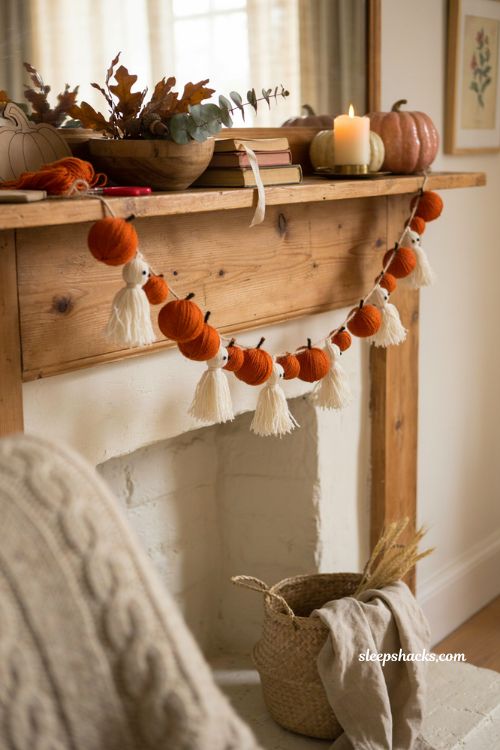
Pom-pom pumpkins take a bit more patience than the ghosts, mostly because getting the shape round and compact takes practice, but a small cardboard template makes it manageable. Wrap orange yarn around the template roughly thirty times, tie the center tightly, then trim the pom-pom into shape before hot-gluing a short piece of brown pipe cleaner on top as a stem. Pairing these with the tassel ghosts on the same strand gives you a two-character garland with almost no extra materials.
5. Wooden Bead Garland as Your Base
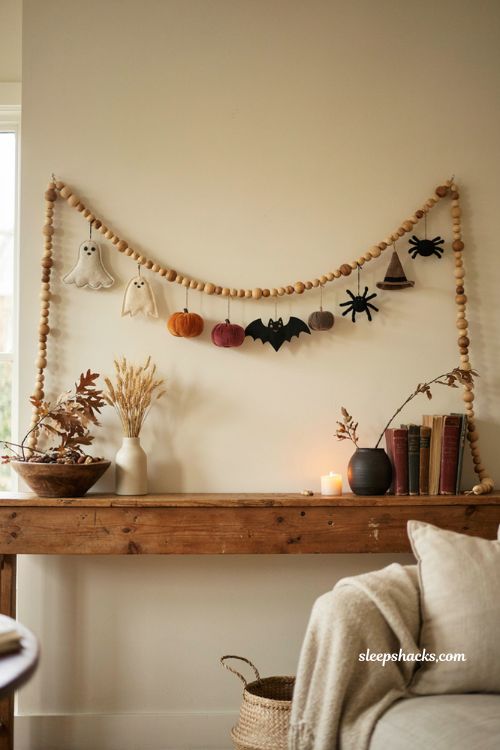
Sometimes the smartest move isn’t making the whole garland from scratch — it’s buying a plain wooden bead garland to use as your hanging base, then adding your own handmade pieces onto it. The neutral wood tone keeps things from looking too crafty or costume-like, and it gives your ornaments something sturdy to hang from using small jump rings. This shortcut saves hours of stringing time while still leaving plenty of room for your own creative touches.
6. Felt Bat Garland with Eyelet Details
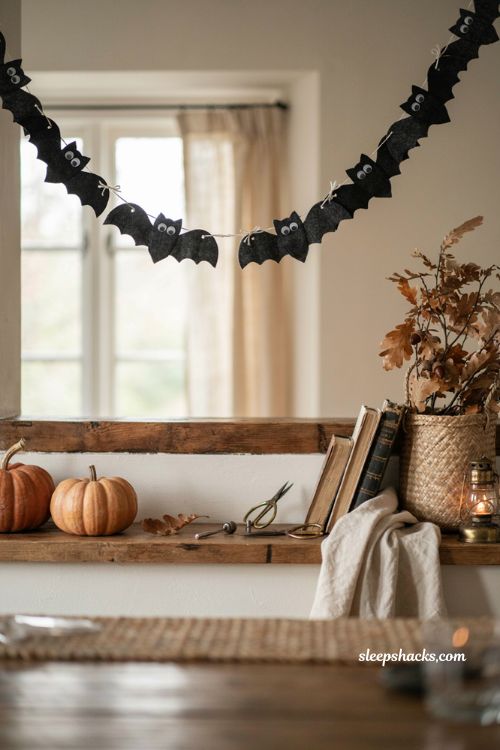
A bat garland made from sturdy felt shapes gets an unexpectedly polished look once you punch a small hole in each wing and set a metal eyelet through it. Tie the bats together with thin white string in little bows, then finish each one with a pair of googly eyes for a bat that reads more charming than creepy. This is a great project if you already have a crop tool or eyelet setter sitting in a craft drawer collecting dust.
7. Scrap Ribbon Garland
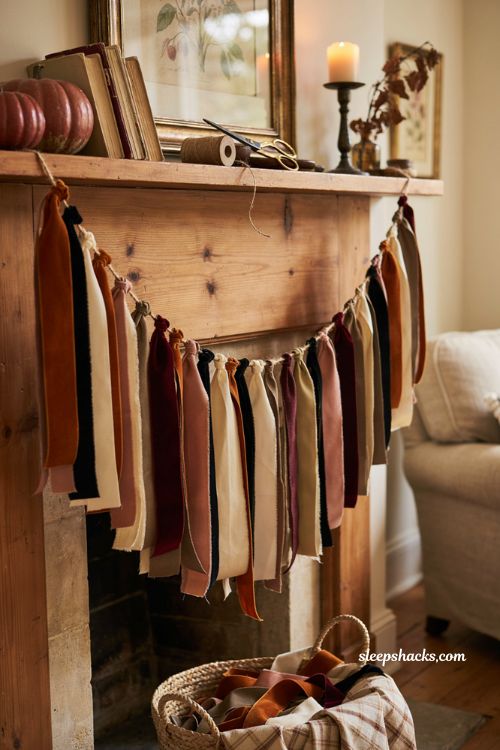
If you’ve got a drawer full of leftover ribbon ends from other projects, this is the garland that finally uses them up. Cut small segments in a mix of Halloween colors and hot-glue them onto a length of string in no particular pattern, letting the randomness do the visual work. Running each cut end briefly near a candle flame keeps the ribbon from fraying, so the finished garland holds up through the whole season.
8. Cupcake Liner Garland
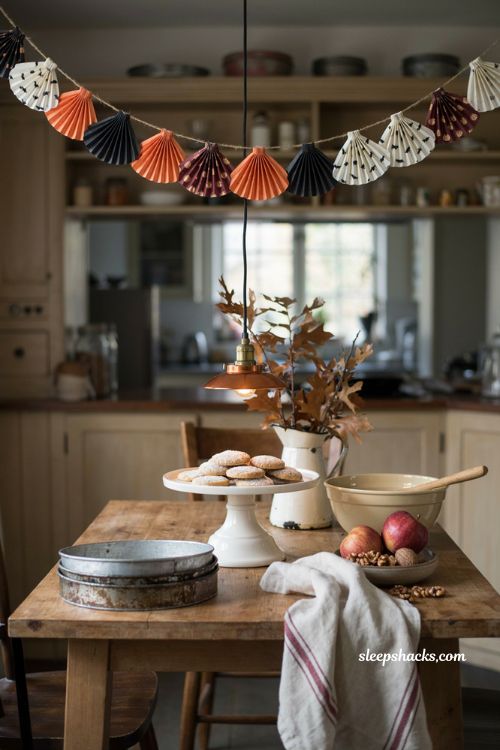
Patterned cupcake liners are an underused craft supply, and stringing a row of them onto twine makes for a surprisingly festive, almost paper-fan-like garland. Flatten each liner slightly before threading it so the pleats fan out evenly once hung, and mix a couple of Halloween-themed prints with solid orange or black liners for contrast. It’s an especially good project if you already have a stash of extras left over from baking.
9. Accordion-Fold Connected Paper Garland
For a garland where every shape stays linked together like a paper chain, fold your cardstock accordion-style before tracing and cutting your template, making sure to leave two connection points uncut. This creates one long continuous strip of ghosts or pumpkins holding hands, which drapes differently than individual cutouts and adds a bit of visual rhythm. It takes slightly more patience with the scissors, but the connected effect is worth it for doorways and window frames.
10. Layered Garland Display
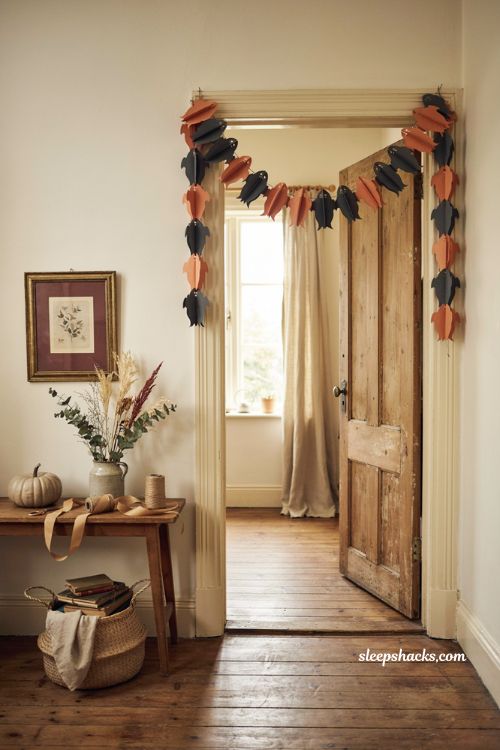
Instead of choosing just one garland style, hang two or three different ones at slightly different heights across the same mantel or window for a fuller, more collected look. A felt character garland paired with a plain ribbon garland underneath, for example, adds depth without any single strand needing to do all the visual work. This approach is especially useful if you’re building your Halloween decor collection slowly and adding a new garland each year.
11. Removable Ornament Garland for Easy Swapping
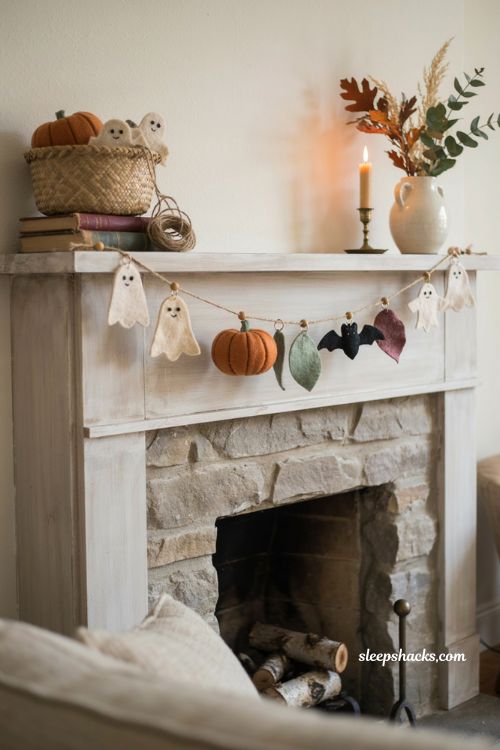
Building a garland where the seasonal pieces attach with small jump rings rather than being permanently strung means you can swap ghosts and pumpkins for something new once Halloween wraps up. Hang the plain base garland on command hooks so there’s no nail damage, then simply unclip the Halloween pieces in November and clip on a fresh set for the next holiday. It’s a small setup choice that saves you from storing an entirely separate garland for every season.
12. Kid-Designed Character Garland
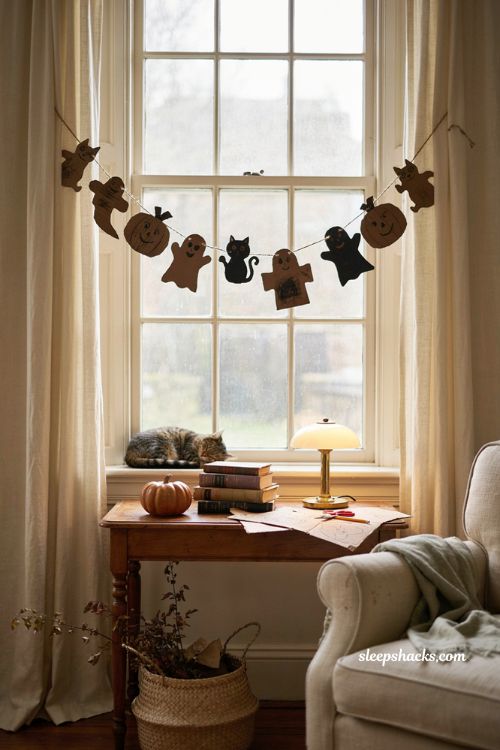
Rather than using a fixed template, hand kids a blank piece of cardboard and let them sketch their own version of a ghost, cat, or pumpkin before cutting it out. The shapes end up delightfully uneven, which is honestly part of the charm once they’re strung together and hanging across a window. This version doubles as a rainy afternoon activity and a finished decoration in one project.
13. Mini Pom-Pom Color Garland
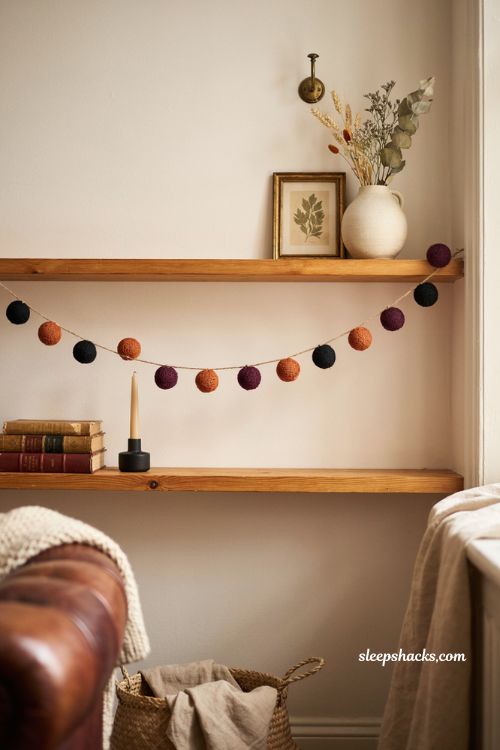
Skip the shaped characters entirely and string a simple row of pom-poms in classic Halloween colors — black, orange, and a deep purple — for a graphic, modern take on garland decor. Premade pom-pom garland kits make this version especially quick, since the color sequencing is already done for you. Hang it along a shelf edge or window frame where the repeating color pattern can really stand out.
14. Picture Ledge or Mantel Display
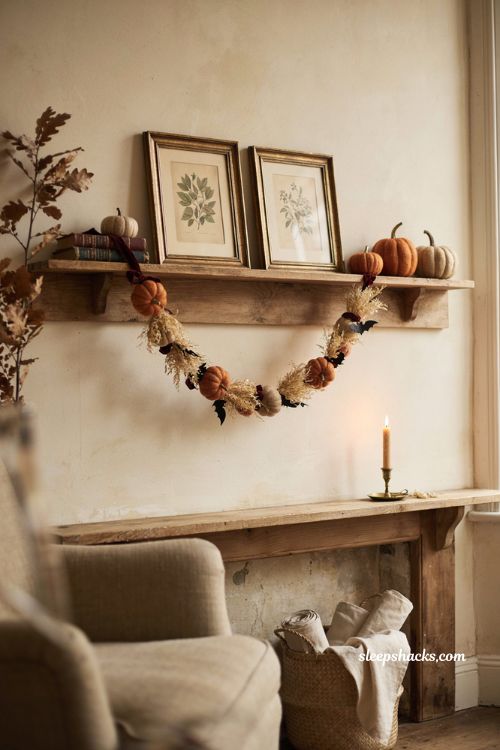
Where you hang a DIY garland matters almost as much as how you make it, and a picture ledge or mantel gives you room to loop the strand up and down instead of hanging it in one flat line. Center the garland first, then loop the ends upward on either side using small command hooks, which creates gentle swags instead of a straight, stiff line. This trick works with almost any garland style and instantly makes a handmade project look more intentional.
15. Mixed-Material Twine Garland
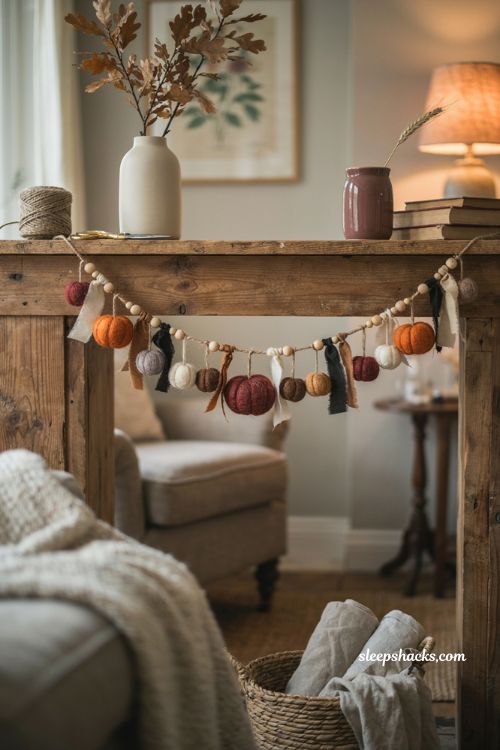
For a garland with real texture, string a single length of twine with a mix of small felt balls, tiny fabric shapes, and the occasional bead, rather than sticking to one material throughout. The variety in size and texture catches the eye in a way a single-material garland can’t, and it’s a great way to use up small craft scraps you already have on hand. Keep the spacing loose and a little irregular so the mixed elements don’t start to look too uniform or planned.
Final Thoughts
Handmade garlands are one of those projects that feel a lot more impressive than they actually are to make, which is exactly why they’re worth trying even if you don’t consider yourself especially crafty. Start with whichever idea matches the materials you already have around the house, whether that’s a bag of yarn scraps or a stash of cardstock, and let the project grow from there. You’ll end up with a decoration that looks nothing like what’s sitting on the shelves at the store, and honestly, that’s the whole point. Happy crafting, and enjoy watching it come together one piece at a time.
Frequently Asked Questions
Q: What materials work best for a halloween garland diy project?
Felt, cardstock, yarn, and ribbon scraps are the most beginner-friendly, since they’re easy to cut, stitch, or glue without special tools.
Q: How long does a DIY Halloween garland take to make?
Simple paper or ribbon versions can be finished in under an hour, while stitched felt garlands typically take several hours spread over a few sessions.
Q: Can a halloween garland diy be reused every year?
Yes — felt, wood bead, and mixed-material garlands hold up well in storage and can be brought back out season after season.