

Picture a workshop table scattered with sawdust, a handful of leftover 2×4 scraps, and a string of mini lights waiting to be added.That’s really all it takes to end up with a mantel full of tiny holiday trees or a porch that glows the moment the sun goes down.

Scrap wood has a way of turning into something charming once the holidays roll around, and wood christmas trees diy projects are some of the easiest ways to prove it. Whether you’ve got a pile of pallet boards, some paint stir sticks, or just a few pieces of trim sitting in the garage, there’s a wooden tree shape waiting to happen. Here are fifteen ideas to get your saw and your imagination moving this season.
1. Small Wood Block Trees for the Mantel
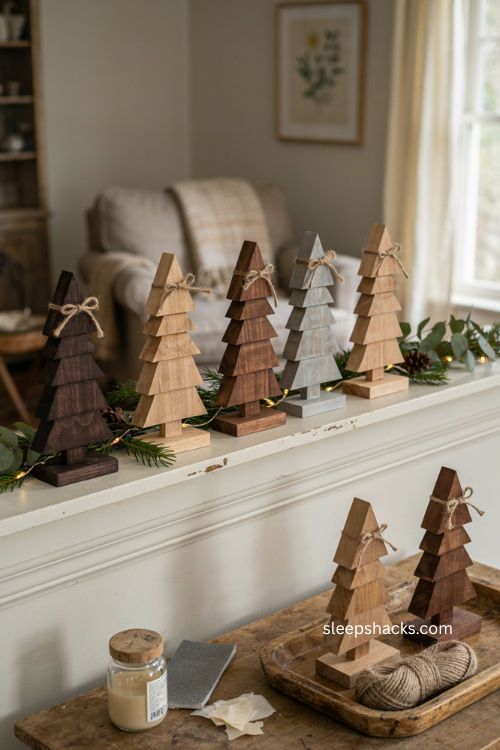
Small wood block trees are the easiest starting point if you’ve never built holiday decor from scraps before. Stack pieces of varying widths — a taller block on the bottom, progressively smaller ones on top — and glue them into a rough triangle. A dab of dark walnut stain on one and a lighter driftwood stain on the next gives a whole row real depth, almost like a mini forest marching across your mantel. Keep the base square and simple so the tree stands on its own without wobbling. Finish with a strip of twine wrapped near the top in place of a star, and you’ve got a rustic accent that takes less than an hour to put together and costs almost nothing beyond glue and sandpaper.
2. A Whole Forest From Basic 2x4s
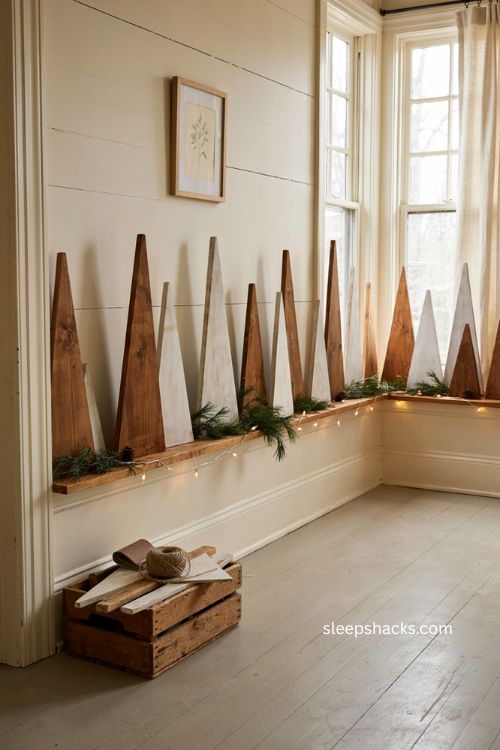
Once you’ve made one tiny tree, doubling up on the project is almost irresistible. Cut a batch of matching triangles from 2×4 scraps, then vary the finish on each one — a few left raw, some given a light whitewash, others stained a deeper brown. Lined up together on a windowsill or tucked along a stair rail, the subtle color variation is what makes a repeated shape look intentional instead of mass-produced. Sand the edges lightly so nothing snags on stockings or garland. This is a good weekend project for using up the odd ends of lumber that are too short for anything else, and it scales easily — make three for a shelf or twenty for a full tablescape.
3. Map-Wrapped Wood Block Trees
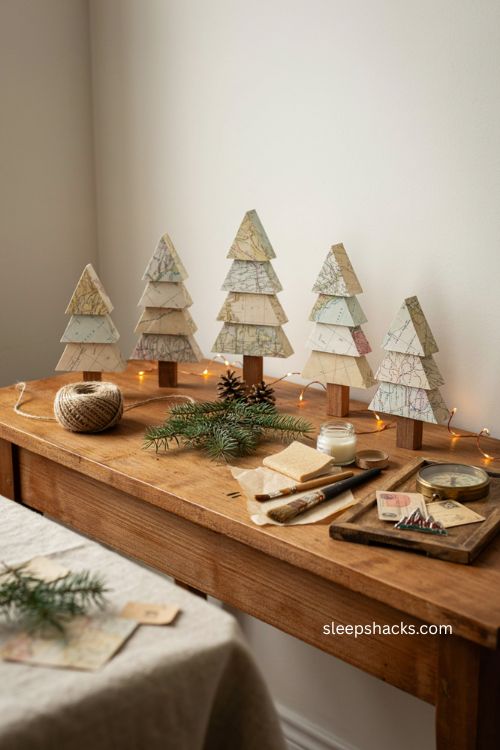
For a Christmas tree with a bit of a story behind it, wrap wood blocks in pages torn from an old atlas or a worn paperback before setting them into a triangle stack. Mod podge or a thin layer of decoupage glue holds the paper in place and gives it a slightly aged sheen once it dries. A wooden dowel painted brown works well as a trunk poking out the bottom for a more finished look. These make a genuinely thoughtful gift for anyone who loves to travel, especially if you use a map from a place that means something to them. Let the glue cure overnight before handling so the paper doesn’t peel at the corners.
4. Stacked Wood Slice Trees
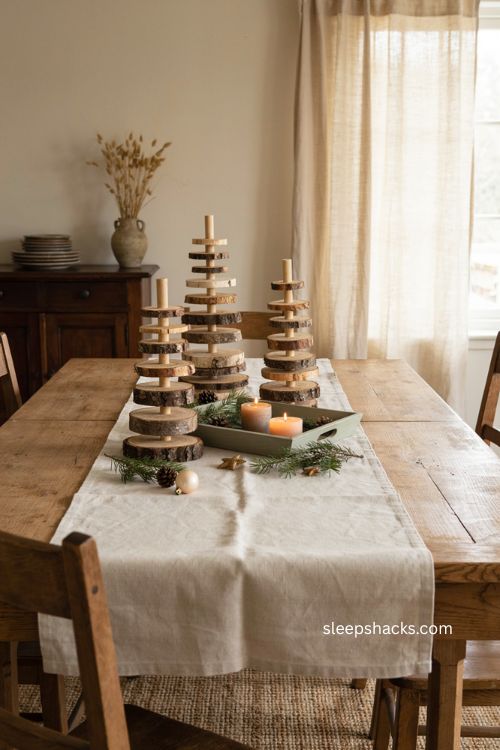
If you have access to a miter saw, slicing branches or logs into thin rounds opens up a completely different look. Arrange the slices from largest to smallest in a loose stack, gluing each one at a slight offset so the tree reads as full rather than flat. Leave the bark on for extra texture, or sand it away for a cleaner, more modern finish. A short length of dowel through the center keeps everything aligned while the glue sets. These wood slice trees work especially well as tabletop centerpieces since they have a natural, slightly irregular shape that store-bought decor rarely matches.
5. Scrap Moulding Christmas Trees
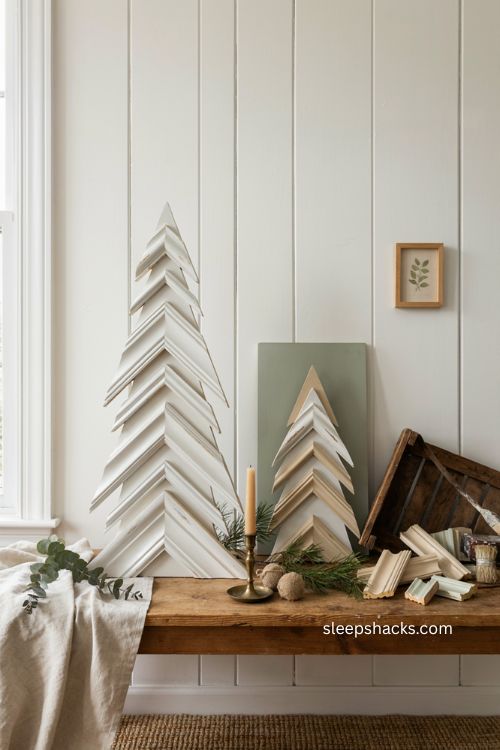
Leftover trim and moulding pieces are often too short to use for their original purpose but perfect for a small Christmas tree. Cut angled pieces in graduating lengths and layer them onto a backing board, or simply glue them edge to edge into a freestanding triangle. The decorative profile already carved into moulding adds a bit of built-in detail you don’t get from flat boards, so even a simple paint job looks a little more finished. A coat of matte white or soft sage paint keeps the shape from looking too busy. This is a smart way to clear out a moulding scrap bin that’s been sitting in the corner of the garage.
6. Pallet Wood Tree in a Frame
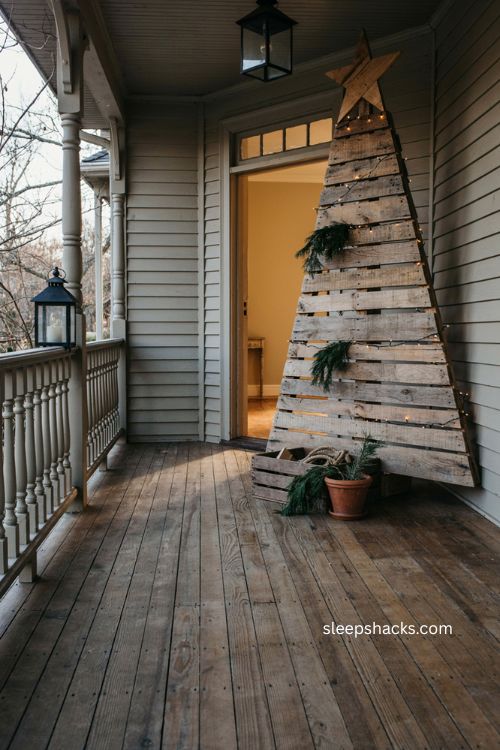
For something sturdier and a bit more architectural, build a simple wood frame in the shape of a tree and fill it in with strips of pallet wood cut to fit. The frame keeps everything structurally sound, so this version holds up well outdoors or as a repeated design for a whole tree-farm display. Stagger the plank widths and leave slight gaps between them for a proper pallet look, then finish with a coat of exterior sealant if it’s headed for the porch. Add a star cut from a scrap of plywood at the top for the finishing touch. This size works well leaning against a doorway or porch railing.
7. Simple Triangle Trees From 1×4 Scraps
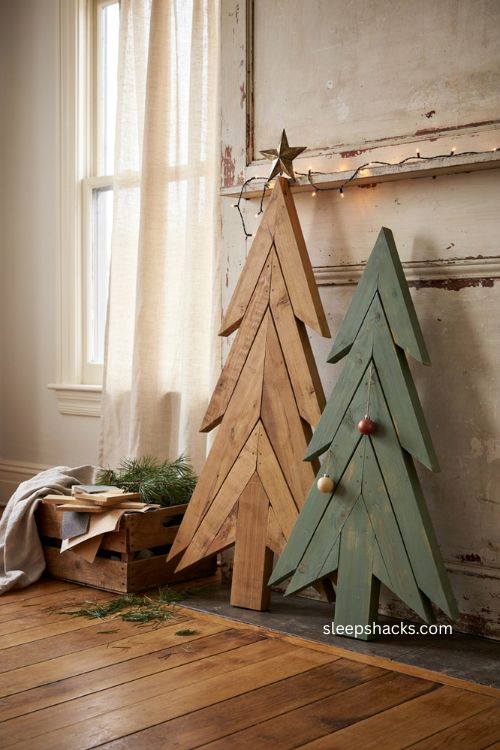
Not every wood project needs measuring twice — this one is about as forgiving as it gets. Cut a handful of 1×4 scraps at matching angles and glue them into a basic triangle shape, no trunk or base required if you’re leaning it against something. Because the boards are wider than a 2×4, the finished tree has a bit more presence without needing extra pieces. Paint it a solid holiday green or leave the wood bare for a more natural look. This is the version to reach for when you want a quick decor win and don’t have much scrap wood or spare time to work with.
8. 3D Stacked Reclaimed Wood Trees
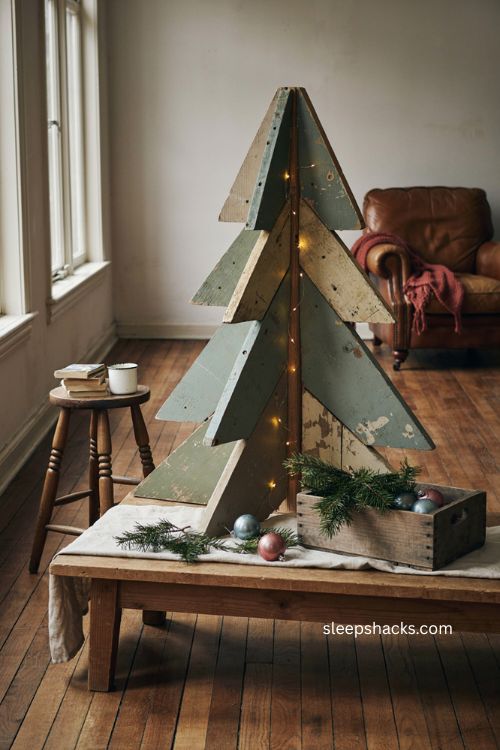
Layering reclaimed boards at different depths gives a Christmas tree real dimension instead of a flat, one-note silhouette. Cut several tree shapes from boards of varying thickness, then stack and offset them slightly front to back so the layers catch shadow and light differently depending on where you’re standing. Weathered, chippy paint left over from old fence boards adds character you can’t fake with a fresh coat of paint. Screw the layers together from the back so no hardware shows on the front. This style photographs especially well, which makes it a strong pick if you’re decorating a spot people are likely to snap a picture in front of.
9. Colorful Outdoor Trees That Glow at Night
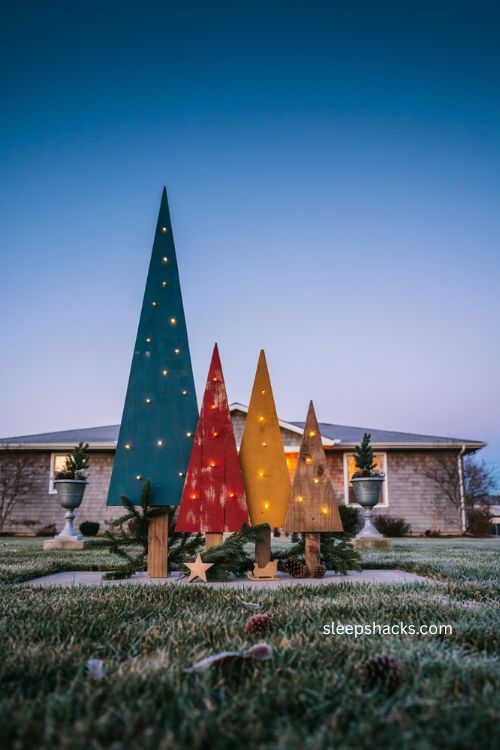
Front lawn decor gets a fun upgrade when you build trees from scrap wood and paint them in bright, punchy colors instead of the usual green or white. Cut simple triangle shapes from plywood or fence boards, then finish each one in a different bold hue — teal, red, mustard yellow — for a playful, candy-shop feel. Drill small holes in a pattern across the front and thread battery-powered lights through so the trees glow once it’s dark out. Anchor each tree with a stake in the ground or a weighted wood base so wind doesn’t knock them over. This is a great option if your yard could use color that isn’t limited to daytime.
10. Rustic Trees With a Junk-Style Finish
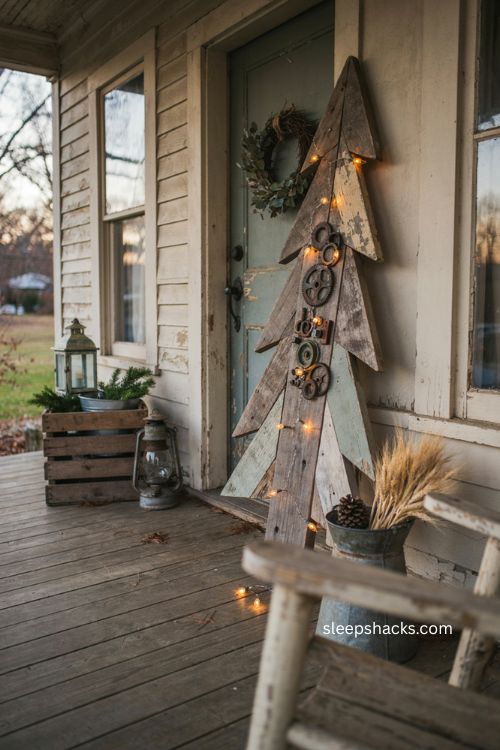
Reclaimed, weathered wood already has most of the character built in, so a tree made from it barely needs decorating to look finished. Cut the tree shape from boards with visible grain, nail holes, or peeling paint intact, and resist the urge to sand it smooth. A few rusty gears, old washers, or leftover hardware glued along the trunk area give the whole thing an industrial, slightly steampunk edge that pairs well with warm string lights. Lean it against a porch post or door frame rather than trying to make it freestanding, since the rougher wood often isn’t perfectly flat. This look works especially well if your porch decor already leans farmhouse or vintage.
11. Full-Size Pallet Trees for the Porch
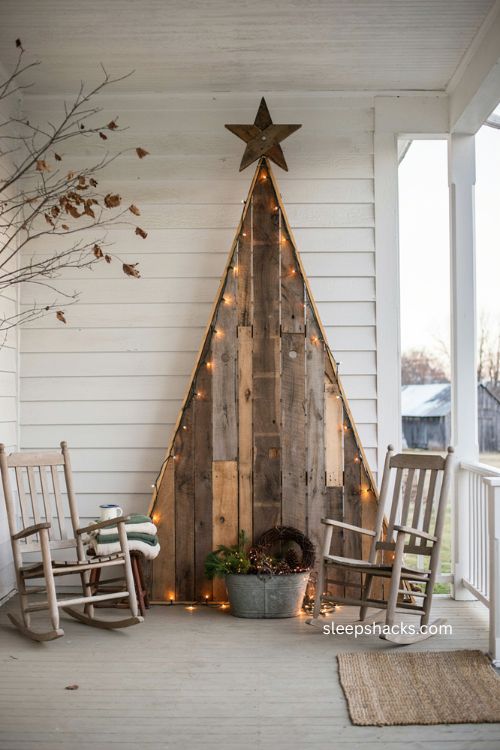
When you want a tree that actually reads as a tree from the street, pallet boards scaled up to five or six feet make a strong outdoor statement. Break down a pallet, sort the boards by length, and arrange them vertically in a triangle frame, leaving the natural gaps between planks for texture. A star made from two crossed scraps and secured with a bolt through the center finishes the top nicely. Seal the wood if it’ll be exposed to snow or rain all season. This size doubles as a backdrop for a wreath, a string of café lights, or a bucket base filled with pinecones.
12. Painted Wood Trees Wired With Lights
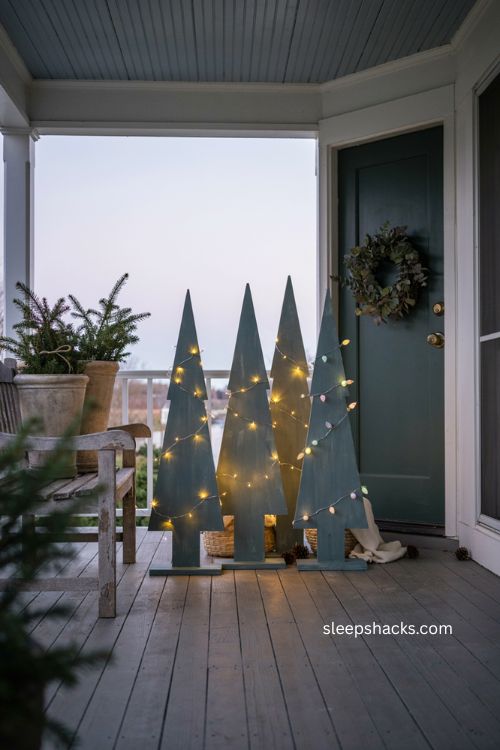
Solid color is sometimes all a wood Christmas tree needs to feel festive. Cut a simple tree shape, paint it a rich evergreen, and once it’s fully dry, hot glue a strand of battery-powered lights across the front in a loose zigzag pattern. Keep the battery pack tucked behind the tree or in a small drilled pocket so it stays out of sight. Three trees in graduating heights lined up by a front door create an instant, low-effort welcome display. Swap warm white lights for colored ones if you want something a little more playful than classic and understated.
13. Layered Outdoor Trees With a 3D Effect
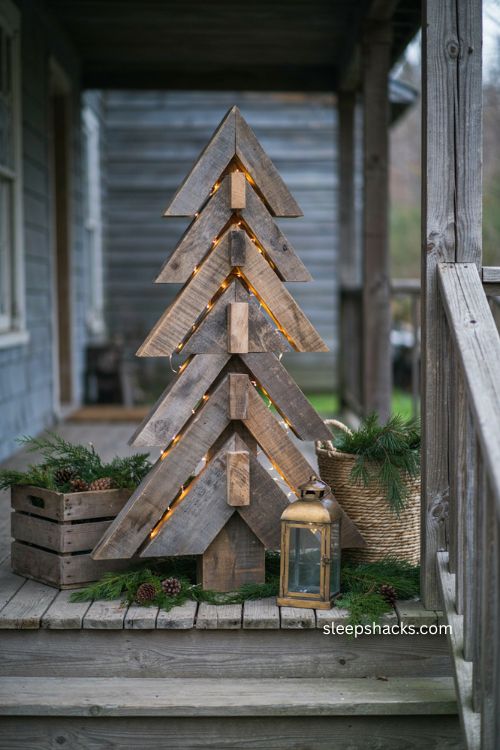
Building an outdoor tree from two or three offset layers, rather than one flat cutout, adds real depth when it’s viewed from the sidewalk or driveway. Cut each layer slightly smaller than the one behind it and space them a few inches apart using wood blocks as spacers, so the tree has visible thickness from the side. Wire lights through the gaps between layers for a glow that seems to come from inside the tree rather than just across its surface. This project takes more cutting and assembly than a flat version, but the payoff is a porch decoration that looks noticeably more custom than a store-bought light-up tree.
14. Space-Saving Wooden Dowel Trees

Not every home has room for a full-sized tree, and that’s exactly where a dowel tree earns its keep. Drill a series of holes at graduating heights down a length of wood, then insert shorter dowels into each hole so they stick out like branches, wide at the bottom and short at the top. Paint the whole thing black, white, or a soft neutral to keep it looking more like a piece of decor than a craft project. Hang small ornaments from each dowel for a display that takes up barely any floor space. This is a smart pick for apartments, dorm rooms, or anywhere a full tree just won’t fit.
15. Herringbone-Style Stenciled Wood Signs
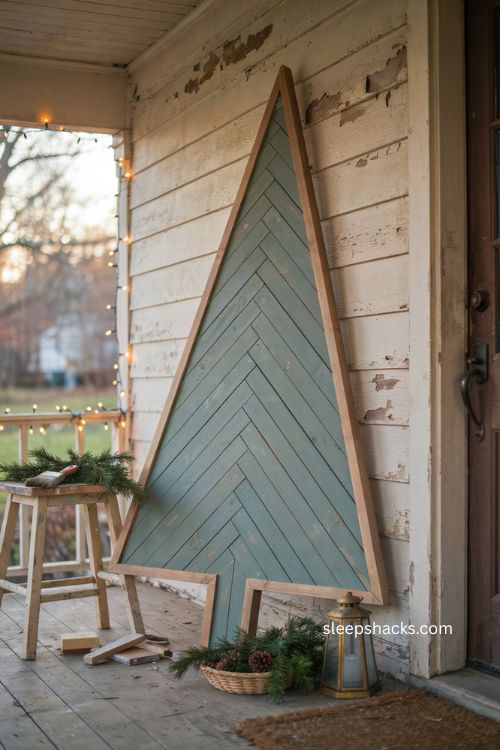
If actual angled wood cuts sound intimidating, a stencil can fake the look on a single flat board. Paint a solid background color, then use a herringbone tree stencil to build the pattern on top in a contrasting shade, working from the bottom up so the rows overlap slightly like real planks. Add strips of natural wood trim around the stenciled shape for a subtle frame that reads as dimensional even though the board itself is flat. This version is ideal for a porch sign or leaning décor piece, since it skips all the angled cutting that a true pallet-style tree would need. A coat of matte sealer keeps it looking sharp through the whole season.
Final Thoughts
You don’t need a full workshop or a stack of fancy tools to pull any of these off — most of them start with wood you probably already have sitting around. Pick one that matches the scrap pile you’ve got on hand, whether that’s pallet boards, paint stir sticks, or a few leftover 2×4 ends, and give yourself an afternoon to cut, glue, and finish it. Once you’ve made your first one, you’ll probably want a second for the mantel and a third for the porch. Grab whatever’s left in your scrap bin, set aside an hour, and start with the smallest tree on this list — it’s the easiest way to see how quickly scraps turn into something worth setting out for the season.
Frequently Asked Questions
Q: What’s the easiest wood Christmas tree to make for beginners?
Small wood block trees or simple 1×4 triangle cutouts are the easiest starting point since they need minimal tools and no complicated angled cuts.
Q: Can wood Christmas trees be used outdoors?
Yes — as long as you use exterior-grade wood or seal the finished piece, pallet and reclaimed wood trees hold up well on porches and lawns all season.
Q: What kind of wood works best for DIY Christmas trees?https://sleepshacks.com/diy-christmas-tree-storage-hacks/
Pallet boards, 2×4 and 1×4 scraps, moulding offcuts, and reclaimed fence wood are all popular choices since they’re inexpensive and easy to shape.