

Nothing quite says the holidays like the soft glow of a vintage ceramic tree sitting on a side table, but if you didn’t inherit one from your grandmother, you might assume that classic look is out of reach.
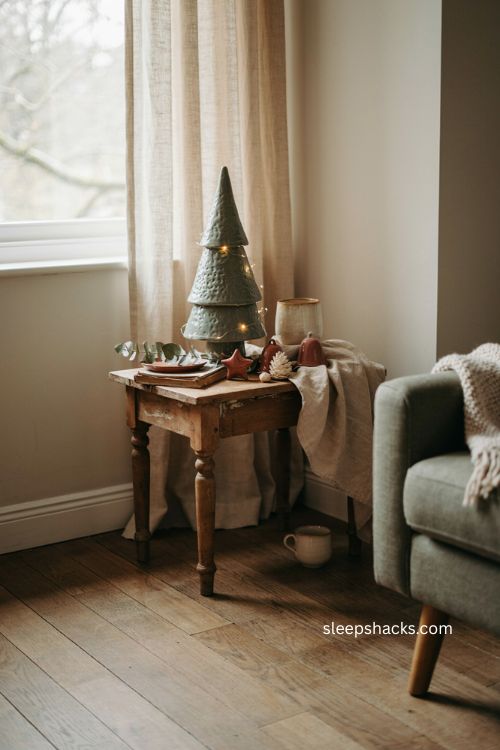
The good news is it isn’t — pottery christmas trees are surprisingly approachable to make yourself, whether you’re working with a pottery wheel and a kiln or just a block of air-dry clay from the craft store. Some versions call for glazing and firing, while others need nothing more than paint and a rolling pin. Either way, you end up with a piece that has real texture and character, something a plastic tabletop tree can’t match. Here are fifteen ways to bring that classic ceramic tree look into your own holiday decor this year.
1. Classic Spiral Wrapped Clay Tree
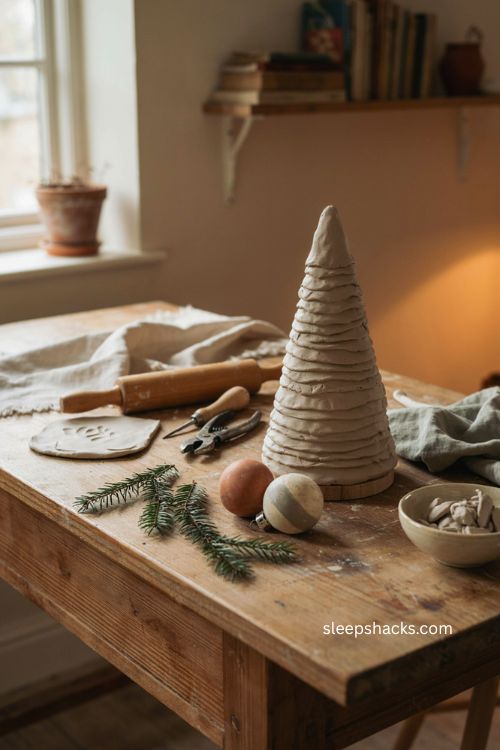
The look most people picture when they think of a pottery Christmas tree starts with a simple paper cone. Roll a triangle of cardstock into a cone, tape the seam, and use it as the form you build around. Roll out a slab of clay, cut it into one long spiral strip, and wind that strip up the cone from bottom to top, pressing gently at each overlap so the layers hold together. Leave the ridges slightly uneven rather than smoothing them flat — that texture is what makes the finished tree look hand-coiled instead of machine-made. Once it’s fully dry, the paper cone lifts right out, leaving a hollow, lightweight tree behind.
2. Hand-Built Slab Cone Tree
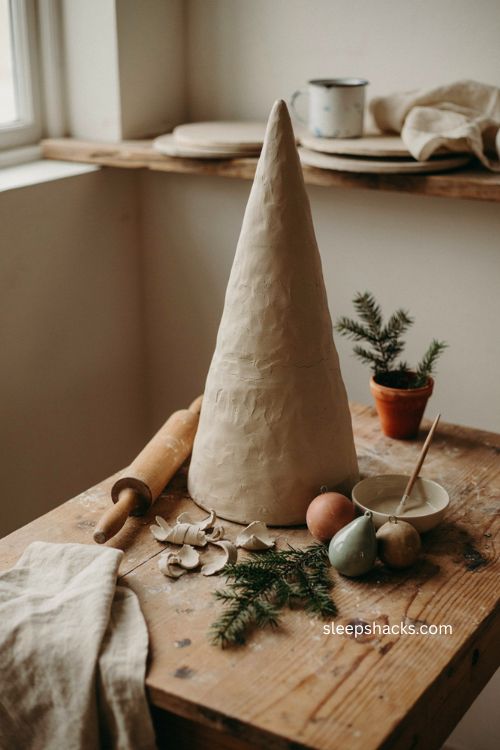
If you’d rather skip the paper form altogether, a hand-built slab tree gives you more control over the final shape. Roll out a slab about a quarter inch thick, cut a large triangle, and gently curve it into a cone before the edges dry out, pinching the seam closed with a bit of slip. Score and smooth the seam line so it doesn’t crack once it’s bisque fired. This method is a good next step once you’ve made a spiral tree or two, since shaping the cone by hand gives you room to make it taller, wider, or slightly asymmetrical depending on the look you’re going for.
3. Wheel-Thrown Ceramic Tree
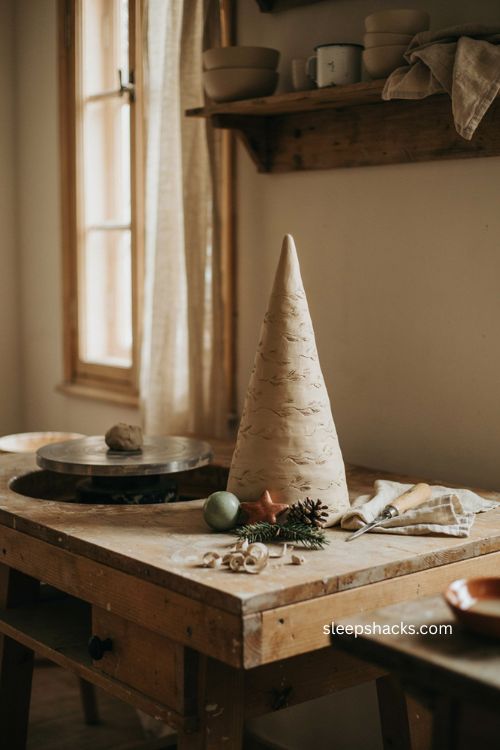
For anyone comfortable at the wheel, throwing a Christmas tree shape is a fun departure from bowls and mugs. Center a ball of clay and pull it upward into a tall, narrow cone rather than opening it into a vessel, keeping the walls thick enough to carve into once it’s leather-hard. After trimming the base flat, use a fettling knife to cut small notches or branch shapes into the sides for texture. This version takes more practice than hand-building, but a wheel-thrown tree has a smooth, symmetrical silhouette that’s hard to get any other way.
4. Vintage-Style Painted Tree With Lights
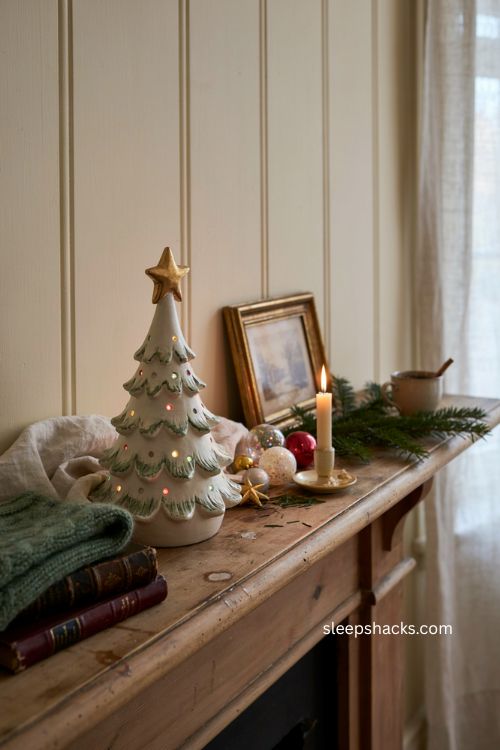
The nostalgic ceramic trees a lot of people remember from childhood get their glow from a simple trick — small holes drilled or carved into the clay before firing, with a light source wired up through the base afterward. Paint the fired tree in a soft matte white or classic green, then let colored light peek through the drilled holes for that familiar retro look. A star cut from a thin slab and glazed gold makes the perfect topper. This is the version worth attempting if you’re chasing that specific grandma’s-mantel feeling more than a modern, minimalist design.
5. Air-Dry Clay Tabletop Tree (No Kiln Needed)
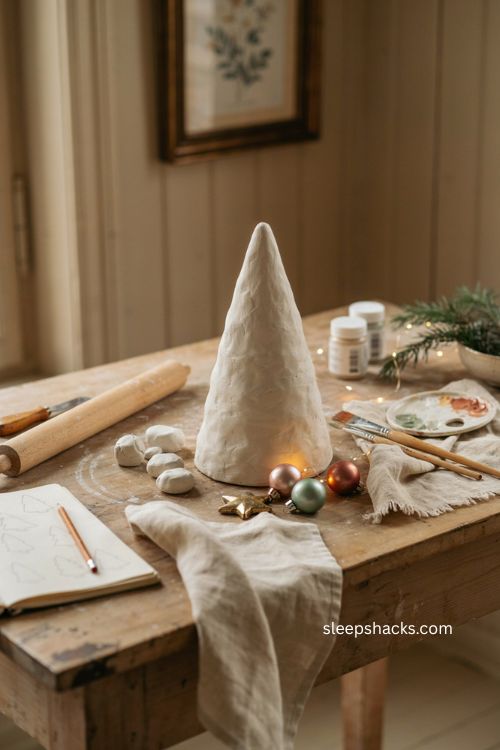
Not everyone has access to a kiln, and that’s exactly where air-dry clay earns its place. Skip the bisque and glaze firing altogether and build your tree using the same spiral or slab technique, letting it cure at room temperature for a day or two instead. Once it’s fully hardened, acrylic paint and a matte sealer give it a finish that holds up just as well as a glazed piece for everyday display. It won’t have quite the same glassy shine as a true ceramic glaze, but it’s the easiest way to get the look without ever touching a kiln.
6. Mini Pottery Tree Ornaments
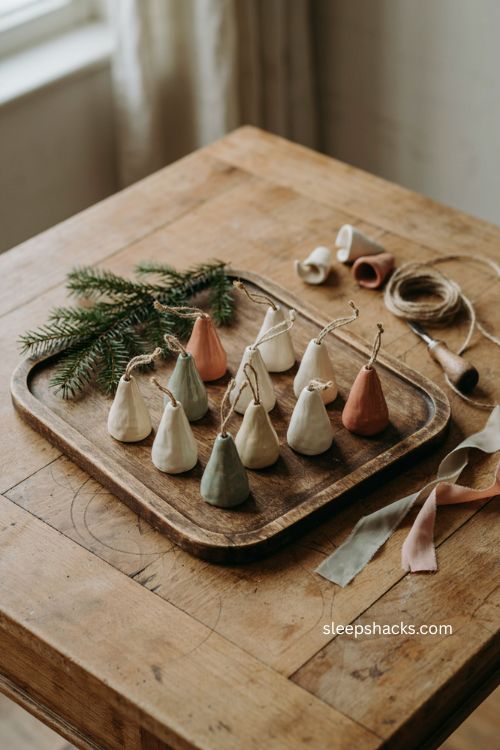
Scale the same cone shape down to just a couple of inches, and you’ve got a batch of tree-shaped ornaments instead of one large centerpiece. Poke a small hole near the top before firing so you can thread a loop of twine or ribbon through once it’s finished. Make a handful in slightly different heights and finishes — some glazed glossy white, others left in raw stoneware — and tie them onto a gift, a wreath, or the branches of your actual Christmas tree. These small trees also use up leftover clay from bigger projects instead of letting scraps go to waste.
7. Textured Bark-Effect Clay Tree
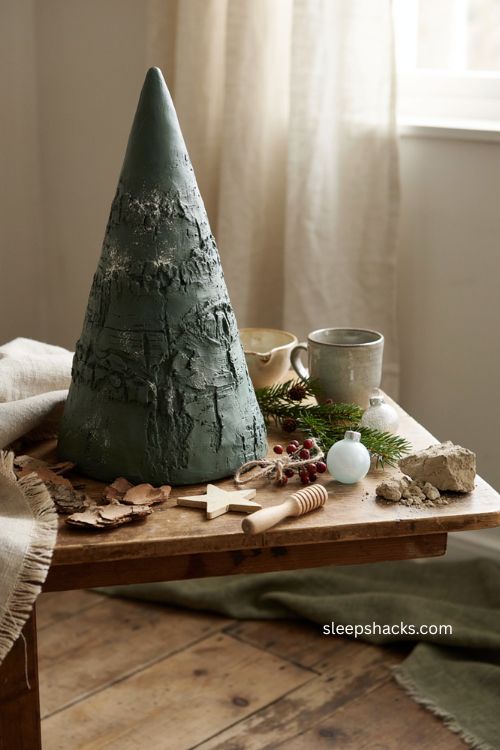
Instead of a smooth cone, press real texture into the clay before it sets to give the tree a rougher, more natural finish. Rolling the slab over a piece of tree bark, burlap, or a textured rolling pin before shaping it into a cone leaves an imprint that reads almost like real evergreen branches once it’s glazed in a deep matte green. This works especially well if you want the tree to look less like polished pottery and more like something carved from wood. A light dry-brush of white glaze over the raised texture mimics a dusting of frost.
8. Snow-Dusted White Glaze Tree
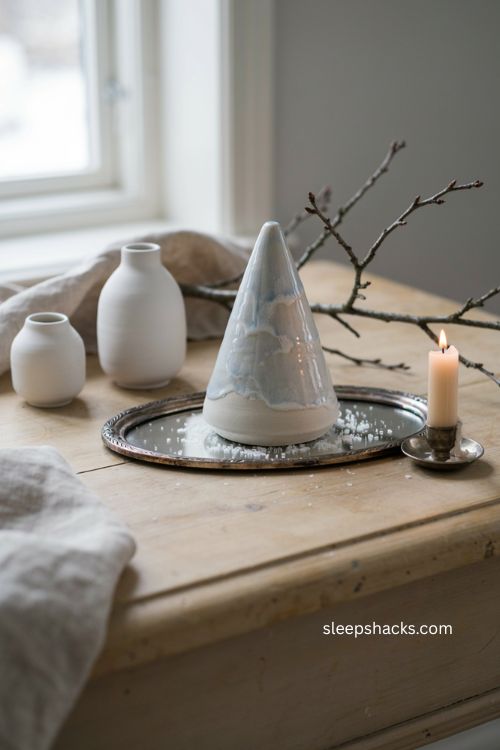
A layered white glaze is one of the simplest ways to make a plain cone shape feel finished and festive. Apply a base coat of matte white glaze, then dab a slightly glossier or slightly bluer white unevenly near the top and along the ridges to suggest drifted snow. Firing brings out subtle variation between the two glazes that flat, single-color paint can’t replicate. Set the finished tree on a small mirror or a scattering of coarse salt for a display that leans fully into the winter theme without adding any extra color.
9. Colorful Glazed Trees for a Retro Look
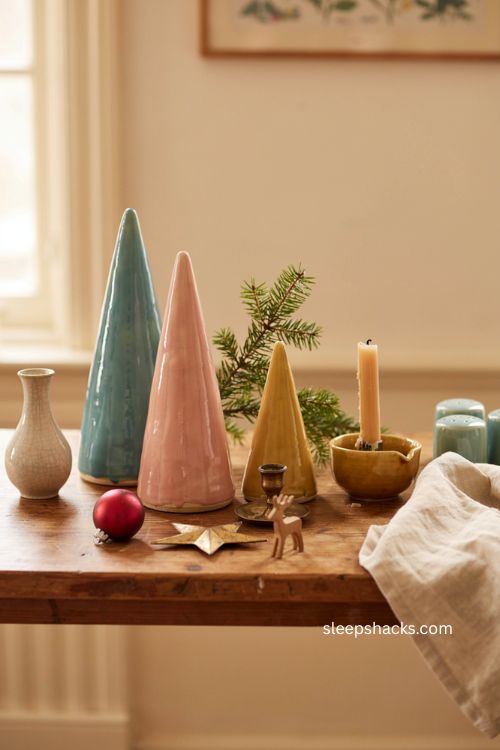
If white and green feel a little expected, a bright glaze in turquoise, pink, or mustard yellow gives a pottery tree a fun, midcentury feel instead of a traditional one. Glossy glazes in unexpected colors catch the light differently than matte white does, so the same simple cone shape reads as bold and modern rather than classic. Line up two or three different colored trees in graduating sizes on a shelf for a display that looks intentional and collected rather than matchy. This is a good option if the rest of your holiday decor already leans playful over traditional.
10. Star-Topped Trees With a Cutout Detail

A simple star cutout at the very top of the tree adds a small design detail without much extra work. Roll a thin slab, use a star-shaped cutter or a craft knife to cut two matching stars, and press them together at the tip of the cone before it fully dries. For an extra touch, cut a few smaller stars or dots along the body of the tree itself and let light show through the openings once it’s finished. Gold luster or metallic paint on just the star creates a nice contrast against a plain white or green base.
11. Multi-Bough Tabletop Trees
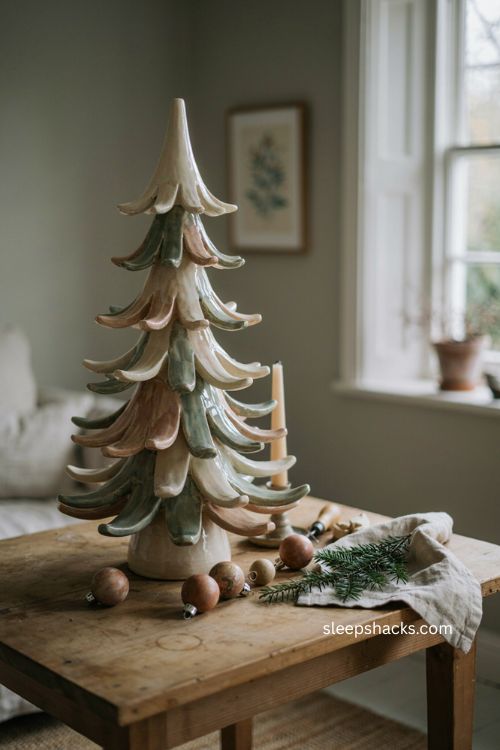
Larger ceramic trees are often built with a separate, wider base bough that the main trunk sits into, which gives the whole piece a fuller silhouette without needing to make one giant cone. Build the trunk section and the base bough separately, letting each firm up before joining them, so the extra weight of a wide base doesn’t distort the taller top piece. This layered construction is closer to what you’ll see in a proper ceramics studio’s tree lineup, and it holds up better for taller trees that would otherwise be top-heavy or prone to leaning.
12. Studio Paint-Your-Own Tree Kits
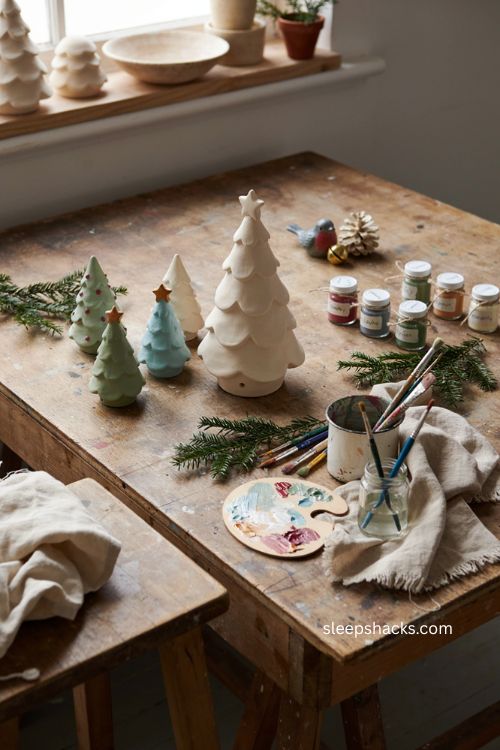
If building the clay shape yourself isn’t the part you’re after, plenty of pottery studios sell pre-fired ceramic trees specifically for painting, either in-studio or as a to-go kit you finish at home. These kits usually include the bisque tree, paint, brushes, and sometimes a light and star already built in, so all that’s left is choosing a color and painting the piece before it goes back for a final firing. It’s a good middle ground if you want the classic look and the fun of picking colors without committing to the slab-and-cone building process from scratch.
13. Bisque and Glaze Fired Trees
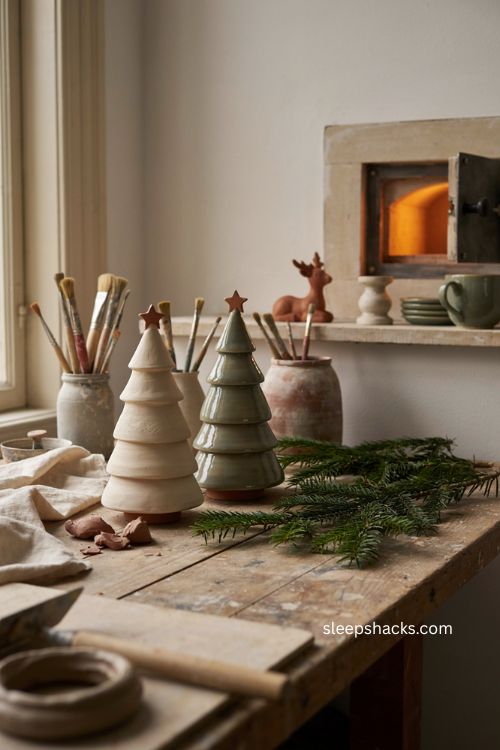
For anyone working with a proper kiln, understanding the two-firing process matters more than it might seem. The tree is bisque fired first at a lower temperature to harden the raw clay, then glazed and fired a second time at a higher temperature so the glaze melts into a smooth, glassy finish. Skipping straight to a single high firing with glaze already applied often causes cracking or uneven color, so patience with the two-step process pays off in the final result. This is worth knowing before you commit a whole afternoon to painting a tree that hasn’t been properly bisque fired yet.
14. Textured Surface Trees Using Lace or Leaves

Pressing found materials into the clay before it sets is an easy way to add detail without carving anything by hand. Real lace, doily paper, or a fresh leaf pressed firmly into a slab and then peeled away leaves behind a delicate pattern that reads beautifully once glaze pools slightly into the recessed lines. Wrap the textured slab around your cone form the same way as a plain one, positioning the pattern so it faces outward and catches the light. This method turns a basic tree shape into something that looks far more intricate than the actual technique requires.
15. Family Craft Night Trees for Kids
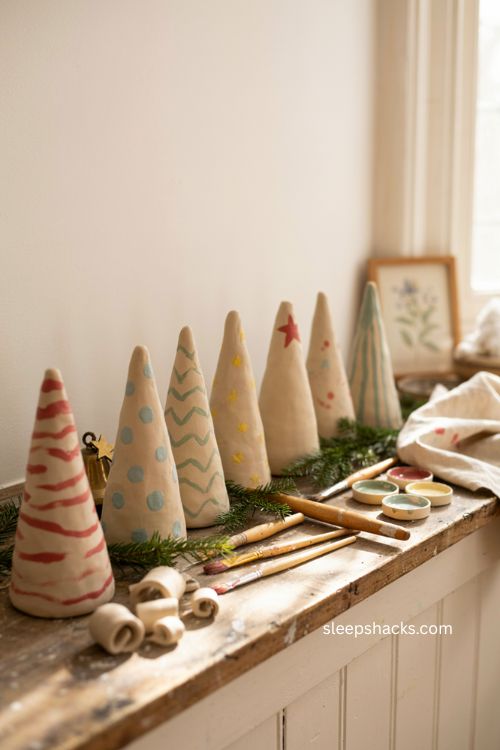
Pottery Christmas trees make a genuinely good kid-friendly project, especially with air-dry clay that skips the kiln step entirely. Let each child roll and shape their own small cone, then hand over a tray of paint colors and let them decorate however they like without worrying too much about matching a specific look. Uneven lines and mismatched dots are part of the charm here, and every tree ends up a little different. Lining up a handful of these on a windowsill afterward makes for a sweet, low-pressure holiday decoration that doubles as a keepsake from the year it was made.
Final Thoughts
However you decide to make yours, a pottery Christmas tree has a way of feeling more personal than anything you’d pick up off a store shelf. Maybe it’s the slight unevenness in the spiral, or the glaze that pooled just a touch differently than you planned — those little imperfections are usually what people end up loving most. Start small if this is your first time working with clay, and don’t worry about getting it perfect on the first try. Even a slightly wobbly tree earns its spot on the mantel once it’s glowing next to a few candles and some greenery. Here’s hoping this becomes one of those projects you find yourself making again every year.
Frequently Asked Questions
Q: Do you need a kiln to make a ceramic Christmas tree?
No — air-dry clay lets you build the same cone shape without firing, though a kiln gives you the classic glossy glazed finish.
Q: What is the traditional pottery Christmas tree design based on?
The classic version is modeled after vintage ceramic trees with small drilled holes lit from inside, often finished in white or green glaze with a gold star.
Q: How long does it take a clay Christmas tree to dry?
Air-dry clay pieces typically need 24 to 48 hours to fully harden, while kiln-fired versions require separate bisque and glaze firings.