

You’ve seen those glowing church windows at Christmas and felt that little pull in your chest, the one that says you want that color and light in your own home. But real stained glass costs a fortune, and it takes years to learn. It’s easy to feel like it’s out of reach.
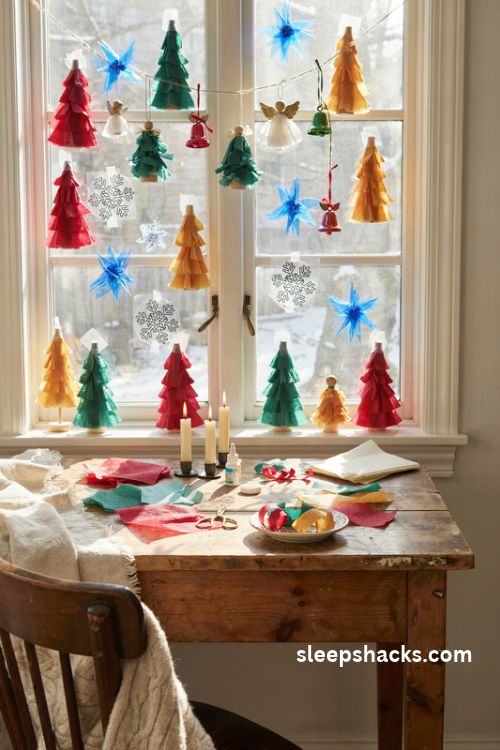
It isn’t. These fifteen Christmas stained glass ideas use tissue paper, glue, cellophane, and a few craft supplies to give you that same jewel-toned glow. You don’t need any special skill. Some take twenty minutes, others an afternoon, and all of them look best when the sun or a candle shines through.
1. Tissue Paper Window Panels
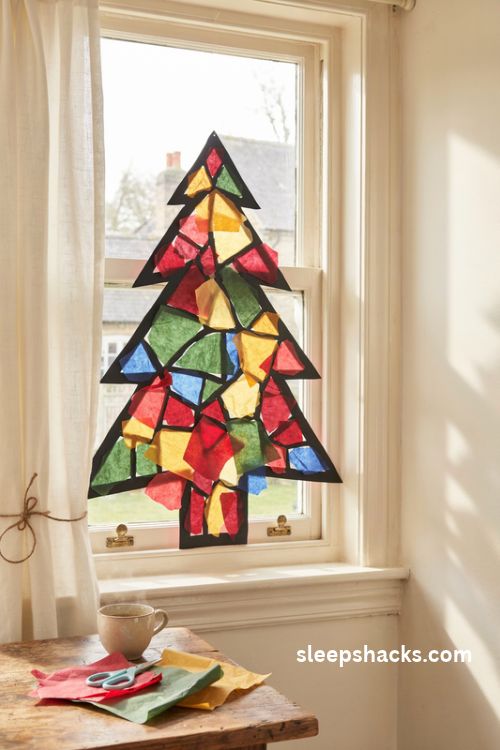
This is the classic for a reason. Cut a frame from black cardstock, leaving a window-shaped opening, then glue overlapping pieces of colored tissue paper across the back in a mosaic pattern. Tape the finished panel to a window, and sunlight pours through the colors like it would through a church window.
Cut the tissue into small irregular shapes, and overlap the edges slightly so the colors blend where they meet. Use a glue stick instead of liquid glue to avoid wrinkles. A star, a bell, or a simple tree outline gives you a clear shape to fill. Tape it at the corners only so you can swap panels, and seal the whole thing with clear contact paper for a longer life.
2. Faux Leading Ornaments
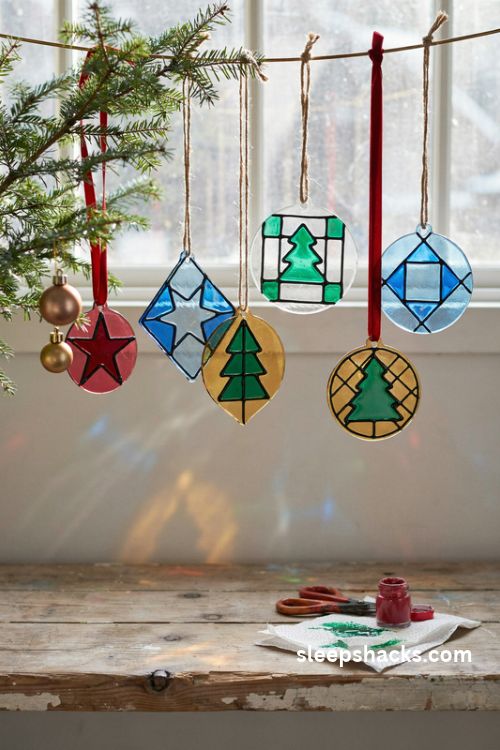
Adhesive-backed lead lines make this one look professional. Stick the lines onto a clean square or circle of plexiglass in a simple pattern, forming a few sections, then brush stained glass paint into each section. Let it dry flat, and the colors look glassy and bright.
Cut the lead lines with a craft knife so the corners meet neatly, and apply thin coats of paint to avoid drips. Choose red, green, and gold for a classic palette. Seal with a clear gloss spray to protect the finish. Tie on a red ribbon or twine and hang it on the tree or in a window. A set of six in jewel colors makes a lovely gift that people will treasure.
3. Glue Peel Suncatchers
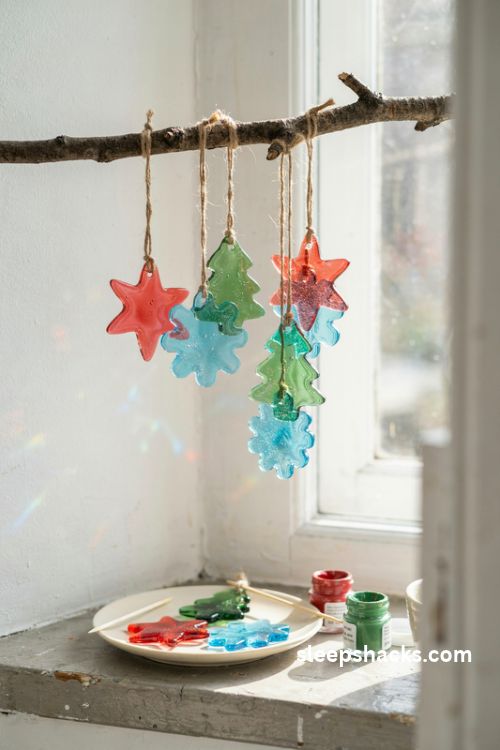
Mix white craft glue with a few drops of acrylic paint, pour it into a small cookie cutter or onto a plastic lid, and let it dry for a day or two. Peel it off, and you have a translucent, rubbery suncatcher that glows when the sun hits it. Make a few in red, green, and blue.
Spread the glue about a quarter inch thick for good color and strength, and pop any bubbles with a toothpick. Poke a hole near the top while the glue is still soft, and thread a string through. Drying time varies with humidity. Hang them from a curtain rod or a branch indoors. They’re light, cheap, and kids love peeling them off like stickers.
4. Melted Bead Suncatchers
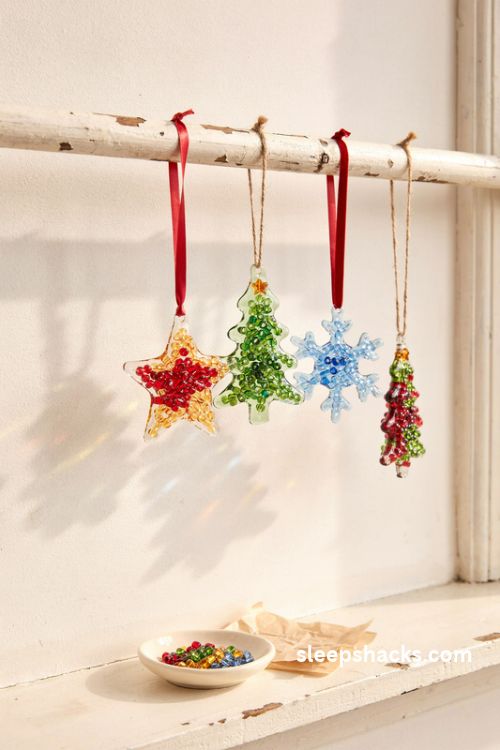
Fill the cavities of a metal cookie cutter with clear plastic pony beads, set it on parchment paper on a baking sheet, and bake until the beads melt into a smooth, glossy pane. Let it cool completely, pop it out, and the little shape glows like colored glass.
This project needs an adult in charge because the oven gets hot and melting plastic can smell, so open a window and keep the room ventilated. Choose a mix of two or three colors, and pile the beads in a single layer to avoid cloudy spots. Cool it fully before handling. Hang with a ribbon, and enjoy the way each tiny piece catches the light.
5. Contact Paper Stained Glass
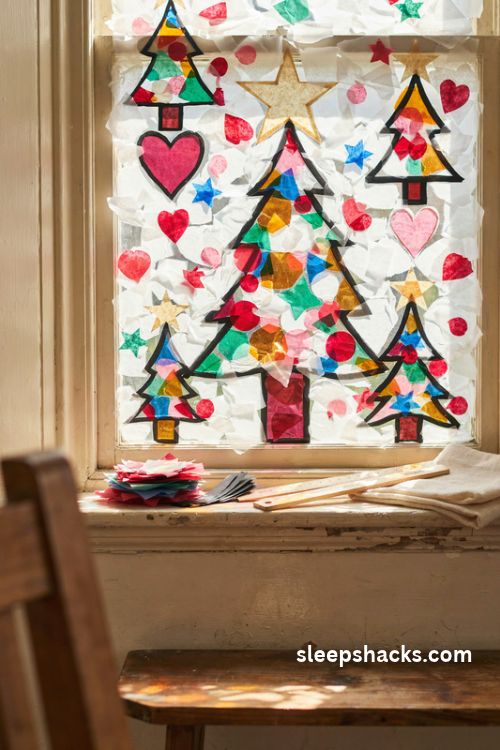
Clear contact paper is a no-mess way to build stained glass. Peel the backing, lay the sticky sheet face up, and press scraps of tissue paper or cellophane onto it in a pattern. Cover with a second sheet, trim the edges, and tape it up in a window.
Cut simple shapes like stars, trees, and hearts from the finished sheet for hanging ornaments. Press out air bubbles with a soft cloth, and use a ruler to keep edges straight. Frame the panel with black electrical tape or construction paper to mimic leading. It’s a smart choice for younger kids, since there’s no glue to spill. The sheet also resists fading, so it looks great all season.
6. Tissue Paper Mason Jar Lanterns
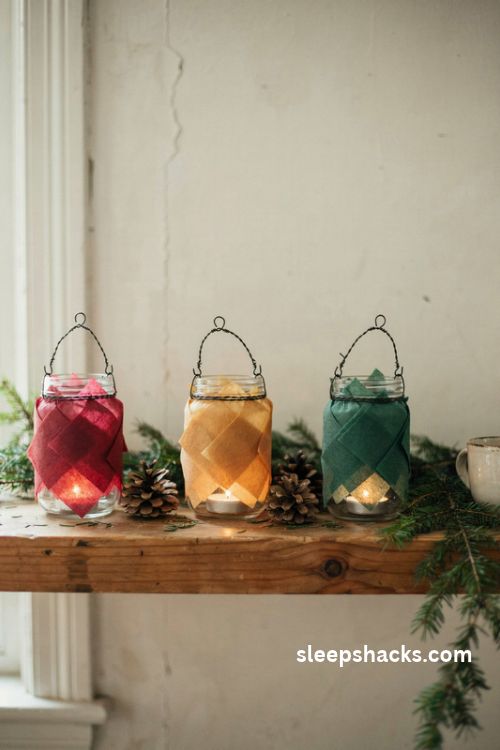
Wipe a clean glass jar, then brush a thin layer of decoupage glue onto it, press on squares of colored tissue paper in overlapping patches, and brush another coat on top. When dry, the jar glows with warm color once a tea light is placed inside. The effect is just like a stained glass lamp.
Wrap black craft wire or thin ribbon around the neck for a handle, and line a few jars along a mantel or a porch step. Use battery tea lights for safety, especially around curtains and kids. Mixing red, amber, and green creates a rich, holiday glow. A few sprigs of pine at the base finish the arrangement.
7. Cellophane Window Scene
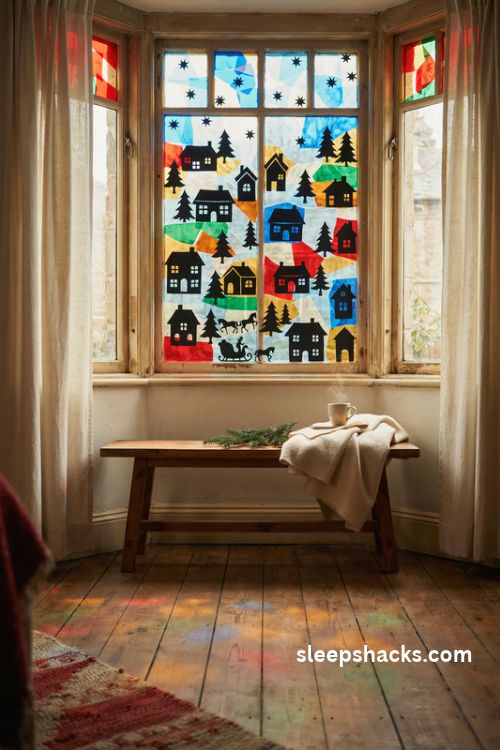
Draw the outline of a nativity, a sleigh, or a winter village on black paper, cut out the colored sections, and back them with cellophane in matching colors. Tape the paper to a window, and the scene glows in the daylight like a real church window.
Cut the cellophane slightly larger than each opening so the edges overlap and no light leaks around them. Layer two sheets in one section for a deeper tone. Hang the scene where the morning sun reaches it, and the colors will spill across the floor. It makes a lovely centerpiece for a bay window or a stairwell, and it peels off gently at season’s end.
8. Stained Glass Snowflake Hangings
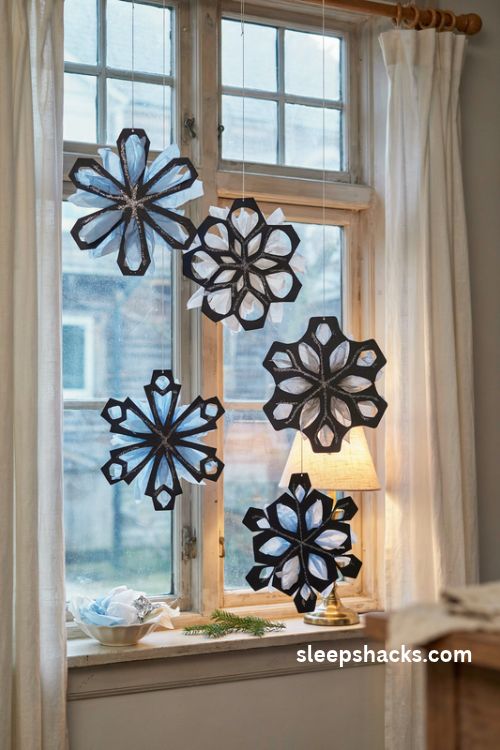
Cut a snowflake from black paper with several large openings, then fill the gaps with pale blue, silver, and white tissue paper. The result looks icy and elegant, like a winter window in a cathedral. Hang a group at different heights from a curtain rod.
Fold the black paper into sixths before cutting, and keep the cuts simple so the openings are big enough to fill. A bit of glitter glue along the edges adds frost. Press them flat under a book overnight. Use clear fishing line, so the snowflakes appear to float. A set of five makes a charming garland, and they look especially pretty at night when a lamp is behind them.
9. Paper Light Box with Tea Light
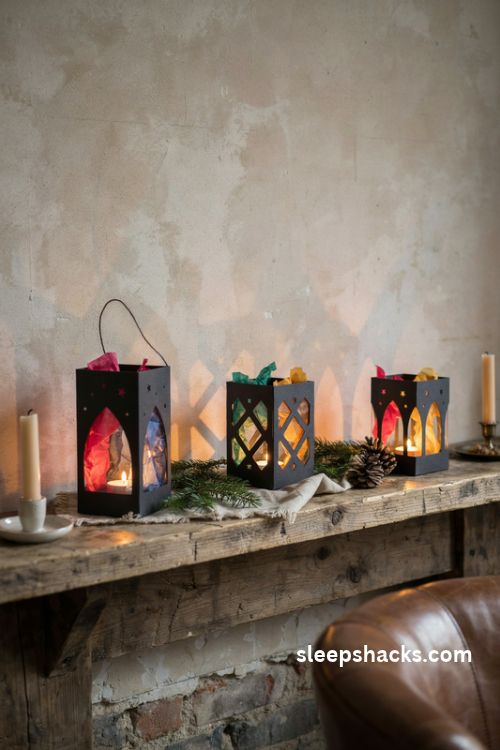
Build a small paper lantern from black cardstock, cut windows into each side, and cover them with colored tissue. Fold it into a square box with an open bottom and set it over a battery tea light. The windows glow in the dark like tiny cathedral panes.
Make a set of three in different heights for a mantel display. Use a craft knife to cut crisp window shapes like arches and stars, and glue the tissue on the inside. Add a loop of wire to hang one. Keep the lights flameless to avoid fire risk. When it’s dark, turn off the lamps and watch the whole room fill with soft color.
10. Glass Picture Frame Mosaic
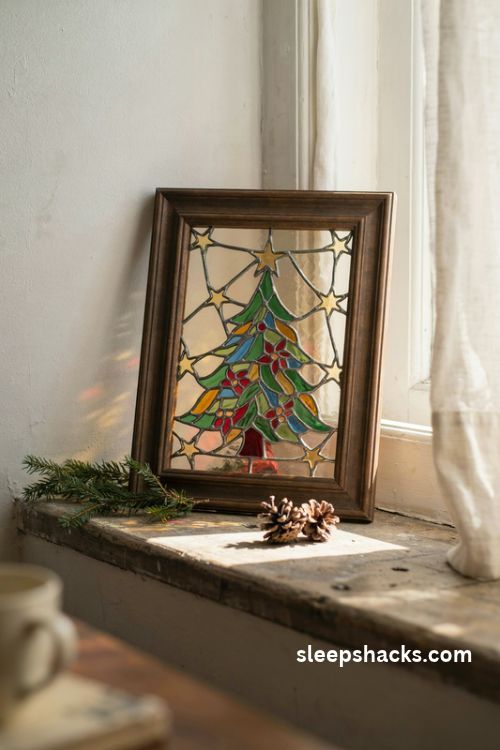
Remove the glass from a clear frame, wash it with soap, and paint it with a stained glass scene using liquid leading and glass paints. A simple tree, a star, or a poinsettia works well. Let the paint cure fully, put the glass back, and prop the frame on a windowsill so light shines through.
Draw the design on paper first, tape it beneath the glass, and trace over it with the leading paint to keep the lines neat. Fill each section with a thin coat of color. Choose a frame with a thick, dark border, which echoes the look of lead. It’s a keepsake project that you can pull out year after year.
11. Stained Glass Nativity Panel
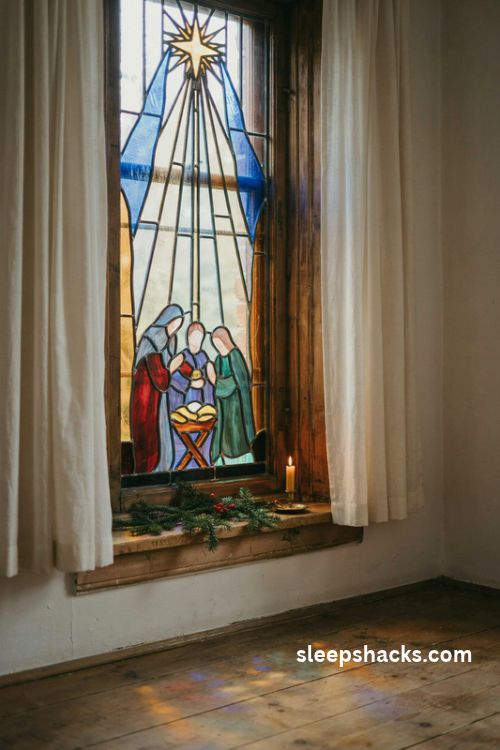
A nativity in jewel colors is a beautiful traditional choice. Sketch a simple scene with a star, a stable, and three figures, then fill each section with deep blue, ruby, and gold. Use tissue paper on contact paper, or paint on plexiglass, and hang it in a window facing the street.
Keep the figures simple, almost geometric, so the shapes stay bold even at a distance. Add a golden star at the top, with a few rays leading down to the manger. Frame it in black for contrast. Neighbors passing by in the evening will see the glow from outside. It also looks wonderful on a mantel, propped behind a candle.
12. Hard Candy Cookie Ornaments
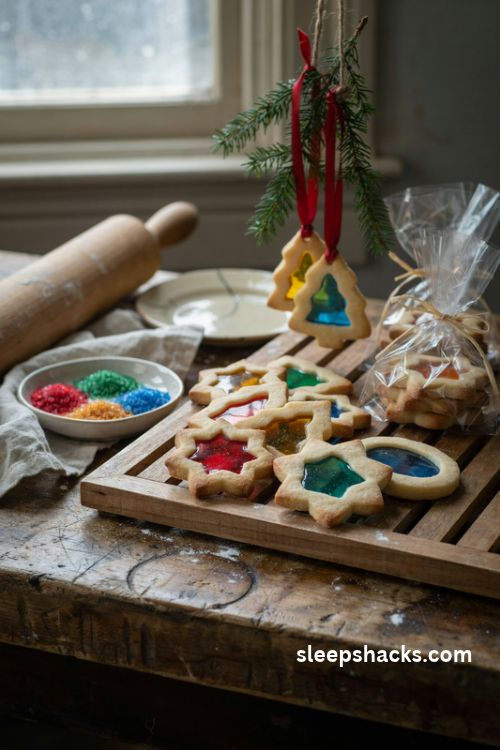
Here’s one you can eat, or at least admire. Cut shapes out of sugar cookie dough, then cut a smaller opening in the center of each. Fill the opening with crushed hard candy in a single color, and bake until the candy melts into a glassy window. Let cool, and the cookie looks like it has a stained glass center.
Crush each color separately and sort them by hue. Line the baking sheet with parchment so the candy doesn’t stick, and poke a hole at the top before baking if you want to hang the cookies. Let them cool fully before moving them, since the candy stays very hot. They make impressive gifts when wrapped in clear bags.
13. Stained Glass Star Garland
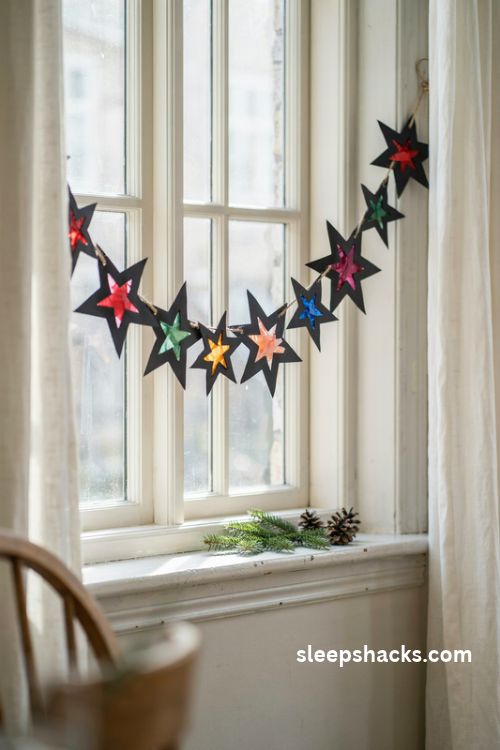
Cut a series of stars from black cardstock, each with a smaller star cut out of the middle, and glue colored tissue or cellophane over the opening. String them along a ribbon or a length of twine, spacing them evenly. The garland looks like a string of tiny windows glowing in the light.
Make the stars in different sizes for an organic look. Use a star template to keep the shapes consistent, and cut the inner opening with a craft knife. Drape the garland across a window, a mantel, or even the tree. The colors look best against white walls or sheer curtains, where the light filters through. Reuse it every year by storing it flat.
14. Stained Glass Gift Tags and Cards
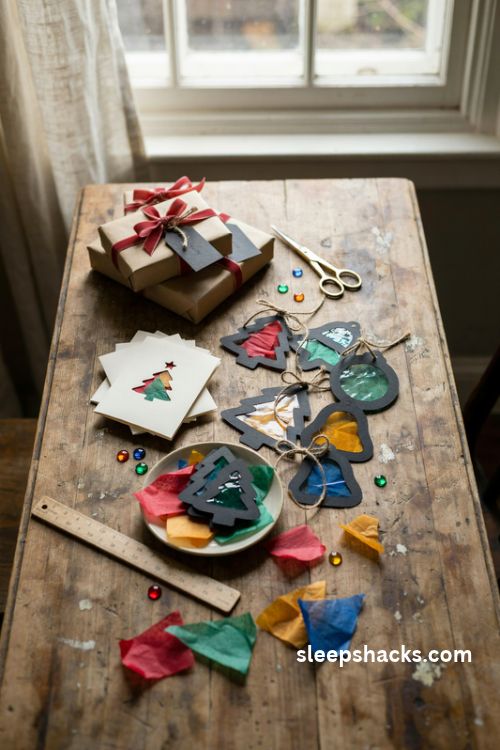
Turn tiny scraps into tags. Cut a small black frame in the shape of a tree, bell, or ornament, and glue a bit of colored tissue to the back of the opening. Punch a hole at the top and tie it to a gift with twine. The tag glows when held up to the light.
For cards, cut a window into the front of a folded card and tape colored cellophane inside. When the recipient holds it up to the light, a little scene appears. Write your message on the inside page. Make a batch while you watch a movie. It’s an easy way to use leftover tissue paper, and each one feels special and handmade.
15. Colored Pencil Stained Glass Ornaments
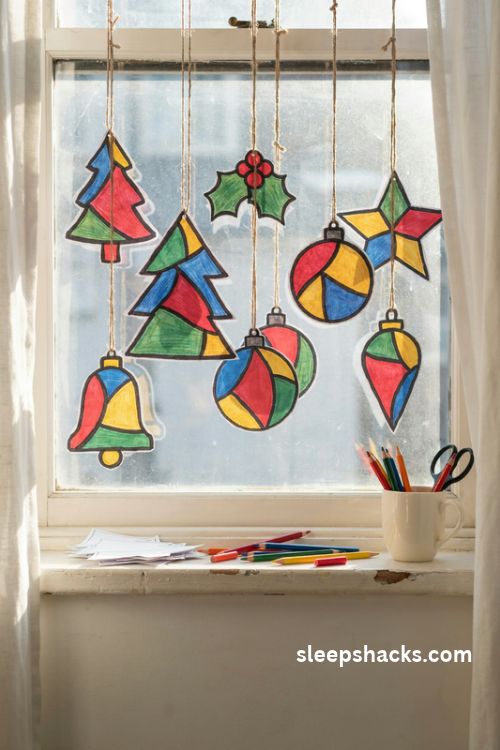
This one is great for kids or anyone who loves coloring. Print a simple holiday design, trace over it with a black marker to create thick lines, then color each section with vibrant markers or pencils. Brush a little cooking oil on the back, and the paper turns translucent.
Let the oil dry on a paper towel first, then tape the finished piece to a window or hang it with a string. Cut the shapes out and tape them up for a gallery effect. Use bold, saturated colors, since they look duller on paper than they will in the light. Older kids can design their own patterns, while little ones can use printed templates.
Final Thoughts
Let’s be straight: faux stained glass won’t fool anyone standing two inches away. The edges will be a bit wobbly, the tissue paper might wrinkle, and a drip of paint will probably land where you didn’t want it. Expect to redo at least one panel. That’s part of the deal with handmade.
But what these projects do give you is real. A window that fills with color at ten in the morning, a lantern that makes a dark corner feel safe, an ornament your kid proudly points out each year. Start small, skip the perfectionism, and let the light do most of the work. It’s good at its job.
Frequently Asked Questions
Q: What materials do I need for faux stained glass?
Tissue paper, black cardstock, glue, and clear contact paper are enough for most projects. Stained glass paint and liquid leading give a glossier finish.
Q: Where should I hang Christmas stained glass crafts?
Windows that get direct daylight work best, since the light makes the colors glow. Tape them to the glass or hang them with clear thread.
Q: Are stained glass crafts safe for kids?
Tissue paper, contact paper, and cellophane projects are safe for most ages with a little help. Skip oven-based projects like melted beads or candy windows unless an adult handles them.