

Picture a shallow wooden box on your mantel, lit from one side by a single strand of warm lights. Inside, a bottle brush tree leans toward a tiny deer, and a dusting of faux snow catches the glow. The whole scene is smaller than a loaf of bread, yet you lean in without meaning to, the way you do with anything small and perfectly made.
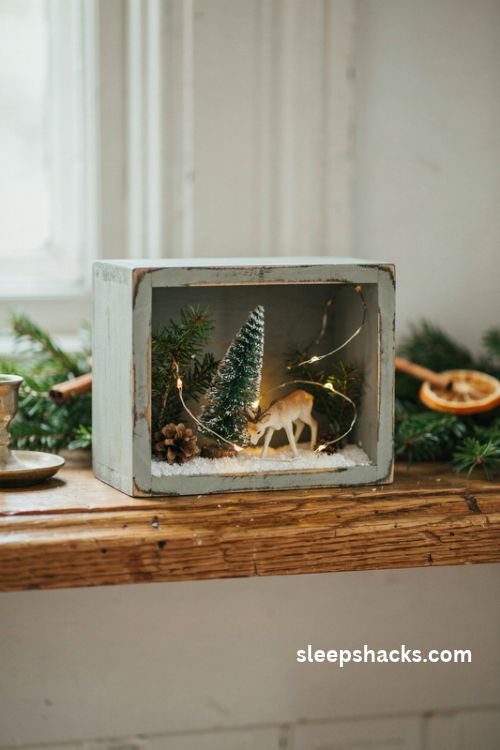
That pull is exactly why Christmas diorama ideas never go out of style. You don’t need fancy skills, only a container, a few miniatures, and a free evening. These sixteen scenes range from rustic boxes to kid-friendly mysteries, so you’ll find one that fits your shelf, your budget, and your patience.
1. Classic Shoebox Snowy Forest
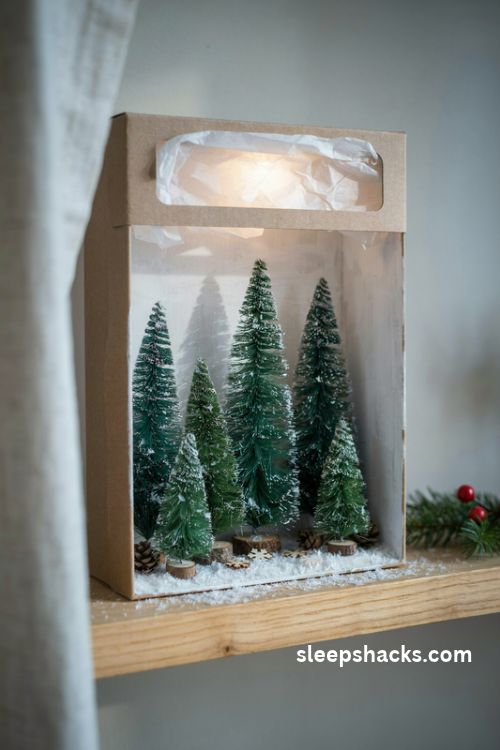
Start with the humble shoebox you probably have in a closet. Turn it on its side, paint the inside a soft white or deep midnight blue, and glue in a cluster of bottle brush trees at different heights. The tallest ones go in back, which gives the scene real depth and makes it feel like a forest instead of a row.
Cover the floor with a thin layer of white glue and sprinkle on faux snow or cellophane flakes, then tap off the extras. Cut a window into the lid and tape tissue paper behind it so light spills in softly. It takes about an hour, and kids can handle most of it.
2. Rustic Cigar Box Scene
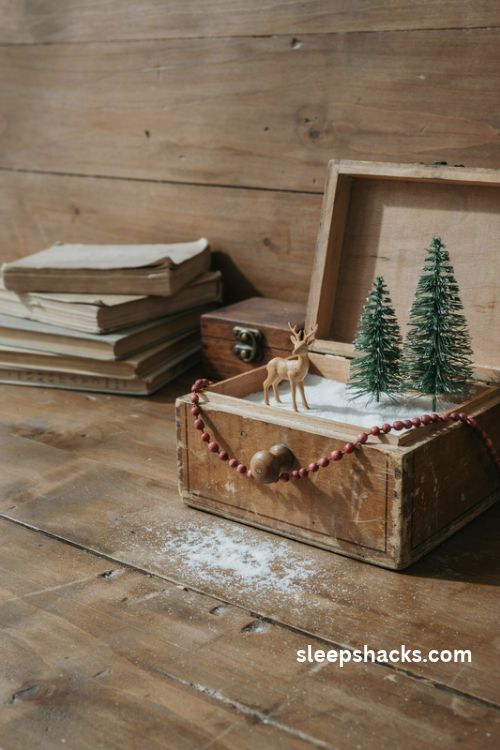
An old wooden cigar box already has the weathered charm that most crafters try to fake. Leave the outside scuffed, paint the inside white, and run a strand of red garland around the rim for a pop of color. Then set a small deer and a couple of trees inside, moving them around until the grouping feels right.
Here’s a little trick: glue a small wooden knob or ball on the lid as a handle, so the box looks like a tiny treasure chest. Thrift stores and flea markets are goldmines for these boxes, and a stack of three or four looks wonderful lined up along a bookshelf.
3. Upcycled Drawer Woodland Display
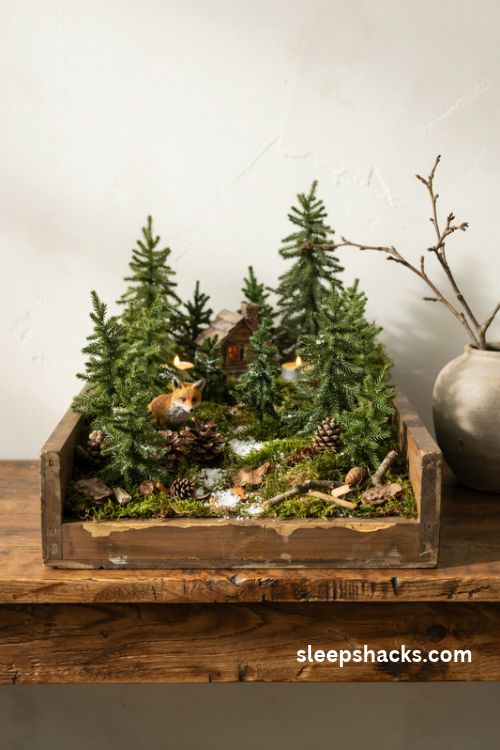
A battered wooden drawer makes a surprisingly grand stage. Its deep sides hold more scenery than a box, so you can build layers: a mossy ground, a stand of evergreens, a little cabin, and maybe a fox peeking from behind a pinecone. Keep the colors natural, with browns, greens, and whites, and the scene will feel calm.
Hang it on the wall with a sturdy hook or prop it on a console table. Because the scene is a winter forest rather than strictly Christmas, you can leave it up until February without anyone blinking. Tuck a couple of battery tea lights behind the trees for an evening glow.
4. Retro Cake Pan Wall Diorama
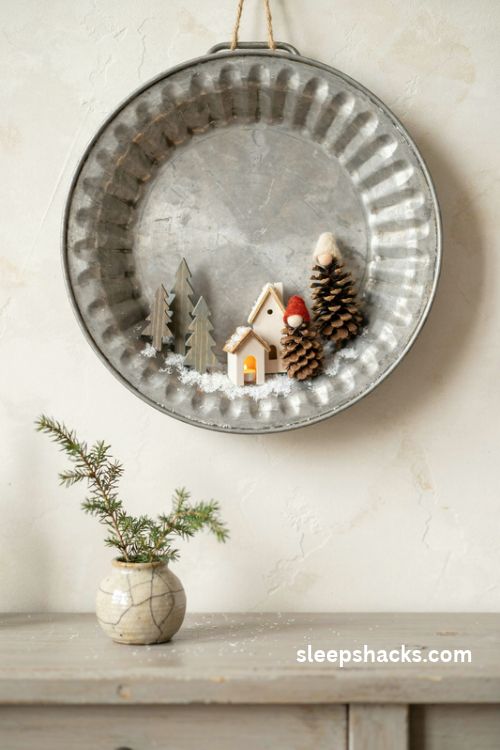
Vintage cake pans, especially the fluted or round ones, make wonderful little frames. Cut a piece of foam to sit flush with the rim, glue it in, and coat it with white glue and sparkly flakes. Then stand up tiny wooden ornaments, pine cone elves, or small houses so each one gets its own moment.
A twine loop glued to the back turns it into a wall hanger. Try grouping three or four pans at different heights above a bed or sofa, or hang a single one on the front door instead of a wreath. It’s a smart way to show off ornaments that get lost on a crowded tree.
5. Antique Lantern Glow Scene
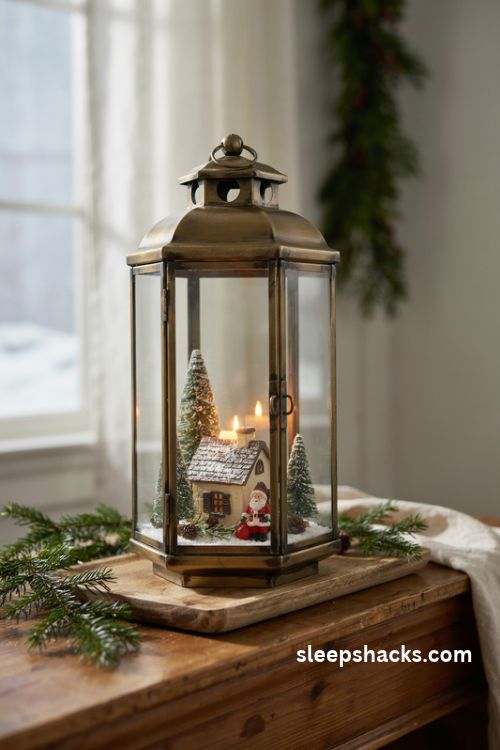
A glass-sided lantern is a diorama that frames itself. Slip a small Santa or a snowy cottage inside, add a bottle brush tree or two, and sprinkle faux snow across the base. The glass lets you see the scene from every angle, which is a lovely surprise when guests walk around it.
Brass or black metal lanterns look best, since their warm tones suit the holiday palette. Drop a battery candle in the top for gentle light, and set the whole thing on a tray with some pine sprigs. Just keep the figures small enough that they don’t touch the glass.
6. Cardboard Christmas Village
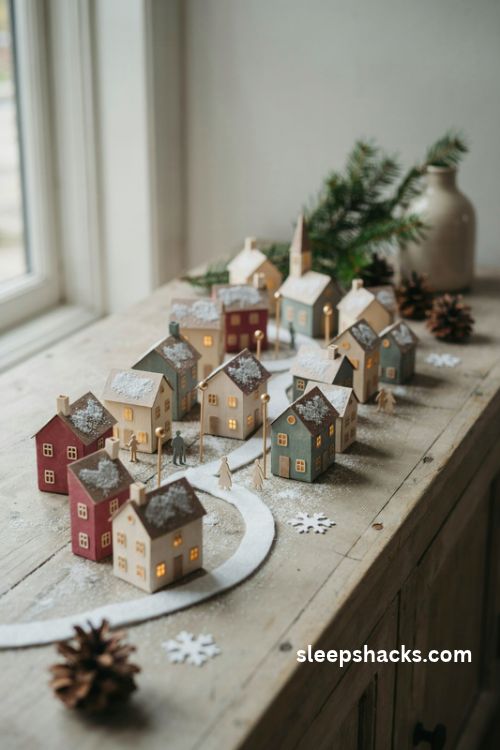
Cut small house shapes from cardboard, paint them in muted reds, creams, and greens, and glue on paper roofs dusted with snow. Mix tall and short buildings, add a church with a steeple, and your village instantly has character. Draw windows with a gold pen so they look lit from within.
Plan the layout on paper first. A winding path made of white felt or cotton batting guides the eye through the scene, and a few toothpick lampposts tipped with tiny beads add a delicate detail. Small paper figures walking along the path give it life, and a long board will happily fill a sideboard.
7. Quiet Nativity Diorama
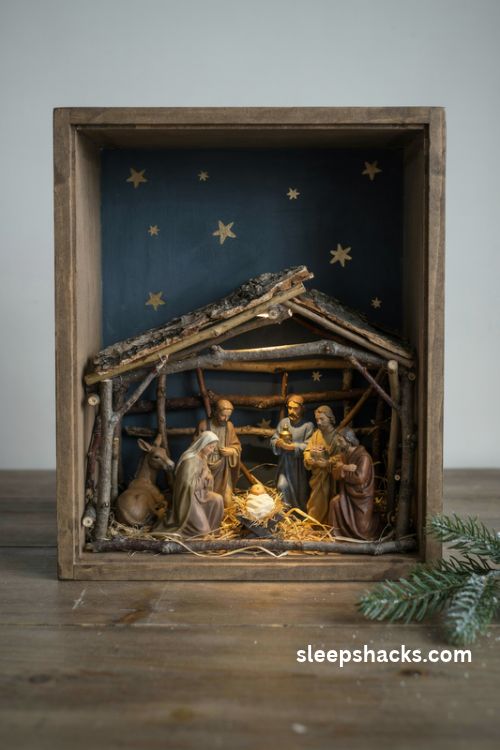
A nativity diorama works beautifully when you keep it simple. Build a small stable from craft sticks or bark, scatter hay, and place the figures so they gather around the manger. A deep box with a navy backdrop and a few gold paper stars gives the night sky a reverent, peaceful feel.
Some churches go enormous, with hundreds of figures and miniature lights, but a single shelf version carries just as much meaning. Add a warm, hidden light behind the stable so the manger glows. Families love building this one together as part of an Advent tradition, and the wise men can travel a little closer each week.
8. Tiny Diorama Ornaments
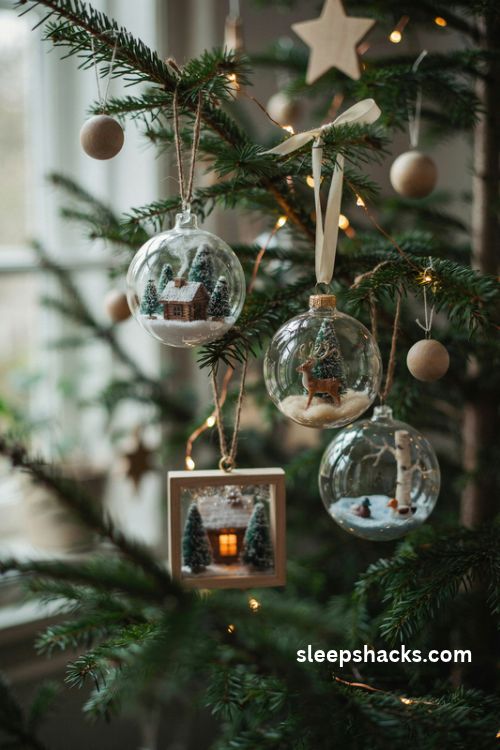
Shrink everything down and hang it on your tree. Clear fillable ornaments or small wooden frames hold a miniature scene: a snowy hill, a lone cabin, or a tiny reindeer under a pine. Use tweezers to place the pieces and a drop of craft glue to hold them steady.
Fill the bottom with fake snow or crushed glitter, and keep the background simple so the scene reads from a distance. Make a set of six in matching colors for a polished look, or let each one tell its own story. They also make thoughtful gifts when tucked into a small box with tissue paper, and a thin marker can label the back with the year.
9. Glass Cloche Winter Scene
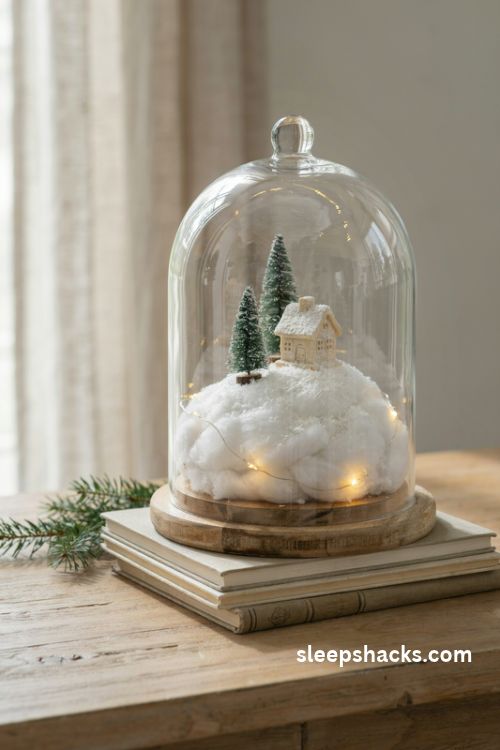
A glass dome instantly makes any scene feel precious. Set a little wooden base under it, build a hilltop of cotton and snow, and add a single cottage with a bottle brush tree or two. The dome protects the delicate pieces, so this one keeps its charm through years of storage.
Place it on a cake stand or a stack of old books to give it height on a table. A strand of micro lights curled around the base casts a soft shimmer through the glass. Keep the scene sparse, because a cloche looks best when it has room to breathe, and silver or champagne accents suit a more modern home.
10. Gingerbread Street in a Box
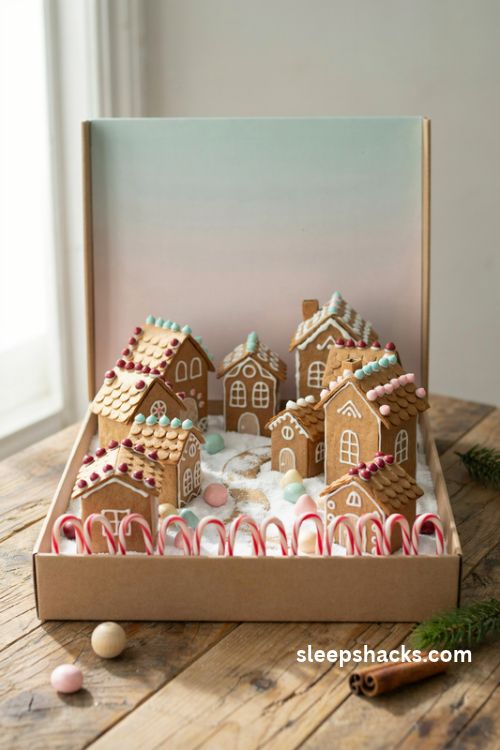
Build a candy-colored street inside a deep box. Make little gingerbread houses from brown cardboard or felt, trim them with white puffy paint icing, and top them with gumdrop-style beads. Pipe-cleaner candy canes along the front make the whole thing look sweet without being sticky, and a palette of three or four colors keeps it cohesive.
Because it’s all craft materials, nothing melts, spoils, or attracts ants, which is a relief for anyone who has watched real gingerbread crumble in December. Paint a pale pink or mint sky behind the houses for a playful twist. This one is a favorite for kids who want to see their own design come to life.
11. Santa’s Workshop Shadow Box
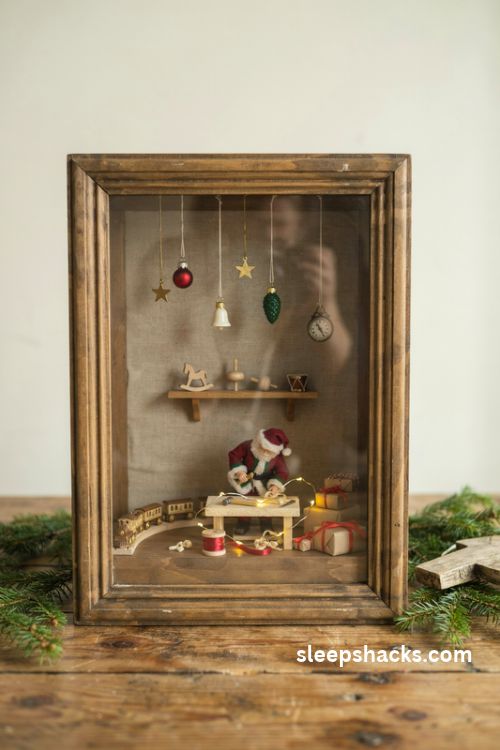
Turn a shadow box into a cozy workshop. Line the back with brown paper to resemble wooden walls, then add a tiny workbench made from a matchbox, a shelf of small toys, and Santa bent over a project. Little details like a spool of ribbon or a toy train sell the story.
Because a shadow box is deep, you can hang tiny items from the top with thread: stars, a clock, or a string of mini lights. Keep the figures small and the clutter purposeful. Position a battery light at the top so the whole workshop looks busy and warm, and peek at it from the front before gluing anything permanently.
12. Winter Cabin with Fairy Lights
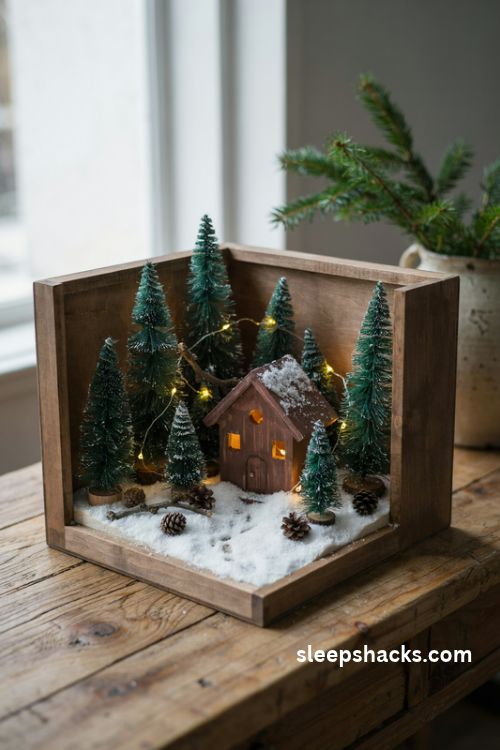
A lone cabin in the snow has a quiet, storybook mood. Use a small wooden birdhouse or a handmade box as the cabin, paint it deep brown, and add a snow-capped roof. Surround it with evergreens and a few pinecones so the cabin looks tucked into a forest.
The magic comes from the light. Thread a strand of warm white fairy lights through a hole in the back, letting a few bulbs peek out from the windows and the rest glow behind the trees. Turn off the room lamps in the evening and the little cabin will look like someone actually lives there. A trail of footprints pressed into the snow adds a final touch of story.
13. Who Ate Santa’s Cookies Mystery
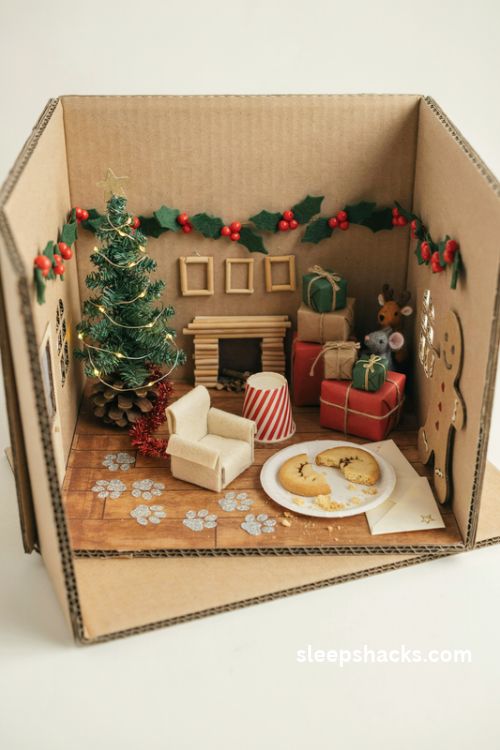
Here’s one that gets kids laughing. Sketch your layout on paper first so you know which props you need, then build a living room scene in a box with a tiny tree and a plate of crumbs. Add clues: paw prints in glitter, a toothpick tail poking from beneath the tree, and a note from Santa. Someone, clearly, ate the cookies.
Let friends or siblings study the scene and guess who the culprit was. Use upcycled bits like paper cups, coffee stirrers, and pipe cleaners to keep costs low. It’s a clever classroom or party activity, and it works well as a creative writing prompt afterward. Draw a few suspects on index cards for extra fun.
14. Layered Paper Cut Diorama
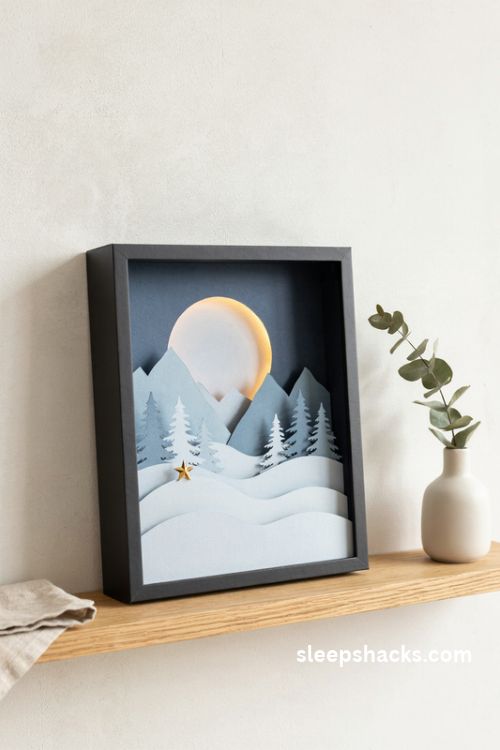
Stack several cutouts of snowy hills, trees, and a moon in a frame with small spacers between each layer. The shadows create a surprising sense of depth, much like the paper-cut light boxes you see in craft stores. Use cardstock in shades of one color, from pale to deep, for a calm gradient.
Cut the pieces with a craft knife or a cutting machine, then glue foam squares between layers. Slip a thin LED strip behind the back panel for a gentle glow. This style suits modern homes, because it’s tidy, flat, and works well on narrow shelves or a window sill. A tiny gold star on the topmost layer ties it together.
15. Frozen Pond Skating Scene
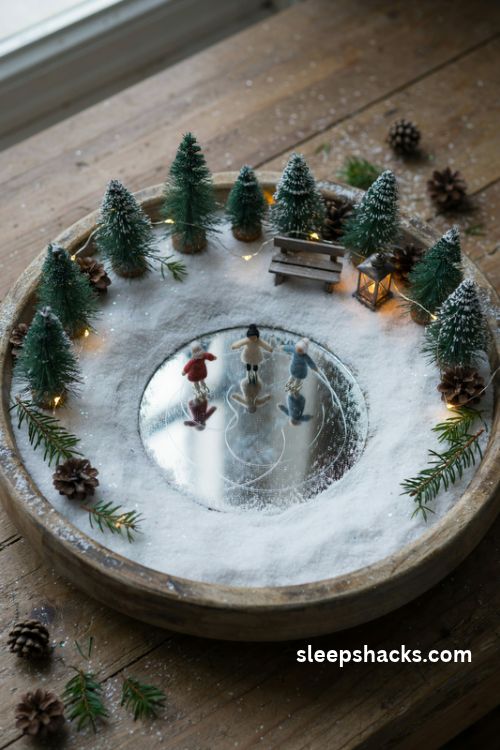
Cut a small oval of mirror or silver cardstock, set it into a snowy base, and you have a frozen pond. Add little skaters made from wire, felt, or tiny figurines, plus a ring of evergreens and a bench on one side. The shiny surface bounces light beautifully.
Draw faint skate trails with a fine white pen across the pond for movement. Place it on a tray with a few sprigs of pine around the edges to ground it in the room. This idea works especially well in a round container, such as a large bowl, which feels like a mini ice rink. Frosted glitter on the banks gives it a crisp, wintry shimmer.
16. Vintage Putz House Mantel Display
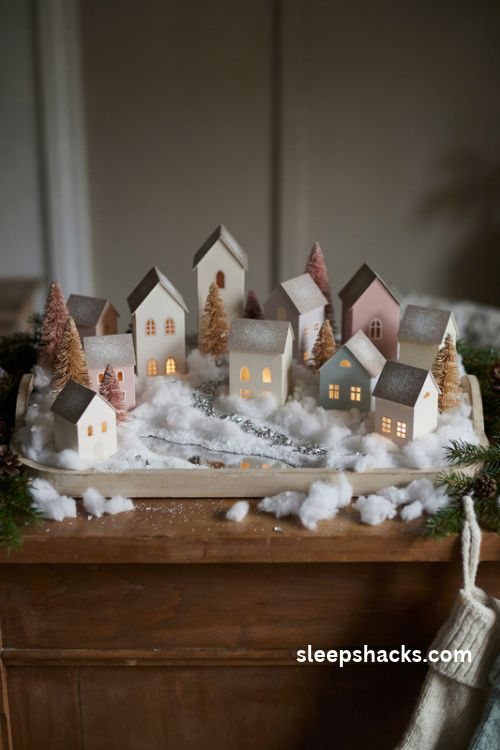
Old cardboard putz houses carry a nostalgic glow. Gather a handful on a long tray, set them on cotton batting snow, and add tiny feather trees in between. Mix sizes for an uneven skyline, and tuck one or two lit houses behind the others for depth. A limited palette of soft pastels and cream keeps it feeling cohesive.
If you don’t own vintage ones, many shops sell reproductions with a similar glittery finish. Line the tray with a bit of mirror for a frozen pond or a road of crushed mica. It looks right at home on a mantel beside stockings, and it only needs five minutes to rearrange each year. Handle the old ones gently, since the glue and glitter are fragile.
Final Thoughts
Pick one idea tonight and start with what’s already in your house. A shoebox, a few tea lights, and a handful of tiny trees are enough to build something that makes you smile every time you walk past it. Thrift shops, craft bins, and the back of the junk drawer hold more treasure than you’d think.
Don’t wait until you have the perfect supplies. Set the scene on the table, move the pieces around, and stop when it feels right. Tomorrow evening, turn off the big lights, switch on the little ones, and watch how a tiny world changes the mood of an entire room. Then make a second one, because honestly, they’re addictive.
Frequently Asked Questions
Q: What materials do I need to make a Christmas diorama?
A container such as a box, drawer, or tin, plus mini trees, figurines, faux snow, and a hot glue gun. Battery lights are optional but add a lovely glow.
Q: How can I make a Christmas diorama on a small budget?
Upcycle shoeboxes, cardboard, and old tins, then paint them white or deep blue. A few cheap bottle brush trees and craft-store snow finish the look.
Q: How long does it take to make a Christmas diorama?
Simple box scenes take about an hour, while villages and layered paper versions can fill a relaxed weekend.