

Picture the corner of your living room where the tree usually goes. Instead of pine needles, there’s a tidy pyramid of well-loved novels, their spines glowing under a string of warm lights.
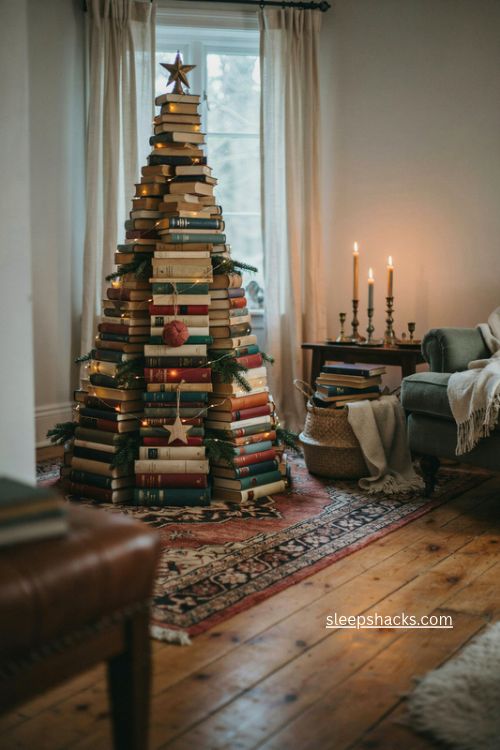
Guests lean in to read the titles. Someone pulls out a paperback they haven’t touched since college. That’s the quiet magic of a book Christmas tree. It costs next to nothing, it sheds nothing, and it puts your collection on display right when the whole family is home to notice it. Some versions take an hour of stacking, while others need just one paperback and a little patient folding. Here are 17 ways to build one, whatever your shelf space, budget, or patience level.
1. Classic Stacked Pyramid Tree
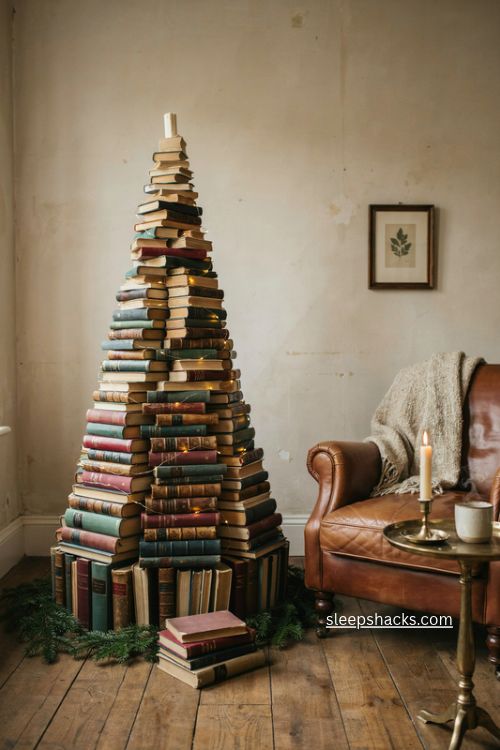
Start with the widest, heaviest books you own and lay them in a triangle on the floor. That base decides everything above it. One reader built a three-foot tree from roughly 100 books by first sorting them into piles of similar thickness, width, and height. Each layer should sit at the same level, so add a second thin book wherever a row looks lopsided. Shift the books slightly in and out as you go, so the edges look like layered branches instead of a flat wall. Keep choosing smaller books for each row, and finish with your tiniest pocket paperback on top. Sorting takes the longest, but it makes the stacking surprisingly fast.
2. Spine-Showcasing Pyramid Tree

Turn every spine outward and your tree becomes a bookshelf portrait. The cracked red spine of a classic sits beside a crisp white paperback, and suddenly the color mix looks planned. Titles facing out also give you something to chat about while you hang ornaments. Build it the same way as the stacked pyramid, with big books at the bottom and a gradual shrink upward, but pay attention to color as you place each layer. Alternate dark and light covers so no two similar shades touch. If a spine looks too plain, flip that book around and use the page edges instead. Thick hardcovers anchor the base nicely, and slim paperbacks do the delicate work near the top.
3. Sky-High Book Tower
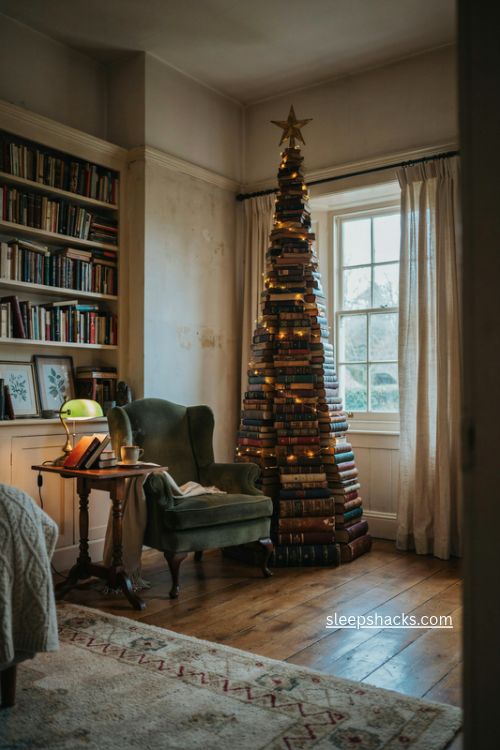
Height changes the whole mood of a room. Stack sturdy hardcovers in a narrowing column that climbs toward the ceiling, and you get a statement piece that doesn’t need a single branch. Sturdiness matters here, so pick the thickest, flattest books for the first few levels and test the wobble before adding more. Place the tower against a wall or in a corner for extra support. Top it with a gold star or a simple bow. Wrap a thin strand of battery-powered lights around it, spiraling upward, and the whole thing glows at night. Guests tend to stop and stare at this one, and a few usually wander off with a book to read by the fire.
4. Folded Paperback Tree

You can make a tree from a single paperback without spending a cent. Grab an old book with about 150 pages, glued at the spine, and pull off the cover. Take the first page, fold the top corner down to the spine, then fold again so the outer edge lines up with the spine. Turn the page over like you would in a book, and tuck the bottom edge up inside the folds. Repeat on every page. It gets fiddly toward the middle, so keep checking that each fold meets the spine. Once you find a rhythm, the whole tree takes under thirty minutes, and it stands up on its own.
5. Gold-Sprayed Folded Tree with a Star
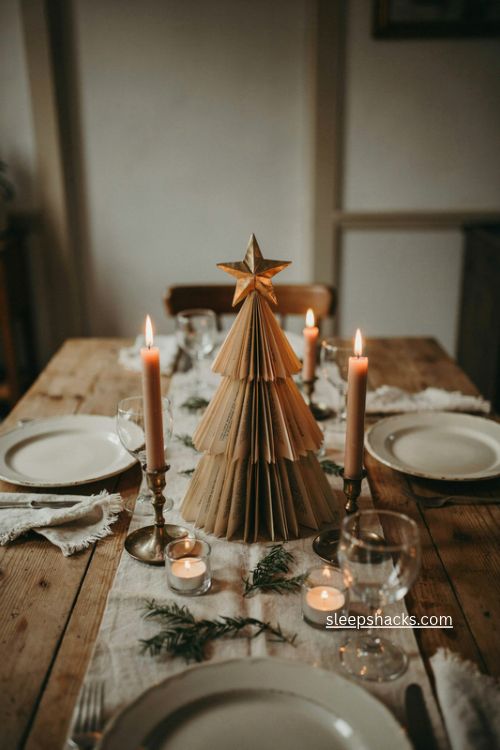
A plain folded book already looks sweet, but a coat of metallic spray paint makes it feel like a proper holiday piece. Lay the finished tree on newspaper outdoors and give it a light, even coat of gold. The printed words still show through, which is exactly the charm. Once it dries, add a star on top. You can fold a five-pointed origami star from one of the pages you removed at the start, spray it gold too, and glue it in place. Set the whole thing on the dinner table as a centerpiece, with a couple of tea lights nearby but safely away from the paper. It looks far more expensive than the effort behind it.
6. Flat Lay Floor Tree

Not every tree has to stand up. Set two brown books side by side on the floor or a tabletop for the trunk, then layer green books above them in a pyramid, with the widest row at the bottom and a single book at the tip. The whole thing takes about ten minutes, and it’s a great way to use up a pile that’s too wobbly to stack. Photograph it from directly above for the best angle. Tuck small pine sprigs, mini ornaments, or a few cranberries between the books for extra color. This one works beautifully on a bed, a rug, or a wide windowsill, and it comes apart in seconds when the season ends.
7. Diagonal Herringbone Tree

Pattern does most of the work in this one. Lay green books on their sides and angle them diagonally, alternating left and right in neat rows, until the whole arrangement forms a triangle with a herringbone texture. A coffee table, a hallway floor, or a bed makes a good stage. Use books of similar size so the rows stay crisp, and tuck a brown book at the bottom for the trunk. If your greens vary in shade, group the darker ones low and the lighter ones near the tip for a natural gradient. It’s a fresh take that feels modern rather than crafty, especially against a plain white duvet or dark wood table.
8. Bookshelf Tree
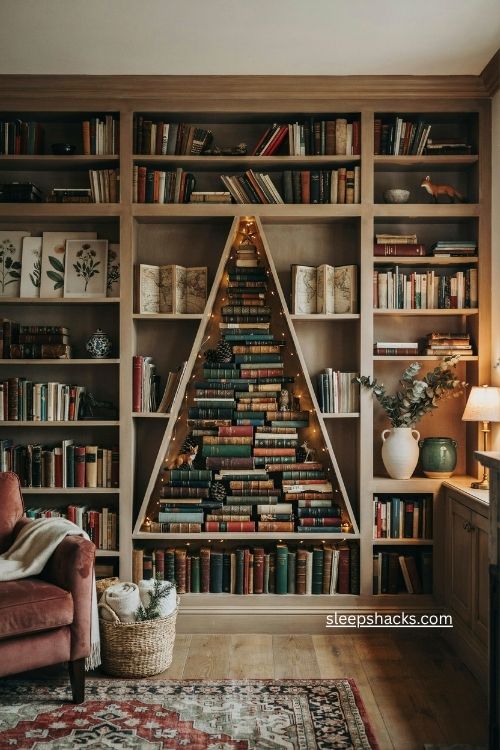
Your shelves are already the best stage you own. Arrange books into a stepped tree shape right inside one bay, with the widest stack at the bottom and each level shrinking as it rises. Fill the gaps on either side with small ornaments, a few pine cones, or figurines from a favorite series. Harry Potter characters look especially cute peeking out from the branches. Thread a string of twinkle lights along the shelf edges so the whole unit glows after dark. Because the books never leave their home, there’s no cleanup in January. You just slide them back. This works well for renters or anyone short on floor space who still wants a tree in the room.
9. Open Book Tree

Half-open books have a soft, fan-like shape that stacks into a pretty tree. Open each book to roughly the middle and set it face down so the pages fan outward, then pile them on top of each other, rotating each one slightly so the pages overlap like branches. Put thicker, bigger books on the bottom and smaller ones as you climb. A little ribbon bow or paper star finishes the top. Fully opened books create a lovely illusion of stories intertwining, with the page edges of one resting against the next. Add a bit of removable tape between layers if you worry about wobbling, and keep the whole thing out of reach of curious pets.
10. Rainbow Gradient Tree

Line your books up by color and you’ll have a rainbow before you’ve placed a single ornament. Start with black or deep navy at the bottom, then move through purple, blue, green, yellow, and orange, and finish with red at the tip. You’ll probably need to borrow a few books from friends to fill the gaps, which is half the fun. Stack with spines out so the colors read clearly from across the room. Because the covers do all the decorating, keep the extras minimal. A white string of lights and a simple gold star are plenty. Kids especially love this one, and it makes a lively backdrop for family photos.
11. Classic Red, White, and Green Tree
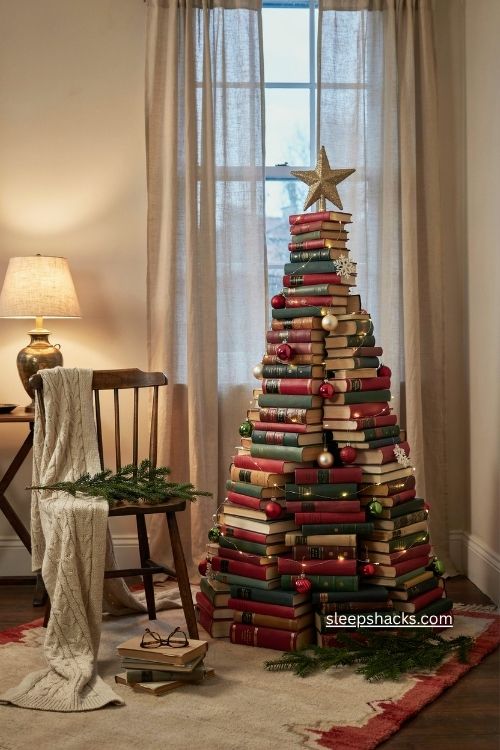
For the look of a traditional tree, stick to the old holiday palette. Gather books with red, white, and green covers and stack them in a pyramid, mixing the colors so no single shade dominates. Then dress it like you would a real tree, with paper snowflakes, tiny glass balls, warm white lights, and a glittery star on top. Cream-colored vintage paperbacks work wonderfully for the white. Matching your decorations to the books keeps everything cohesive. Seen from the doorway, it reads as a real tree, and only up close do people realize that every layer is a stack of novels. That little double take is the best part.
12. Lazy Green Stack Tree

Some days you just want a tree and zero effort. Grab your green books, stack them in a tall pile, wrap fairy lights around the middle, and set a star on top. That’s it. The stack doesn’t need to be a perfect pyramid, because the lights and the color do the convincing. Surround it with a few smaller piles of books tied with ribbon and you’ve got a tiny gift scene at the base. LED lights are the safer choice here, since paper and heat don’t mix, and a cool-running bulb takes most of the worry out of a book-based tree. Ten minutes and a cup of tea is about all it needs.
13. Torn-Page Wall Tree
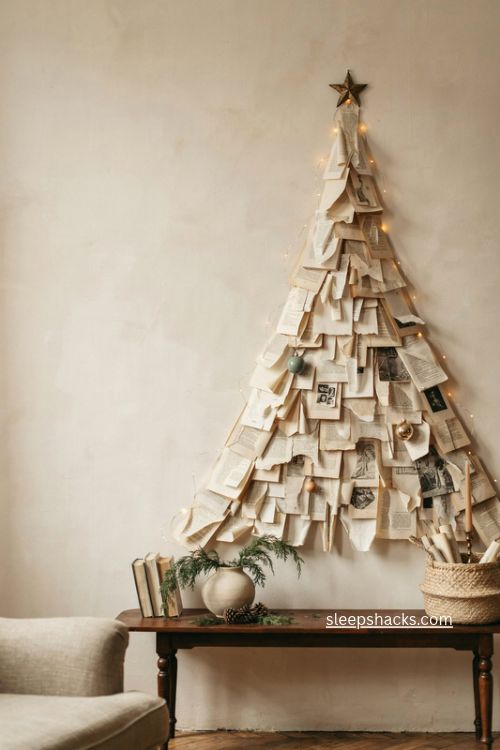
A forgotten book with a broken spine can become wall art. Tear out the pages, crumple or fold them loosely, and tape them to the wall in the shape of a triangle. Layer them densely at the bottom and thin them out toward the point. Some people go for a scattered, chaotic look, while others lay the pages in neat rows, and both versions look great. Use removable adhesive strips so you won’t damage your paint. Add a tiny string of lights across the top for a soft glow, and hang a few mini ornaments from pins. It’s a lovely choice for apartments or small rooms where there’s simply no floor left for a tree.
14. Paper Snowflake Tree
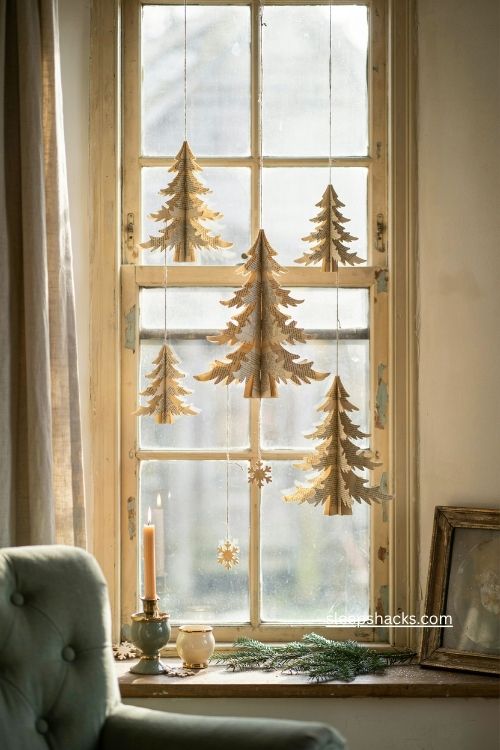
Remember cutting snowflakes out of paper at school? Bring that feeling back with a book page. Tear out several pages from an old book, fold them as you would for a snowflake, and cut a tree shape with little notches along the edges. Open it up and you get a delicate, lacy tree with the text still faintly visible. Make a handful in different sizes and string them across a window, or tape them to a mirror. A sharp pair of small scissors keeps the cuts tidy. Pages from older books yellow beautifully, giving you a warm vintage tone without any paint. Kids can help, and an afternoon is enough to fill a whole window.
15. Rolled-Page Needle Tree
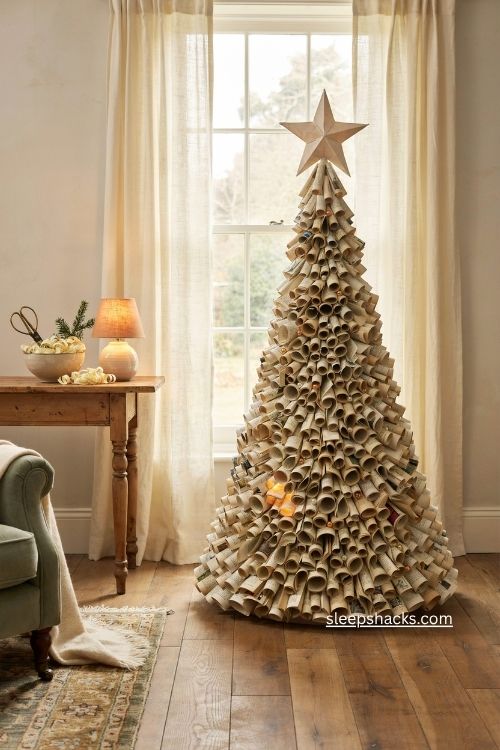
Spiral needles make this tree feel lush. Take pages from a book you’re happy to sacrifice and twist each one into a tight curl, then secure it with a dot of glue. Attach the curls row by row to a paper or foam cone, starting at the bottom and overlapping as you climb. The result looks like a full, textured evergreen made entirely of printed paper. Choose pages with plenty of text so the lettering adds depth. Tuck a few small beads between the curls for a bit of sparkle. It takes patience, so put on a podcast and make a big batch of curls in front of the TV first.
16. Pages-Out Paper Tree
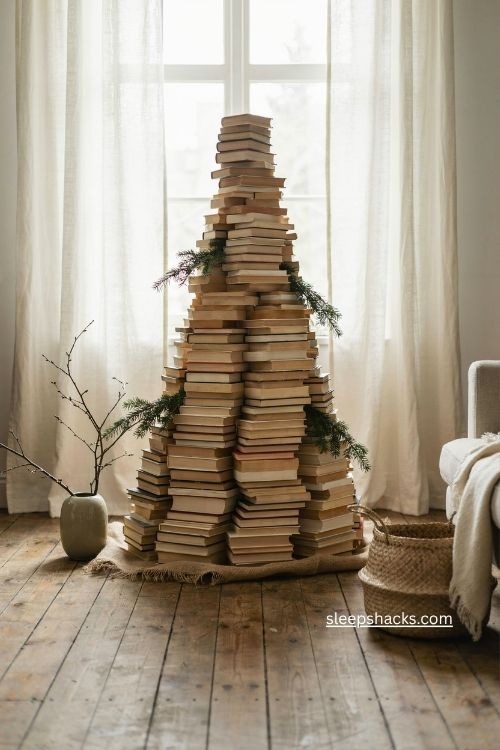
Turn the books around so only the pages show, and your tree takes on a soft, creamy quality. Stack them in a pyramid with the page edges facing outward, and the whole thing looks like carved paper. Because the ivory edges are so uniform, the tree feels calm and almost sculptural. It looks especially lovely next to a window with white curtains. Tuck a few sprigs of real greenery between the layers, or wrap a strip of burlap around the base for a rustic touch. This is a smart option when your covers are loud or mismatched and you want something quieter and more cohesive.
17. Themed Mini Tabletop Tree
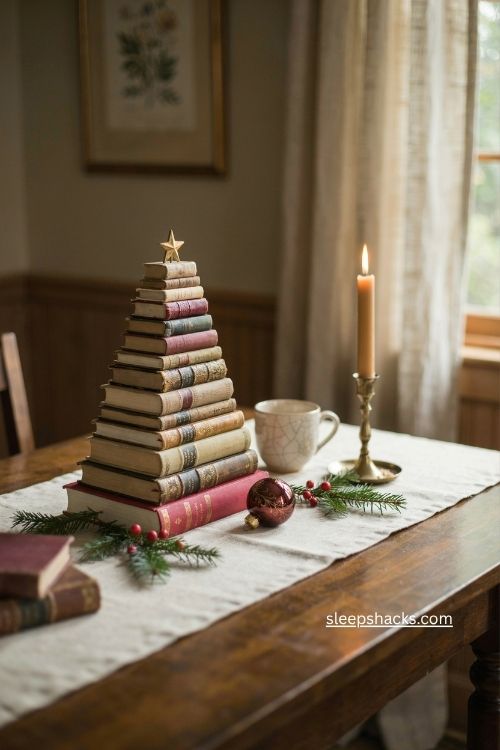
Smaller spaces deserve a book tree too. Pick a theme, say all your favorite sci-fi paperbacks or only young adult novels in shades of red, and build a tabletop version about a foot tall. A single color or genre makes it feel intentional, almost like a collection on display. Stack from the widest book at the bottom to the smallest on top, and perch a tiny star or pocket-sized ornament at the tip. Set it on a side table, a desk, or a mantel. Mini trees also make thoughtful gifts for fellow readers, and they store flat in a box until next year.
Final Thoughts
Pick one idea from this list and take ten minutes tonight to pull the books you’d use off your shelf. Don’t start building yet. Just lay them out by size or color and see which tree they suggest. Most people are surprised how quickly the shape appears. If you have one old paperback you’d happily fold, start there, since you could finish before your tea cools. Once your tree is up, snap a photo and save it to Pinterest so you have it ready for next year. And when you’re ready to refill those shelves, a trip to a used bookstore makes a perfect excuse for a December afternoon.
Frequently Asked Questions
Q: How many books do you need for a book Christmas tree?
A three-foot stacked tree takes about 100 books of mixed sizes, while a tabletop version needs only 20 or 30. A folded tree needs just one paperback of around 150 pages.
Q: Are book Christmas trees safe to decorate with lights?
Yes, as long as you use LED or cool-to-the-touch lights, since paper burns easily and regular bulbs can run warm. Never leave the lights on when no one is home.
Q: What is the easiest book Christmas tree to make?
The folded paperback tree is the easiest, since it needs one book and about 30 minutes. A lazy green stack with fairy lights is a close second.