

You’ve seen the gorgeous beaded ornaments in shop windows, then flipped over the tag and put them straight back. Handmade ones cost far less, but most tutorials look fiddly, with tiny beads, tricky wire, and steps that seem to need three hands.

The good news is that beaded Christmas decorations are among the easiest handmade projects you can do, and most can be finished while watching a movie. Below are 13 beaded Christmas decoration ideas for the tree, mantel, table, and gifts, from pipe cleaner candy canes to wooden bead garlands. Each one has a note on skill level, cost, or safety, so you can pick the project that fits your hands and your free evening.
1. Pipe Cleaner Beaded Candy Cane Ornaments

Thread red and white pony beads onto a white pipe cleaner in an alternating pattern, then bend the top into a hook, and you have a candy cane that looks like it came from a craft fair. Leave about half an inch bare at each end so you can fold the ends over and stop the beads from sliding off.
This is the easiest project here, and a good first one for kids with adult supervision. A pack of pony beads and pipe cleaners costs very little, and one ornament takes about five minutes. Tuck the sharp wire ends inside the last bead so they don’t scratch the tree or small fingers. Make a dozen for a whole tree.
2. Beaded Garland for the Christmas Tree

Strings of small glass or acrylic beads in red, green, and gold, draped in loose swags from branch to branch, shimmer beautifully in the lights. Alternate the bead sizes along each strand, with a few larger ones among many tiny ones, so the garland has rhythm and doesn’t look like a plain necklace.
Use strong beading cord or fishing line instead of thread, so the weight doesn’t snap it. Plan on one strand per swag and join the strands with a small knot and a dab of clear glue. This is cheap if you buy beads in bulk, though it takes a couple of hours. Tangles are the main risk, so keep each strand short.
3. Wooden Bead Garland with Jute Twine

Chunky natural wooden beads, some painted white or sage green, strung on thick jute twine with a knot between each one, make a rustic garland that hangs in thick, relaxed loops. Add a few red beads near the ends for a small pop of color.
Wooden beads cost little, and big ones thread quickly, so a long garland takes under an hour. Knot between beads so they stay spaced instead of bunching together. This suits farmhouse and Scandinavian trees, and it’s safe around kids and pets because the beads are large. Seal painted beads with clear spray and let them dry fully before stringing, so the paint doesn’t stick.
4. Felt Ornaments with Beaded Details

Cut two matching felt shapes, like a tree, a star, or a mitten, and stitch tiny seed beads along the edges and across the middle like sequins. Cream, red, and green felt each look different with bead accents, and a loop of ribbon at the top finishes the job.
Felt doesn’t fray, so cutting is forgiving, and stitching on beads takes only basic sewing skills. This suits beginners who want a handmade look with a little more detail. A small piece uses scraps, so the cost is tiny. Use a thin needle that fits through the bead holes, and knot the thread firmly. Keep seed beads away from small children, who could pick them off.
5. Beaded Snowflake Ornaments with Wire
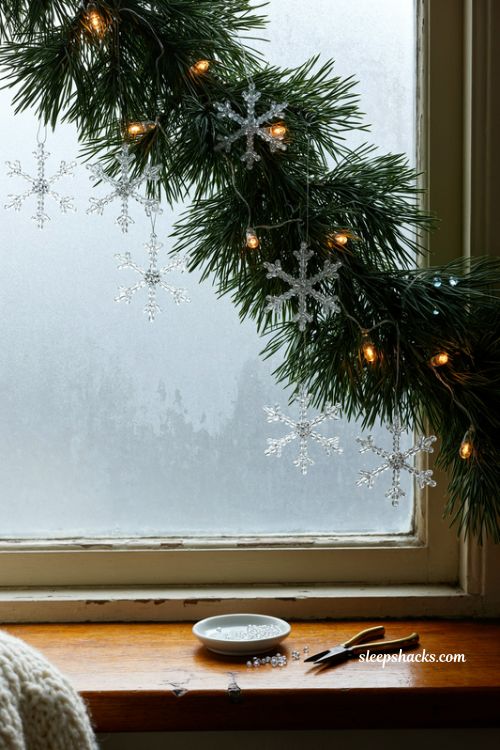
Thread clear and silver beads onto thin craft wire, then twist the strands into a six-armed snowflake with a small bead at each tip. The beads catch the light like frost on a window. A snowflake about three inches wide hangs well from a thin ribbon.
This is a little trickier than a candy cane because the wire needs careful twisting, so it suits intermediate crafters. Wire and beads for a handful of snowflakes cost only a few dollars. Use small pliers to close the ends neatly so nothing pokes out. Hang the finished snowflakes near a window or lights, where the sparkle shows up best.
6. Beaded Wreath Ornaments on Wire Circles

Thread green and red beads onto a circle of wire a few inches across, twist the ends together, and add a tiny ribbon bow. The result is a miniature wreath that looks just like a full-size one. Mixing two or three shades of green gives it depth.
These take about ten minutes each, and they’re a great way to use up leftover beads. They suit anyone who likes a classic Christmas look. Because the beads are strung tightly, the wreath holds its shape well. Tie a loop of thread around the wire at the back instead of through the beads so it hangs straight. They also work nicely as gift toppers.
7. Beaded Christmas Tree Ornaments

Shape thin wire into a small triangle and thread green beads back and forth to fill it, adding a gold bead on top as a star and a brown bead at the bottom as a trunk. The finished tree sits flat and hangs neatly from a loop.
This takes patience, since each row has to be threaded and wrapped, but it’s a satisfying project for one evening. It suits crafters who are comfortable with wire. Cost stays low because you only need a few beads of each color. Keep the rows snug by pulling the wire taut. Seed beads in sizes 6 or 8 are easier to thread than the very tiny ones.
8. Beaded Pin Ball Ornaments

Push a pearl-headed pin through a bead, then into a foam ball, repeating until the surface is covered in tight rows of sparkling color. Add sequins between the beads for extra shine. The finished ball looks like an expensive vintage ornament.
This takes a lot of pins and time, often a couple of hours per ball, so make one or two as feature pieces instead of a dozen. The cost is moderate because you need lots of pins. Wear a thimble to protect your fingers, and keep pins well away from children. This suits patient crafters who love a luxurious, detailed look.
9. Beaded Star Tree Topper
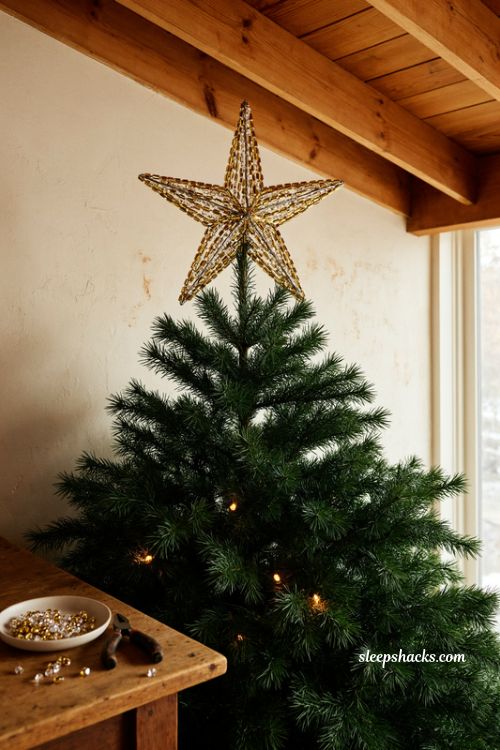
Bend sturdy wire into a five-point star, then thread gold and clear beads along each side so it glows. Add a small wire loop at the bottom to slide over the tree tip. The beads catch the lights from below, so the whole star sparkles.
Use thicker wire for a topper so it holds its shape, and keep it lightweight so it doesn’t tip the tree. It’s an intermediate project that takes about an hour. A handmade topper costs a fraction of a store-bought one. Bend the wire into its final shape first and check that it sits straight before threading all the beads.
10. Beaded Napkin Rings for the Christmas Table
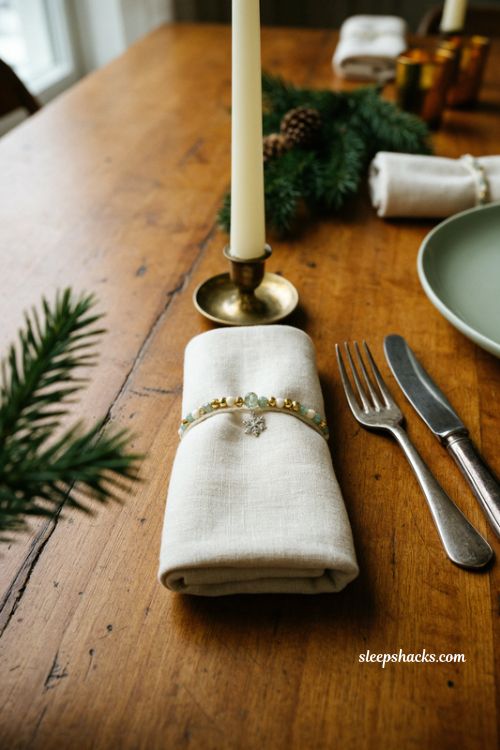
Thread beads onto a loop of stretch cord, mixing cream, gold, and pale green, and slip it around a rolled napkin so it looks like a tiny bracelet. Add a small charm, like a star or snowflake, to make each ring unique.
Stretch cord makes these easy, since there’s no clasp to attach. Six to eight rings take an evening and cost less than most store-bought sets. Tie a surgeon’s knot and add a dab of glue so it doesn’t slip. They suit dinner parties and make lovely gifts. Choose slightly larger beads so the ring slides over thick fabric napkins easily.
11. Beaded Angel Ornaments

A large round bead for the head, a pearl bead for the body, and fan-shaped wings made of small clear beads on wire form a delicate little angel. Add a gold wire halo above the head for the finishing touch.
These need small pliers and a steady hand, so they suit crafters with some wire experience. The materials are cheap, but the work is detailed, about thirty minutes each. Make a few as gifts, since they look special and fit inside a card envelope. Attach a short ribbon loop to the back of the head so the angel hangs upright.
12. Beaded Icicle Ornaments

String a long row of clear and pale blue beads on wire, with the largest at the top tapering to a tiny bead at the tip, and you’ve got a sparkling icicle. Hang several at different lengths from the branches or along the edge of a mantel.
Icicles are easy to repeat, so they’re a good project to do in a batch. Glass beads cost more than acrylic, though they look better in the light. Add a drop of clear glue to the last bead so it doesn’t slide off. These suit white, silver, and blue trees, and they look best near the lights.
13. Beaded Gift Toppers and Tag Charms
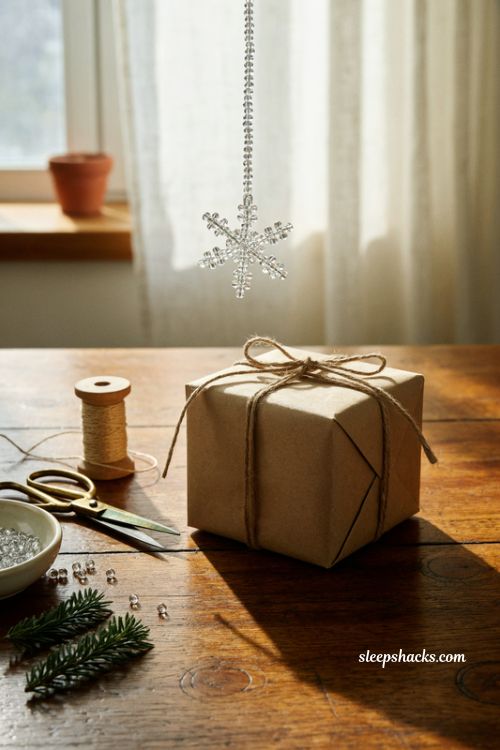
A tiny bead snowflake, a berry cluster, or a small beaded star tied to the ribbon of a gift turns a plain package into something special. Use jute or satin ribbon as the base and let the beads dangle slightly so they move.
Toppers add extra value because the recipient can hang them on the tree afterwards. They cost very little and take just minutes each. This suits anyone who wraps lots of gifts and wants a matching look. Keep the beads small and securely knotted, and skip them on gifts for young children, since loose beads are a choking hazard.
Final Thoughts
There’s something nice about a decoration you made with your own hands. The beads might not be perfectly even, and one wire star might lean a little, but those small imperfections are exactly what make it feel like yours.
So put on a movie, pour something warm, and start with the easiest project that caught your eye. Whatever you make will hang on the tree for years and probably pick up a story along the way. Someday you’ll point at that slightly crooked candy cane and smile, and that’s the real decoration.
Frequently Asked Questions
Q: What beads work best for beaded Christmas decorations?
Pony beads are easiest for kids, glass and acrylic beads sparkle on the tree, and wooden beads suit rustic garlands. Choose bead holes that fit your cord or wire.
Q: What should I use to string beads for ornaments?
Use pipe cleaners or craft wire for shaped ornaments, and beading cord or fishing line for garlands. Stretch cord works well for napkin rings and bracelets.
Q: Are beaded Christmas decorations safe around kids and pets?
Large wooden beads are the safest choice. Skip tiny beads and sharp wire ends near young children and pets, since they can be a choking or scratching risk.