

The best nursery classrooms are rarely the ones with the most stuff on the walls. In fact, a room packed with posters and cartoon characters can leave little ones overwhelmed and distracted before the morning snack even arrives. What young children respond to is calm color, clear spaces, and things they can reach and touch. That’s good news if your budget is small, because thoughtful decoration is mostly about choices, not spending. Whether you’re a teacher setting up a new room or a parent running a small playgroup at home, these 16 ideas will help you build a space that feels cheerful, safe, and ready for curious little hands.
1. Rainbow Welcome Wall at the Entrance
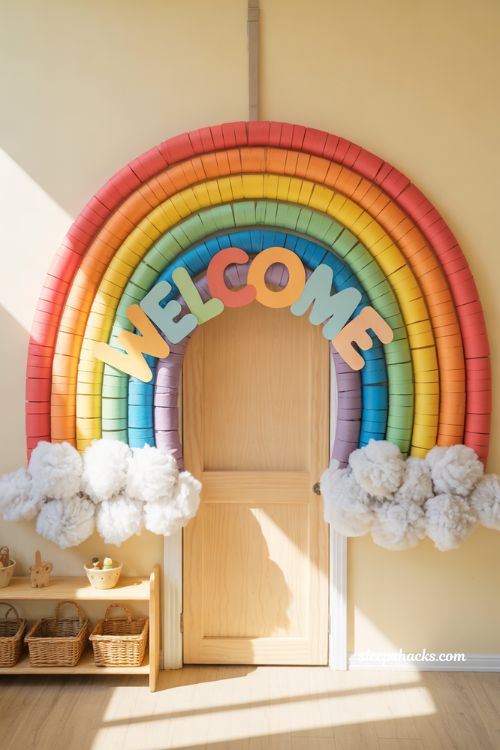
The doorway is the first thing children see each morning, so make it a happy one. Cut arches from construction paper in red, orange, yellow, green, and blue, and layer them into a big rainbow right beside the door. Add a cloud of cotton wool at each end and a bright “Welcome” in large rounded letters. Keep the display low enough that children can point and wave at it. If you laminate the paper pieces, they’ll last the whole year and wipe clean after sticky fingers. Little ones tend to walk in smiling when there’s something colorful waiting for them.
2. A Calm and Cheerful Color Palette
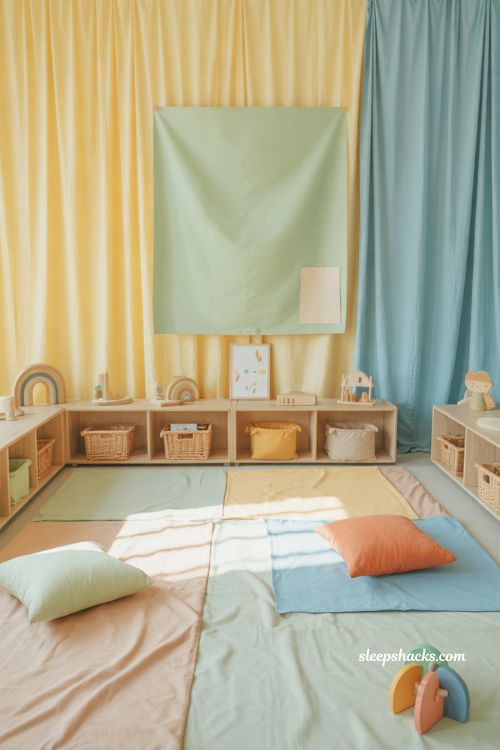
Too many loud colors can make a room feel chaotic, so choose a base of soft shades like pale yellow, sky blue, and mint green. Then let brighter accents show up in toys, cushions, and artwork. Painted walls aren’t always possible, so use fabric panels or large sheets of colored paper to refresh the space instead. Repeating two or three main colors across the room creates a sense of order that children subconsciously find comforting. Avoid placing very dark shades near naptime areas, since they can feel heavy. A balanced palette gives the room a friendly mood without shouting for attention.
3. Paper Cloud Ceiling Display
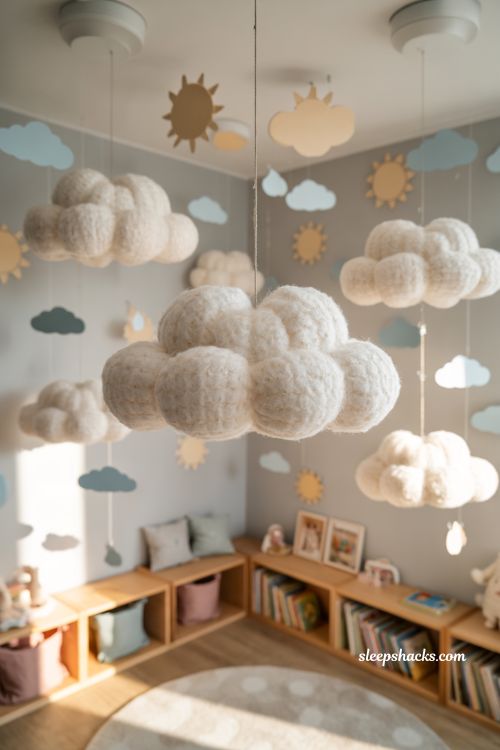
Look up, because the ceiling is often the most forgotten part of a nursery room. Cut fluffy cloud shapes from white card stock, stuff a few with polyester filling so they puff out, and hang them at different heights using fishing line. Space them about a foot apart so they sway gently without tangling. Add a few paper raindrops or suns for variety. Keep everything well out of reach and away from heaters or lights. Children love lying on the floor looking up, and a sky made of clouds turns story time into something dreamy and gentle.
4. Cozy Reading Corner with Cushions
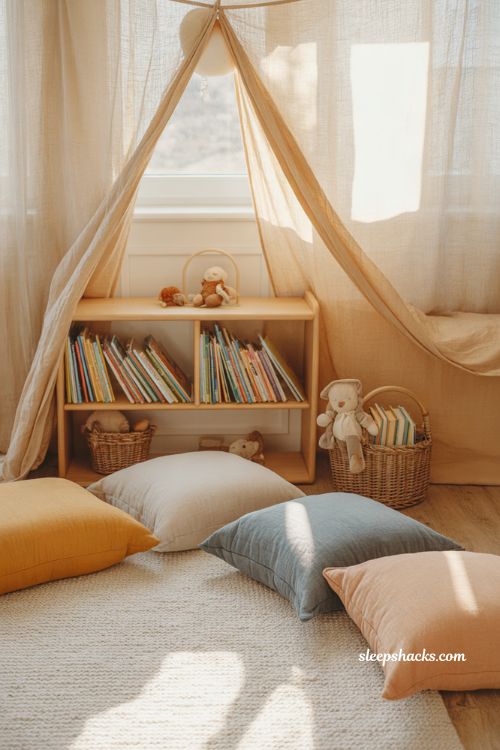
A small book nook gives busy children a place to slow down. Lay down a soft rug, add three or four floor cushions in different shapes, and set a low bookshelf with covers facing out so kids can spot their favorite stories easily. A canopy of sheer fabric draped from the ceiling creates a tent-like feeling. Rotate the books every two weeks to keep interest fresh. Add a small basket of stuffed animals so children can share a story with a friend. The corner works best tucked away from loud play areas, near a window if possible.
5. Child-Height Name Tags and Photo Board
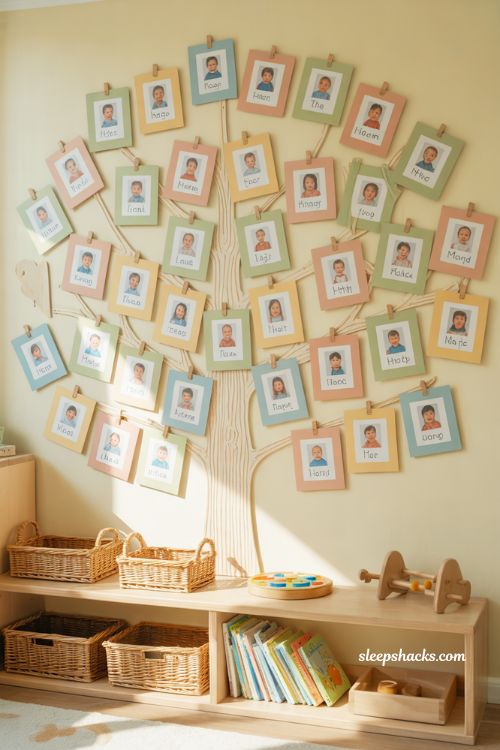
Children feel proud when they see their own name and face in the room. Make a board at eye level, around two feet from the floor, with each child’s photo, name, and a little picture they chose themselves. Cover each tag with clear contact paper to protect it from curious fingers. Arrange them in a cheerful shape, like a tree with names as leaves or a train with a car for each child. Using the same font size and color helps beginners recognize letters. This little display builds belonging, and it doubles as a gentle first lesson in reading names.
6. Alphabet Animal Border
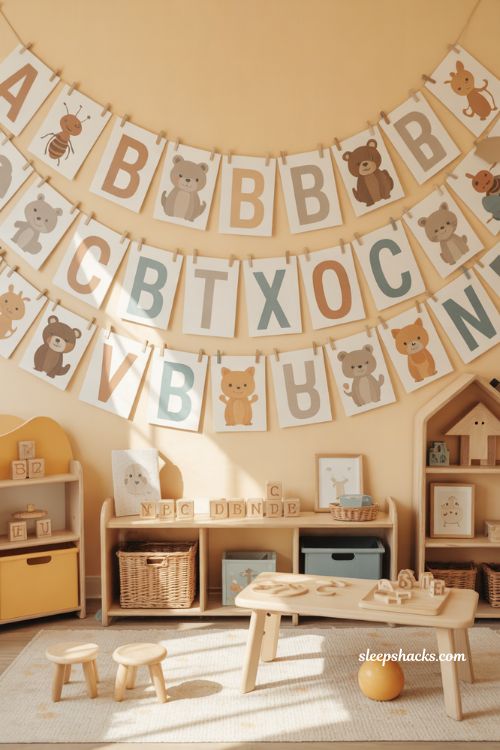
An alphabet border running along the top of the wall teaches letters all day long without any effort. Pair each letter with a friendly animal, like a smiling ant for A, a bear for B, and a cat for C. Print them on sturdy card stock in large, clear letters, about eight inches tall, and use simple, rounded animal illustrations. Mount the border just above the children’s eye level so the whole row is visible from across the room. Stick to one illustration style, since mixing cartoon, realistic, and abstract images can confuse young learners. Point to a different letter during circle time and make it a game.
7. A Number Tree with Felt Leaves
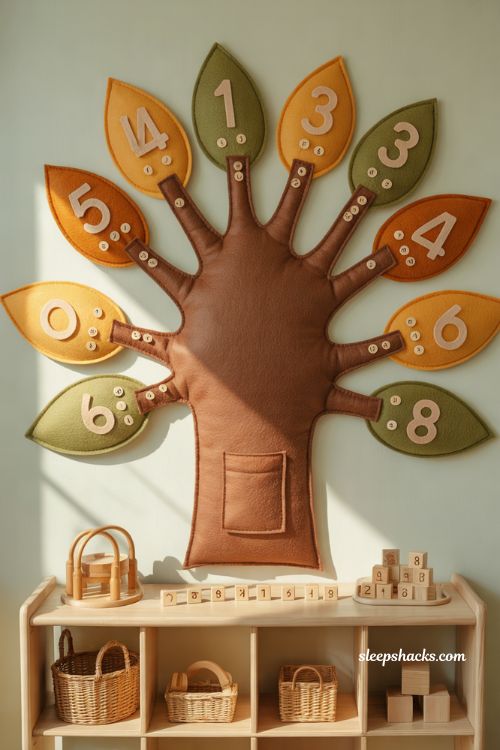
Counting becomes tactile with a big felt tree on the wall. Cut a brown trunk and branches from felt and attach it with sticky tape or velcro. Then make leaves in green, yellow, and orange, each one marked with a number from one to ten. Children can stick the leaves on and off, matching them to numbered dots on the branches. Store the extras in a small pocket sewn to the bottom of the trunk. It’s a quiet, hands-on activity that keeps little fingers busy, and it looks lovely too, especially when the leaf colors change with the seasons.
8. Hanging Paper Garlands and Streamers
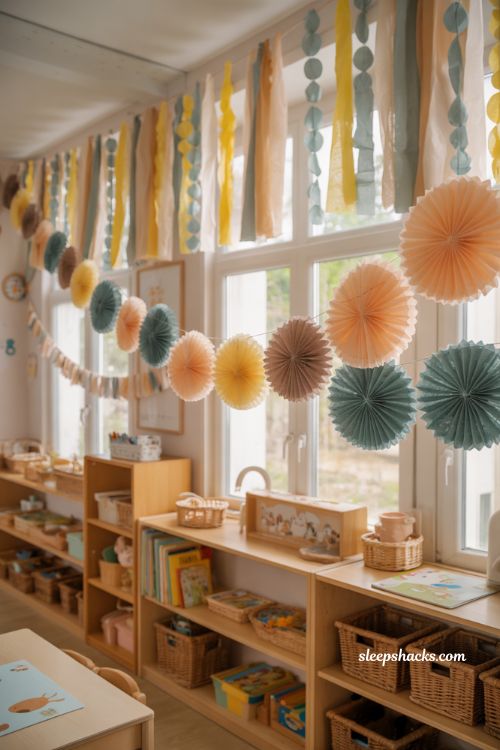
Garlands add motion and color for almost no money. Fold strips of tissue paper into fans, or cut colorful circles and string them together with a needle and thread. Drape them across windows, between shelves, or along the top of the board. Choose three or four colors from your palette to keep things coordinated. Paper garlands are lightweight, so a bit of low-tack tape is enough to hold them. Swap them out each month, or let the children help make new ones as part of a craft session. The room feels freshly decorated without any heavy lifting.
9. Sensory Wall Panels
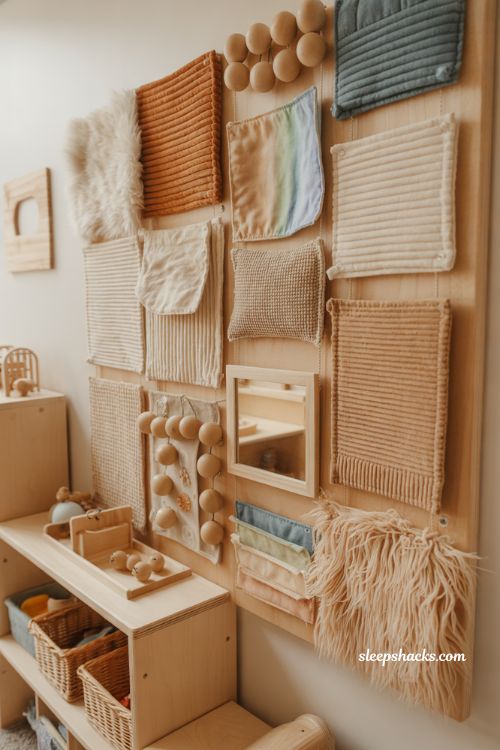
Little ones learn through touch, so a sensory wall gives them something fun to explore. Attach textured fabrics like corduroy, faux fur, satin, and burlap to a sturdy board, then add safe extras like large wooden beads on string, a soft mirror, and Velcro strips. Mount it low and make sure every piece is firmly secured with nothing small enough to swallow. A few jingle bells sewn inside fabric pouches add gentle sound. Children will run their hands across each patch and describe how it feels, which builds vocabulary naturally. It also makes a calm spot for restless afternoons.
10. Seasonal Window Art
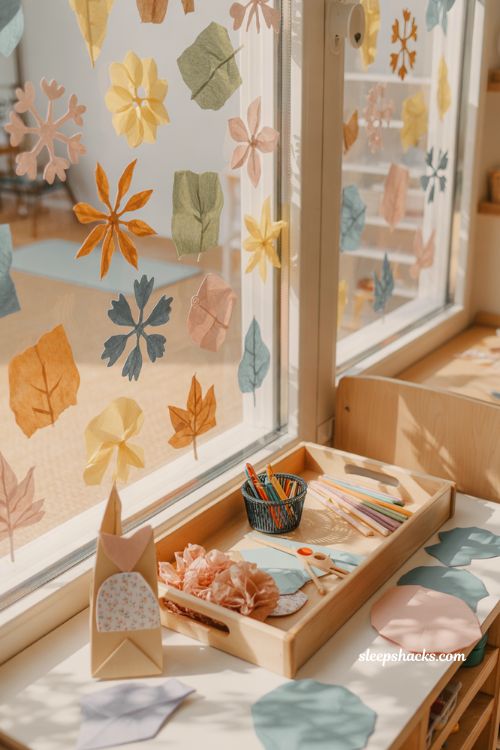
Windows are a free canvas, and they change the mood of the whole room. Cut shapes from colored cellophane or tissue paper, like snowflakes in winter, flowers in spring, or leaves in autumn, and stick them directly onto the glass. When sunlight shines through, the colors splash across the floor like stained glass. Let children help by tearing the paper and pressing it on with a thin layer of glue and water. Take everything down at the end of the season and store the shapes in an envelope for next year. It’s an easy way to mark the passing months and keep things fresh.
11. Weather and Calendar Corner

A simple routine area helps children understand time. Hang a large wall calendar with removable day cards, plus a weather chart showing sunny, rainy, cloudy, and windy pictures. Each morning, invite one child to move the arrow or stick the card in place. Keep everything at their eye level, and use big, bold pictures instead of tiny text. Add a little felt sun and cloud that can be moved around. This area quietly teaches days of the week, weather words, and patterns, and it gives each child a moment of responsibility that makes the day feel special.
12. Artwork Clothesline Gallery
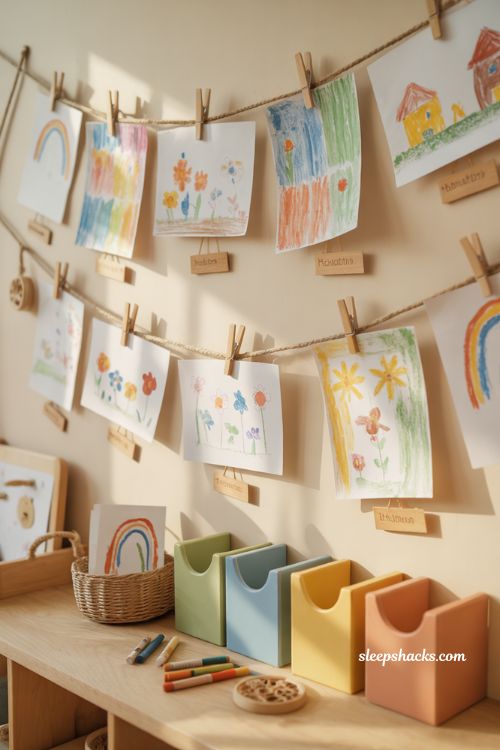
Children light up when they see their creations on display. String a length of twine or thin rope across a wall or between two shelves, about three and a half feet from the floor, and clip each drawing up with wooden clothespins. Swap the artwork every week so everyone gets a turn at the front. Add a small label with the child’s name and a short note, like “Ava painted a blue dragon.” The clothesline looks charming and keeps the walls neat, because pieces can be changed in seconds. Parents love stopping to admire the gallery at pickup time.
13. A Nature Discovery Table
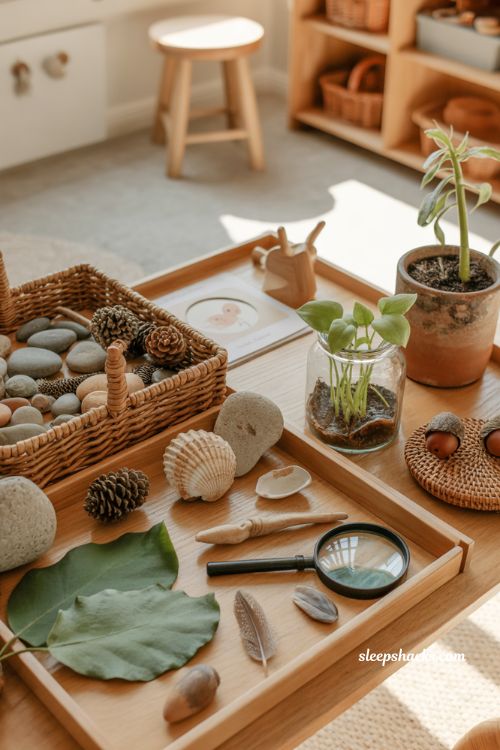
Bring a bit of the outdoors inside with a low table filled with natural treasures. Fill shallow baskets with smooth stones, pinecones, large leaves, shells, and feathers, then add a magnifying glass and a few picture cards for matching. Place a small plant, like a spider plant or a bean in a clear cup, so children can watch it grow. Update the table with the seasons, adding acorns in fall and flower petals in spring. It encourages curiosity and calm observation, and it costs next to nothing since most items can be gathered on a quick walk around the yard.
14. Colorful Floor Mats and Play Zones
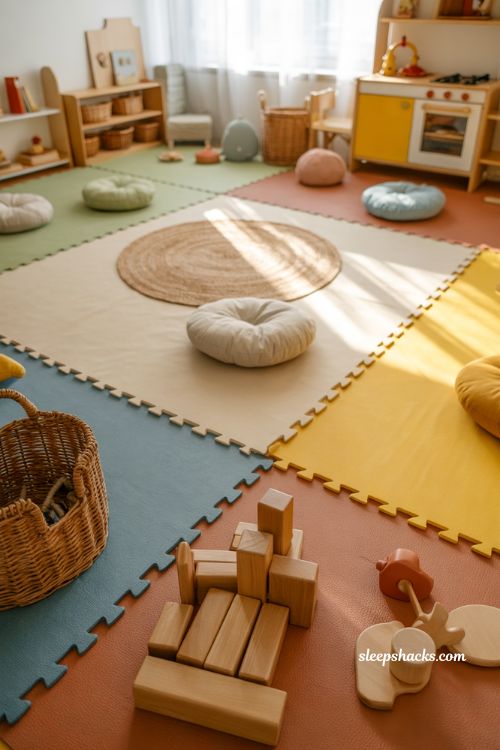
Floors do a lot of the decorating in a nursery room. Interlocking foam mats in bright colors divide the space into zones, like a blue area for block building, a green one for reading, and a red one for dramatic play. The colors help children understand where to go and what to do. Choose mats with rounded edges and non-slip surfaces for safety. Add a round rug for circle time, where everyone can sit in a comfortable shape. Clearly marked zones also make tidy up time easier, since each toy has an obvious home to return to.
15. Picture-Labeled Storage Baskets
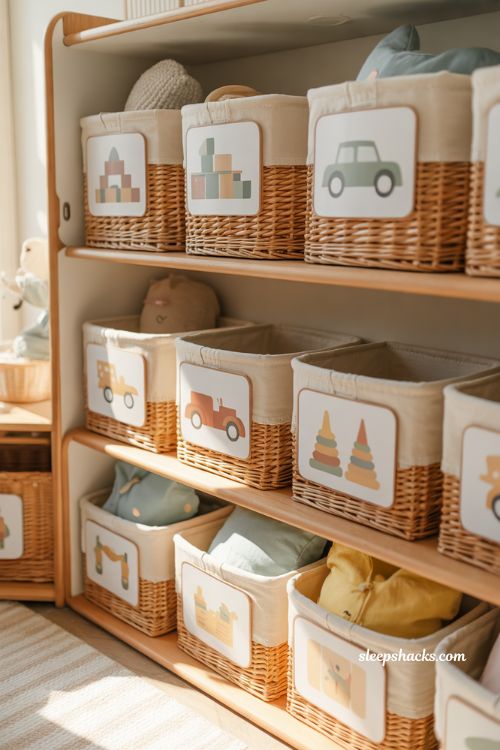
Good storage is decoration in disguise. Use matching baskets or bins in soft colors, and tape a photo or drawing of the contents onto the front, like a picture of building blocks, toy cars, or crayons. Children who can’t read yet can match the picture and put things away on their own. Keep the shelves low and open so everything is easy to reach. Matching containers make the room feel tidy even when it’s busy. Rotate toys every few weeks to keep playtime exciting, and tuck away anything that isn’t needed so the shelves never look crowded.
16. A Birthday Tree on the Wall
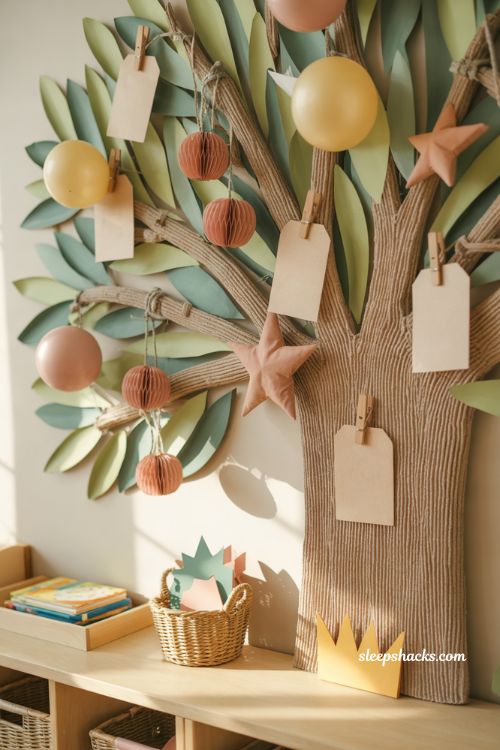
Make every child feel celebrated with a birthday display that stays up all year. Cut a big tree from brown and green paper, and add a paper apple, balloon, or star for each child with their name and birthday written on it. Place it near the entrance or beside the calendar corner. On the day itself, put a small crown or sticker beside their name and sing together. The display gives parents a sweet reminder to join in and helps children learn months and dates. It’s simple, personal, and one of the easiest ways to build a loving classroom spirit.
Final Thoughts
Think back to the classroom you remember most from your own childhood. Was it the posters that stayed with you, or the corner where you felt safe, the table where you made something with your hands, or the teacher who smiled when you walked in? Decoration is only a small part of what makes a room feel like home, but it can set the tone for everything else. What would your little learners say they love most about the space you’ve made for them?
Frequently Asked Questions
Q: What are the best colors for a nursery class?
Soft pastels like pale yellow, light blue, and mint green keep the room calm, while small bursts of brighter colors add energy. Stick to a few main shades so the space doesn’t feel overwhelming.
Q: How can I decorate a nursery class on a small budget?
Use construction paper, recycled boxes, fabric scraps, and natural items like leaves and pinecones to make your own displays. Letting the children help create the decorations saves money and makes them proud of the room.
Q: How high should nursery class decorations be hung?
Learning displays should sit at the children’s eye level, usually between two and three feet from the floor. Anything hanging from the ceiling or above their reach should be lightweight, secure, and away from heat sources.