

Let’s be honest: the same green tree in the same corner every year can start to feel a little predictable. You love it, but you also know exactly where every ornament will go before you open the box.

And if your space is small, or your budget is tight, or your kids keep knocking the tree over, the traditional version can feel like more stress than joy. The good news is that a Christmas tree is really just a shape that says “holiday” at a glance. Books, ladders, wood scraps, and even old magazines can all pull it off. Here are 15 playful ideas that bring back the fun.
1. Folded Magazine Tree
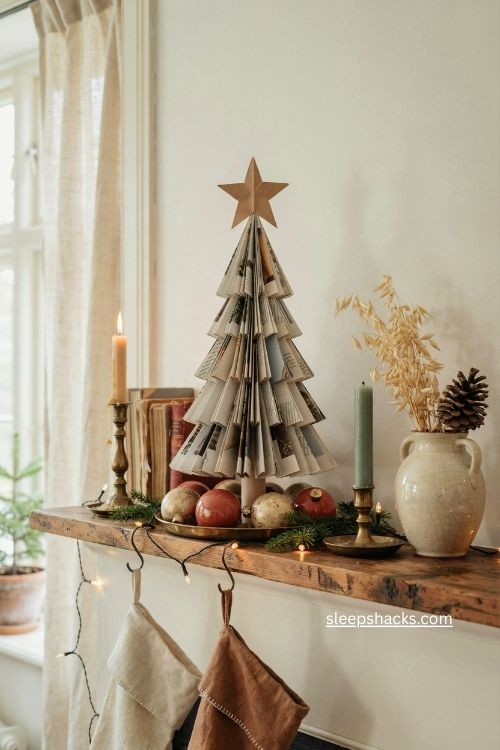
Old magazines are secretly one of the best tree materials around. Fold the top corner of each page in toward the spine, then fold that flap in again to make a narrow triangle. Repeat on every page, tuck the bottom point inside for a flat base, and tape or staple the covers together so it fans into a cone. Thicker magazines give you a fuller tree. A coat of gold or green spray paint hides the printing completely, so no one will guess where it came from. Stand it on a mantel or a bookshelf and add a paper star on top.
2. Stacked Book Tree

Piles of books are already sitting around your house, so why not turn them into a tree? Stack them from largest to smallest, rotating each one slightly so the corners stick out like branches. Pick books with colorful or matching spines for the best effect, such as old hardcovers in red, green, and cream. Finish with a small star or a tiny ornament on top, then weave a thin string of lights between the layers. It’s a lovely fit for bookworms, and it takes about ten minutes. When the holidays are over, you simply put the books back on the shelf.
3. Leaning Ladder Tree

A wooden stepladder makes a charming tree, especially in a room with limited floor space. Lean it against a wall, then wrap garland along the rungs so each step looks like a layer of branches. Hang small ornaments from the sides and set a few little gifts or candles on the steps. The triangular shape of the ladder does most of the work for you. If you don’t own an old wooden ladder, a thrift store or a neighbor’s garage is a good place to look. Because it folds flat, you can pack it away easily after the season ends.
4. Pallet Wood Tree

Rustic fans will love this one, and it’s easier than it looks. Cut scrap pallet boards into different lengths, then arrange them in a triangle on the wall or fasten them to a center post, shortest at the top and longest at the bottom. A bit of white wash or green paint gives the boards a farmhouse feel. Hang ornaments from small nails or hooks so the tree stays flat and tidy. Always sand the rough edges before you start, especially if kids will be nearby. It’s a sturdy tree that you can reuse for many Christmases without any fuss.
5. Upside-Down Hanging Tree

Flipping the tree over sounds silly until you see how much floor space it frees up. Attach a hook to the ceiling, then hang a lightweight artificial tree with the tip pointing down and the wide base near the ceiling. Add unbreakable ornaments, since gravity changes how they dangle. The effect is dramatic, almost like a chandelier, and it keeps curious pets and toddlers far away from the branches. Make sure your ceiling hook is secure and rated for the weight. A tree like this makes the whole room feel playful the moment someone walks in.
6. String Light Wall Tree
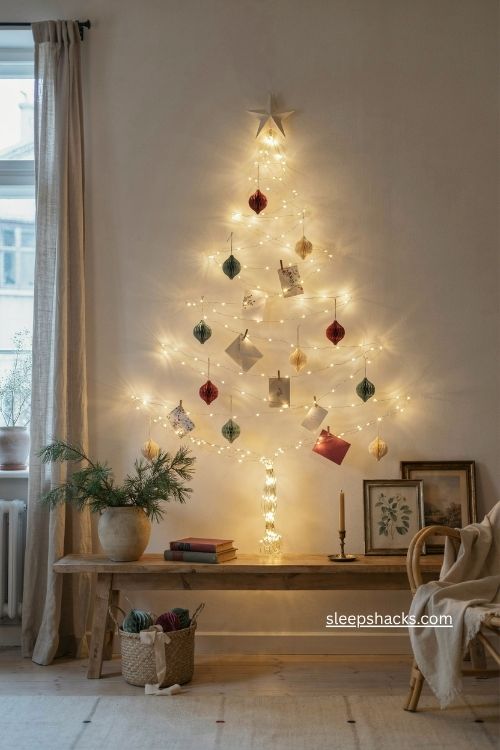
When you have no space at all, a tree made of light can live right on your wall. Tape or tack a string of lights into a big triangle, adding a short trunk at the bottom, and tuck in a simple star at the point. Warm white bulbs feel cozy, while multicolor lights bring back childhood memories. Use removable hooks so you won’t leave marks on the paint. You can hang a few paper ornaments from the lines, or tuck in photos and cards as the season goes on. It’s a clever way to show off your cards, too.
7. Tomato Cage Tree
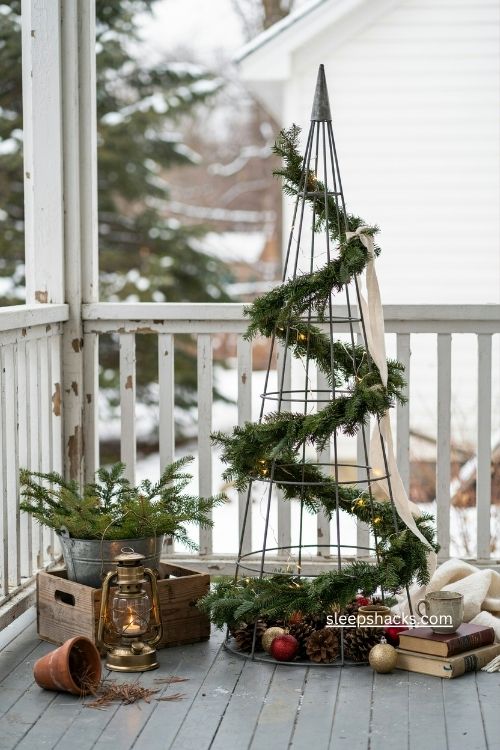
Garden shops carry a surprisingly good tree frame in the form of a metal tomato cage. Turn it upside down so the narrow end points up, then wind garland, ribbon, or fabric strips around the rings. The cone shape is already built in, and the open design makes it easy to tuck in lights from the inside. Spray the cage white for a snowy look, or leave it plain for an industrial style. Place it on a porch with a few pinecones around the base for a festive welcome. It’s light, cheap, and nearly impossible to tip over.
8. Wine Bottle Tree
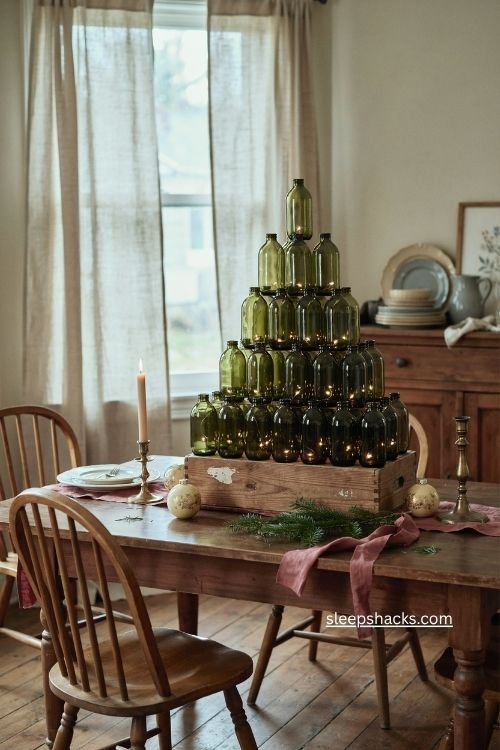
Empty wine bottles in different shades of green make a glowing, glassy tree when stacked in a pyramid on a table. Start with a wide base row and build upward, with a single bottle on top. Tuck a string of small battery lights inside each bottle so the whole thing shines from within. Clean the labels off first for a smoother look, or leave them if you like the cozy bistro vibe. A wooden crate underneath keeps the stack steady. It’s a great party piece, and your guests will probably ask where you bought it.
9. Driftwood and Branch Tree
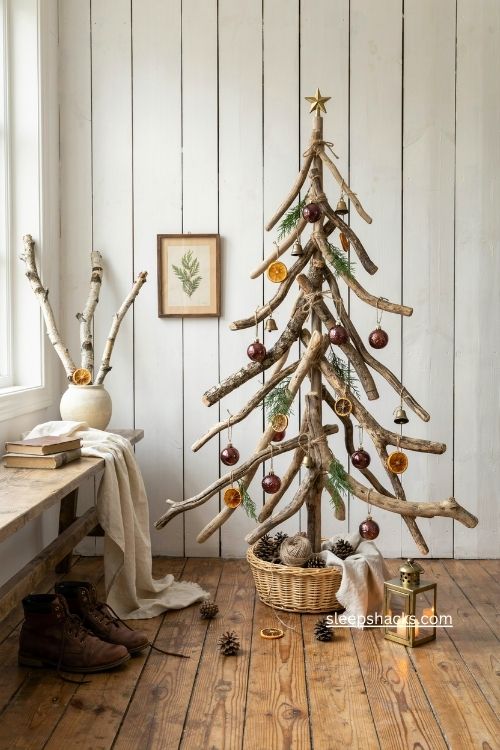
Collect branches from a walk in the park, then lay them out in a triangle shape and bind them with twine. You can also lash several sticks onto a vertical trunk, shorter branches at the top and longer ones at the bottom. White paint or a bit of snow spray adds a wintery touch. Hang lightweight ornaments, little bells, or dried orange slices from the branches. The natural, uneven edges are the charm here, so don’t try to make everything perfect. Place it by the front door, where its earthy look can greet everyone who comes in.
10. Paper Plate Tree

Paper plates are a lifesaver for a quick kid-friendly craft. Cut each plate in half, then roll and tape it into a cone or fan shape. Layer the cones from bottom to top, shrinking the size as you go. Paint them green and let the little ones decorate with stickers, glitter, or bits of tissue paper. The layered edges look like real branches, and the whole thing is light enough to hang on the wall. It’s also one of the cheapest ideas on this list, so you can make a whole classroom of trees without stress.
11. Layered Cardboard Tree
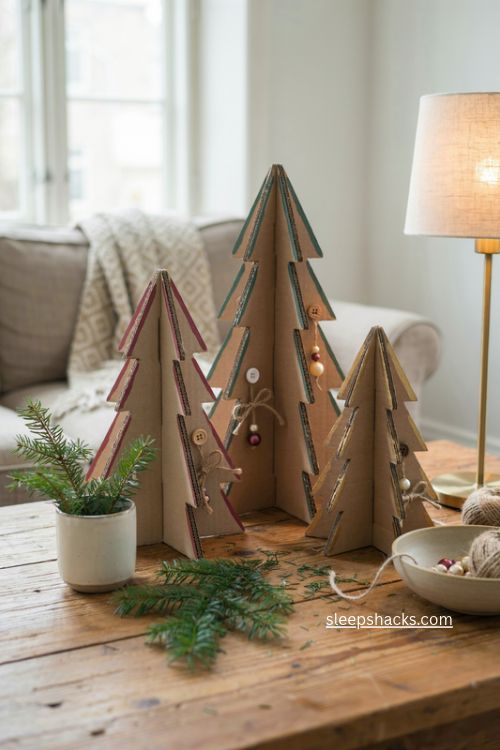
Don’t toss those shipping boxes just yet. Cut cardboard into triangles of different sizes, then stack and slot them together so they stand upright like a flat-pack forest. Paint them in bold colors or leave the natural brown for a modern, minimalist look. You can add stripes with a marker, or glue on buttons and beads as tiny ornaments. A small set of three trees in different sizes looks wonderful on a coffee table. Since cardboard is so lightweight, these also make great gifts for friends, wrapped up with a bit of twine and a handwritten tag.
12. Yarn-Wrapped Cone Tree

A foam cone from a craft store becomes a soft, cozy tree with a little yarn. Start at the base with a dab of glue and wind the yarn upward in tight rows, adding a fresh color whenever you like. Red, white, and green stripes feel traditional, while pastel shades feel playful and modern. Finish with a pom-pom on top, and tuck a few pins with beads into the side for sparkle. These little trees look great lined up along a windowsill, where the light can show off all the colors. Wrap a small one as a handmade gift.
13. Gift Box Stack Tree

You’ll be wrapping presents anyway, so build the tree out of them. Stack empty boxes from biggest to smallest, wrap each one in coordinating paper, and tie them with ribbon. Add a bow or a star at the top, and your tree is done. Use a mix of patterns, such as plaid, kraft paper, and solid red, to keep things lively. Because the boxes are empty, the whole stack is light and easy to move. It makes a gorgeous display near the real presents, and it keeps the base of the room looking tidy and organized.
14. Candy Cane and Lollipop Tree
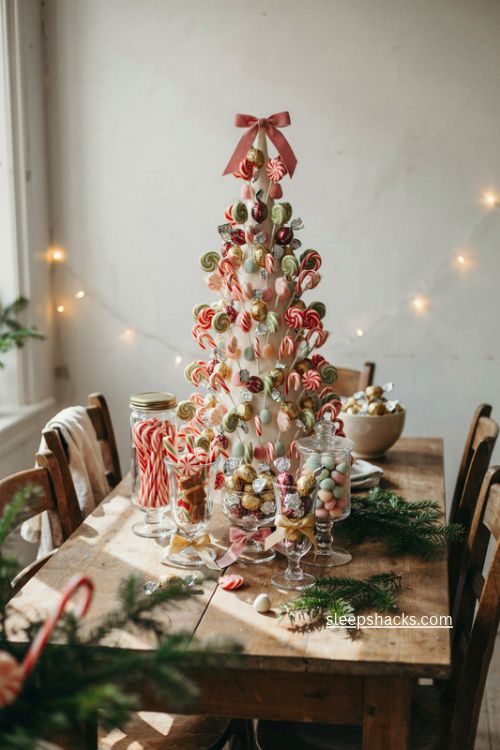
Sweet-toothed kids will go wild for this one. Cover a foam cone with a layer of lollipops, pushing the sticks right into the foam so the colorful tops fan out like branches. Mix in candy canes, wrapped chocolates, or gumdrops, and finish with a ribbon bow at the top. Keep it out of direct sunlight so nothing melts. You can pull off one candy at a time as a holiday treat, which turns the tree into a countdown. It works especially well as a table centerpiece at a family party or a classroom celebration.
15. Hula Hoop Hanging Tree

Here’s a showstopper that uses almost no floor space. Hang several hula hoops from the ceiling in a tower, with the biggest at the bottom and the smallest at the top. Drape garland or strings of lights between the hoops so each ring looks like a layer of branches. Tie on ribbons, ornaments, or paper snowflakes with fishing line. The effect is airy and modern, and it looks especially pretty in a room with high ceilings. If you want an extra festive touch, wrap each hoop in a different color of ribbon before you hang it.
Final Thoughts
You know that feeling when everyone in the house suddenly gathers around something you made together? That’s what a crazy Christmas tree gives you. It doesn’t need to be perfect, and it certainly doesn’t need to match anyone else’s. Maybe it’s a little crooked, or the glitter has found its way into every corner of the room. That’s just part of the story you’ll tell next year. So choose the idea that made you smile first, gather your supplies, and let the kids have a say. Your home will feel more like you, and that’s the best decoration of all.
Frequently Asked Questions
Q: What can I use instead of a traditional Christmas tree?
Ladders, stacked books, pallet wood, tomato cages, and folded magazines all make great alternatives. Pick something you already have so the project stays cheap and easy.
Q: How do I make a Christmas tree for a small space?
Go vertical or go flat, with a wall tree made from string lights or a slim ladder tree. Both take up almost no floor space.
Q: Are DIY Christmas trees safe around kids and pets?
They can be, as long as you use unbreakable ornaments, secure the base, and sand any rough edges. Hanging or wall-mounted trees keep things out of reach.