

Here’s something worth knowing before December gets busy: some of the prettiest ornaments hanging on Pinterest trees started as nothing more than a scrap of cardstock and a bit of glue.

Paper is genuinely one of the most forgiving materials for holiday crafting, since a small mistake usually just means starting over with another sheet rather than wasting anything expensive. Whether you’ve got a stack of old holiday cards, a roll of scrapbook paper, or just a few sheets of plain cardstock lying around, there’s a project on this list that fits your skill level and your budget. Here are 15 DIY paper ornaments for Christmas that come together with basic supplies and a little patience.
1. Folded Paper Stars

Folded paper stars, made by weaving together several folded strips or cones, create a symmetrical, radiating shape that looks far more complicated than it actually is. Deep red or gold cardstock gives the finished star a rich, formal look that suits a more traditional tree. The construction takes a little trial and error the first time through, but repeat stars come together much faster once you understand the folds. A cluster of these hung together makes a striking display on just a few branches.
2. Origami Paper Cranes
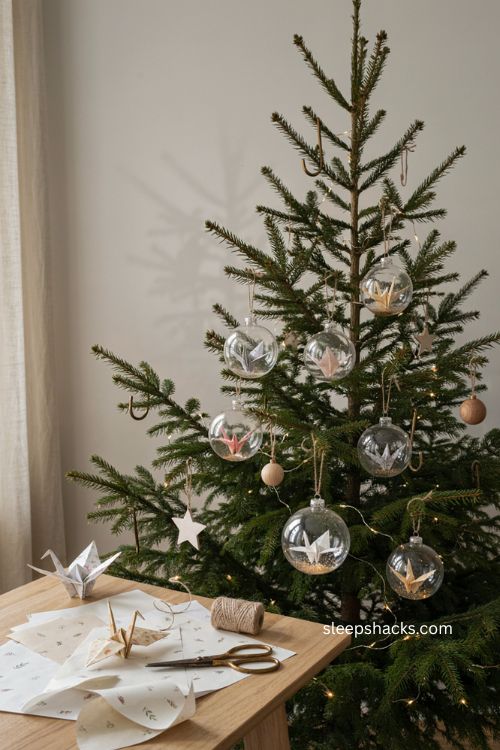
A small folded crane brings an elegant, minimalist touch to a tree, especially when tucked inside a clear glass ornament ball for extra dimension. Lightweight, patterned paper folds more easily than heavier cardstock, so it’s worth choosing something thin for this project. Adding a bit of glitter around the crane inside the glass ball catches the light nicely once it’s hung. This is a lovely option if you want ornaments with a bit of quiet movement rather than bold color.
3. Paper Snowflakes
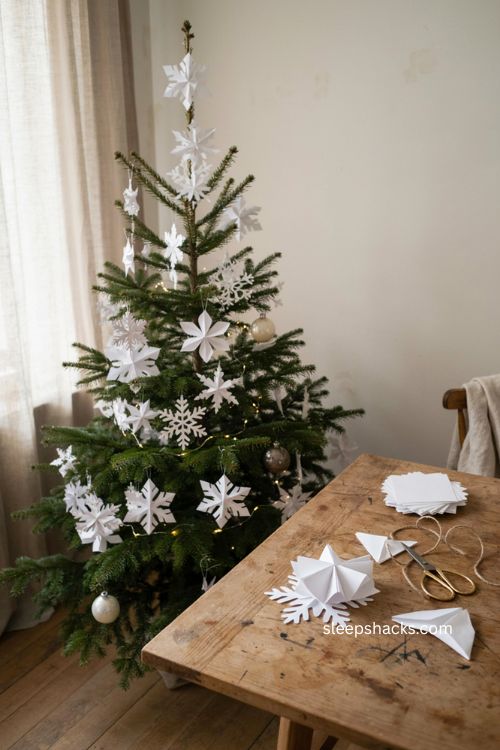
Paper snowflakes are one of the most classic DIY Christmas projects, and there’s a reason they’ve stuck around for generations — they’re genuinely easy and always look good. Fold a square of paper into a small triangle, cut slits along one side, then unfold to reveal the pattern. Layering a few snowflakes of different sizes together creates a fuller, more dimensional ornament than a single flat cutout. This is also one of the best projects to make with kids, since even a simple, imperfect snowflake still looks charming.
4. Honeycomb Paper Ornaments

Honeycomb ornaments have a nostalgic, almost vintage charm that comes from a surprisingly simple folding and gluing technique. Layer several identical cutouts, glue them together at alternating points, then open the stack into a full three-dimensional shape once dry. Double-sided scrapbook paper works best here, since the folds reveal both sides as the ornament opens. A painted gold edge along the rim adds a polished finishing touch.
5. Quilled Paper Snowflakes
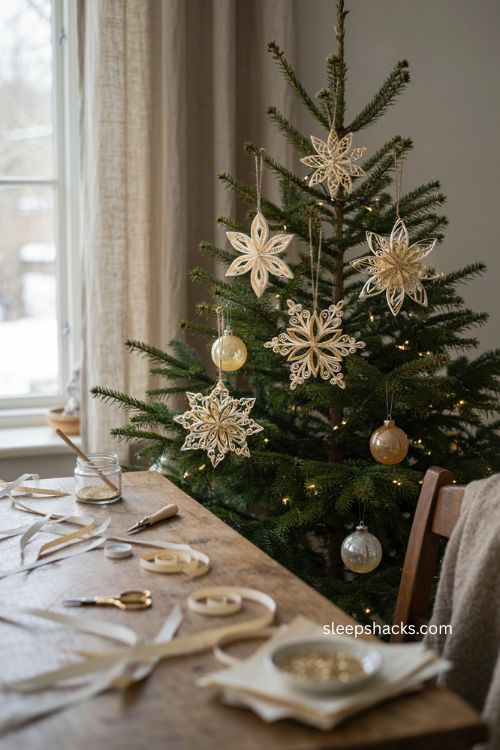
Quilling turns thin strips of paper into tightly coiled shapes that snap together into intricate, lace-like patterns. A snowflake is one of the most natural designs to try this technique on, since its symmetry makes the repeating pattern easier to follow. A light dusting of glitter along the edges adds sparkle once the ornament catches any light. This is a slower project, so it’s a nice one to work on over a few quiet evenings rather than rushing through in one sitting.
6. Gingerbread Paper Ornaments

A gingerbread-shaped ornament brings cozy, cookie-jar charm without any actual baking required. Cut two matching shapes from brown kraft paper, glue around the edges leaving a small gap, then stuff with cotton balls before sealing for a slightly puffed look. Button eyes, a stitched-on smile, and simple seam details finish the design nicely. This is an especially fun project for kids, since the decorating step doesn’t require much precision.
7. Sheet Music Pinecones
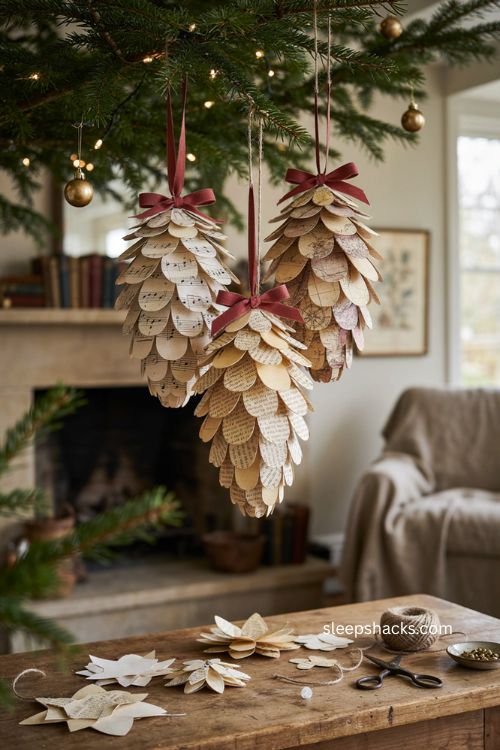
Old sheet music, book pages, or maps make a surprisingly beautiful pinecone-shaped ornament once layered correctly. Cut small strips or petal shapes, then glue them in overlapping rows around a cone-shaped base, working from the bottom up like real pinecone scales. The printed text adds visual texture without needing any paint or extra embellishment. A red ribbon hanger finishes the look with a rustic, slightly literary feel.
8. Woven Paper Pinwheels

A pinwheel ornament made from two-sided scrapbook paper adds movement and color while staying simple to construct. Cut a square, make diagonal slits from each corner toward the center, then fold every other point inward and secure with a brad or dab of glue. Because both sides of the paper show, the pinwheel reads as two-toned even from a single sheet. A cluster of these in coordinating colors adds a playful, retro feel to your tree.
9. Rosette Paper Ornaments
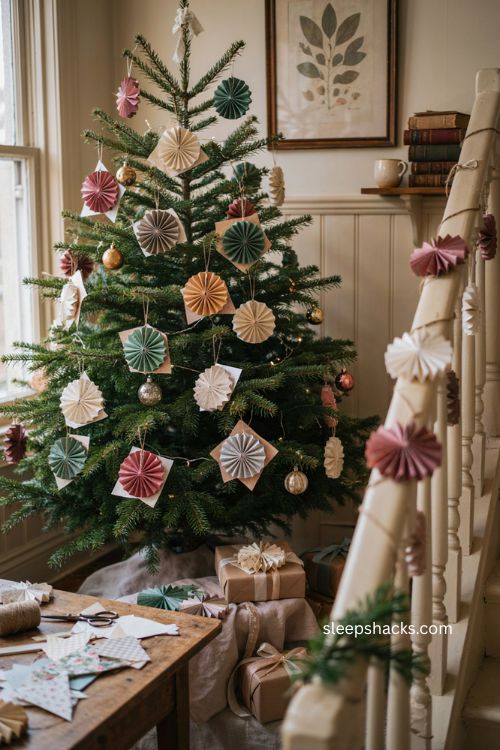
Rosette ornaments have a fuller, more textured look thanks to accordion-folded paper rectangles bent into a circular shape and sandwiched between two cardstock backings. Heavier scrapbook paper holds its shape better than something thin or flimsy. Adding a small adhesive letter or initial to the front turns a simple rosette into a personalized keepsake or gift topper. These work equally well on the tree, tied onto a wrapped gift, or strung along a banister.
10. Vintage Postcard Ornaments

A vintage-style postcard makes one of the easiest ornaments on this list, requiring little more than a hole punch and a length of ribbon. If you don’t want to risk damaging an actual antique postcard, a color photocopy works just as well and keeps the original intact. Backing the postcard with coordinating cardstock adds a bit of structure so it doesn’t bend or curl over time. This is a wonderful way to work sentimental or nostalgic imagery into your tree without much crafting skill required.
11. Paper Christmas Village Houses
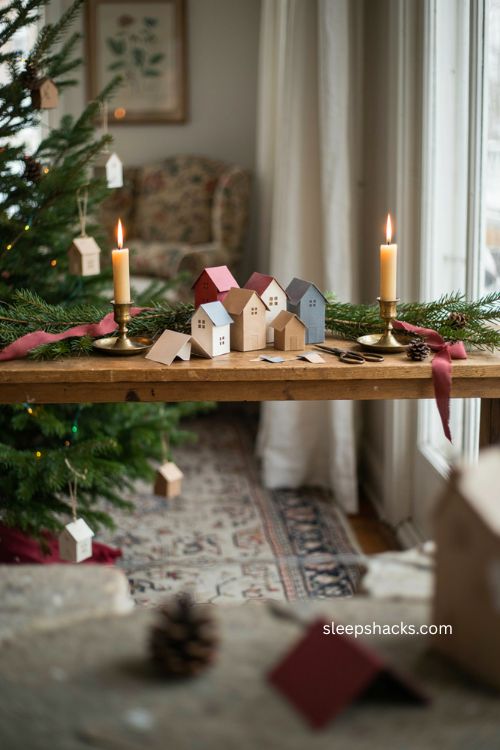
A cluster of small paper houses, each cut and folded into simple shapes and sizes, creates a charming little village scene on your tree or mantel. Templates make this project approachable even if you’re not confident freehand cutting shapes. Varying the roof colors and window details across a few houses keeps the village from feeling too uniform. This project works particularly well as a mantel display in addition to a tree ornament.
12. 3D Paper Christmas Trees

A small 3D paper Christmas tree, built from folded and stacked circles or triangles, makes a satisfying afternoon project with a lasting result. Origami paper or patterned cardstock both work well, depending on whether you want a smooth or textured finish. Adding a bit of twine to the top lets you hang the finished tree from a branch or display it upright on a shelf. These hold up well over multiple seasons since there’s no delicate glitter or beading involved.
13. Sheet Music Sphere Ornaments

Clear, fillable ornament balls stuffed with strips of sheet music make one of the simplest projects on this list while still looking intentional. Cut thin strips from an old hymnal or sheet music, twist or curl them slightly, then loosely fill the clear ball so the paper shows from every angle. Holiday carols make a nice thematic choice if you want a subtle detail hiding inside. These come together in just a few minutes but add real texture next to smoother, solid-colored ornaments.
14. Paper Lantern Ornaments

Miniature paper lanterns bring a soft, glowing quality to a tree even without an actual light inside them. Choose festive colors and patterns, then fold according to a simple lantern template before securing the top and bottom. These are quick enough to make in a batch for an evening project, and they add volume to a tree without much bulk or weight. Hanging several at different heights creates a lovely layered effect.
15. Paper Bauble Ornaments

Round paper baubles, built from layered paper strips or petal shapes glued around a central point, create a classic ornament shape with a handmade touch. Geodesic-style paper baubles take the same basic idea further with a more angular, mathematical look. Both styles work well with leftover scrapbook paper, since the strips don’t need to be large. This is a good project to make in bulk if you want to fill out a tree without buying a full box of store-bought ornaments.
Final Thoughts
So really, the best part about paper ornaments is how forgiving the whole process is — there’s no expensive material to worry about ruining, and even a slightly imperfect fold usually still looks charming once it’s hanging on the tree. Pick two or three projects from this list that match the time and patience you actually have this December, rather than trying to tackle all fifteen at once. Whether that’s a simple postcard ornament or a more involved honeycomb design, each piece adds something a store-bought decoration just can’t replicate. By next Christmas, you might have a whole tree full of ornaments nobody else has.
Frequently Asked Questions
Q: What kind of paper works best for DIY Christmas ornaments?
Double-sided scrapbook paper, cardstock, and even old book or sheet music pages all work well, depending on whether the project needs to fold, curl, or hold a stiff shape.
Q: Are paper ornaments sturdy enough to reuse every year?
Yes, as long as they’re stored flat or in a padded box between seasons, most paper ornaments hold up for many years without tearing or fading.
Q: What’s the easiest paper ornament for a beginner to try first?
A vintage postcard ornament or a basic paper snowflake is a great starting point, since both require minimal cutting and no advanced folding technique.