

Wooden Christmas trees look so simple in photos, which is exactly why they’re so frustrating to plan. Between the angles, the cut lists, and the fear of ruining a perfectly good board, a lot of people close the tab before they ever pick up a saw.
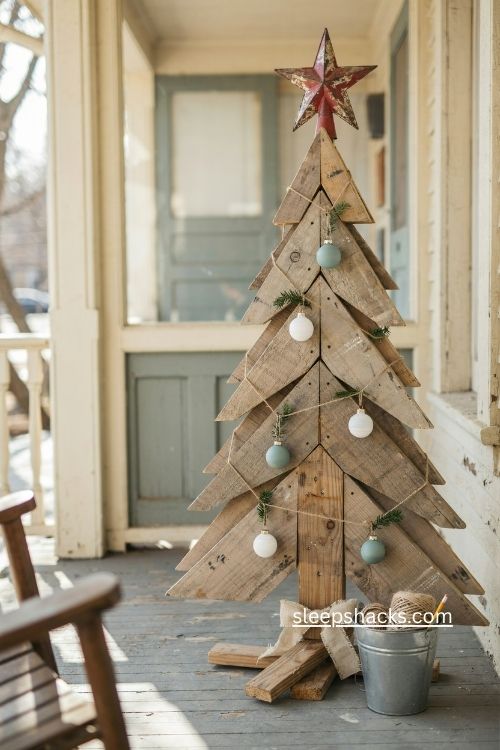
Here’s the good news: a 2×4 Christmas tree is one of the friendliest beginner builds out there. It uses scrap wood or a single board, a handful of basic tools, and a little paint or stain. These 14 ideas cover two build styles, plenty of finishes, and decor tricks, so you can pick whatever suits your skill level and your porch. You don’t need a fancy workshop or years of experience to get it right.
1. The Classic Angled 2×4 Tree
This is the one that started the craze: a tiered, triangle-shaped tree that stands about 34 inches tall and looks like it came from a pricey boutique. It’s built from a single 8-foot 2×4 plus one short 21-inch piece, with the tier ends cut at 22.5 and 45 degrees so the sides meet in a clean point.
Do all your cutting first, then sand every piece before you assemble anything, since flat boards are far easier to smooth. Lay the parts out on the floor in tree shape so nothing gets mixed up. A miter saw gives the cleanest angles, though a circular saw can do the job if that’s what you own.
2. A Stacked Tree from Scrap Cut-Offs
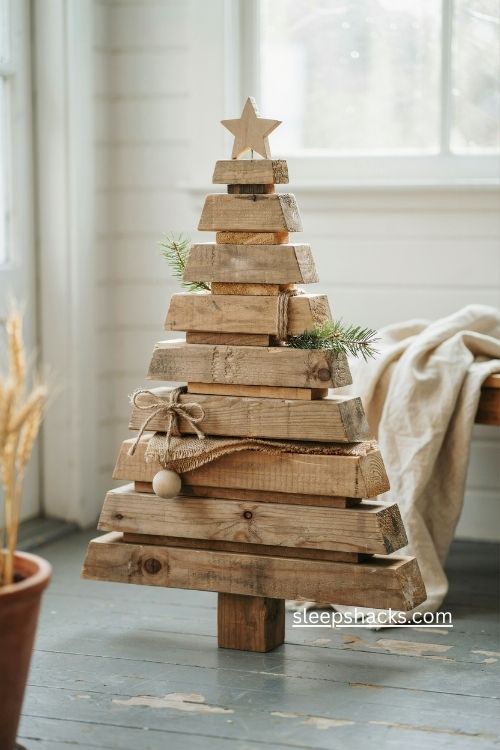
Got a pile of leftover 2×4 chunks in the garage? Cut eight pieces from 8 inches down to 1 inch, each one inch shorter than the last, and stack them like stair steps with half an inch of overhang on each end. Glue goes between every layer, and the whole thing ends up looking like a chunky little pine.
Add a 4-inch trunk piece and a tiny square for the star. A long clamp holds the stack tight while the glue sets, and it’s smart to let it sit for a full day. Since every cut is straight, this one is easy to build with kids, as long as an adult handles the saw.
3. Spray Painted Stacked Tree
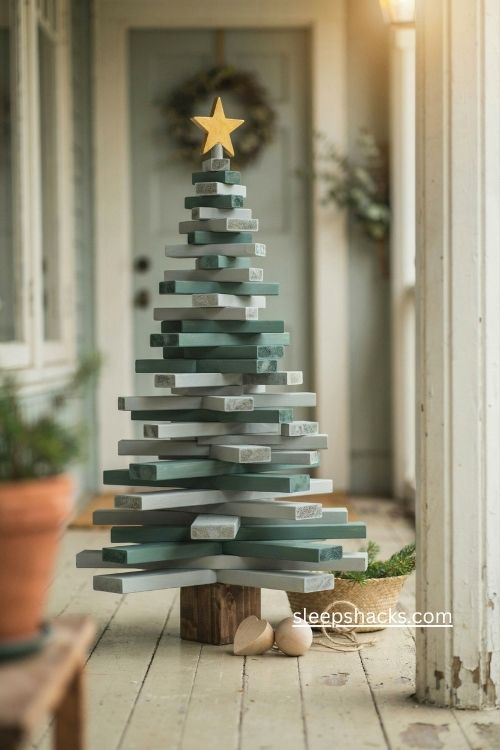
Spray paint turns a plain stacked tree into something instantly festive. Paint the body a classic green, the trunk a deep brown, and the star a sunny yellow, or pick whatever shades you like better. Painting each piece before you glue them together keeps the colors from creeping where they shouldn’t.
Let every piece dry completely, then glue the trunk to the bottom layer and the star to the top. Clamp it once more and wait. For a softer, more modern look, try sage or forest green instead of a bright shade, and finish with a light coat of matte clear spray if the tree will live on a porch.
4. Natural Wood Finish
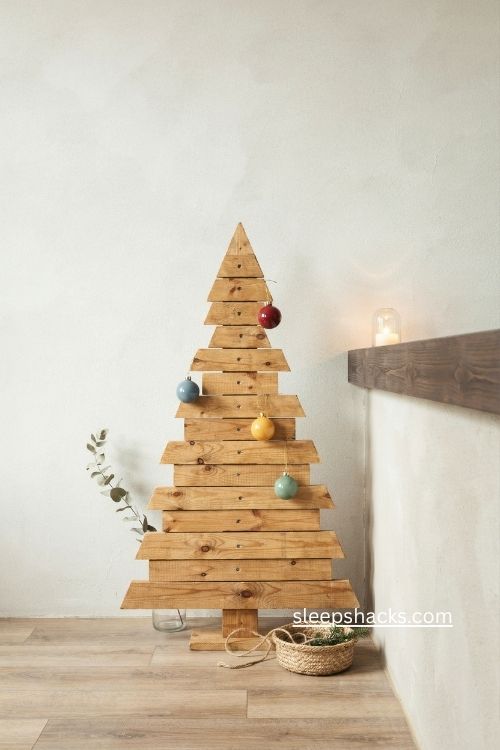
Sometimes the best finish is no finish at all. Leave the tree in its natural pine and the grain and little knots become the decoration, giving you a calm, Scandinavian feel that looks great against a dark mantel or a plain white wall.
Sand thoroughly, starting with a rougher grit and finishing with a fine one, then wipe away the dust with a damp cloth. Fill the visible screw holes with wood putty and sand them flush so they disappear. A natural tree also pairs nicely with colorful ornaments, since the neutral wood never competes with whatever you hang on it, and it’s the cheapest finish you can choose. It’s also the quickest, since you skip the drying time.
5. Rustic Brown or Golden Oak Stain
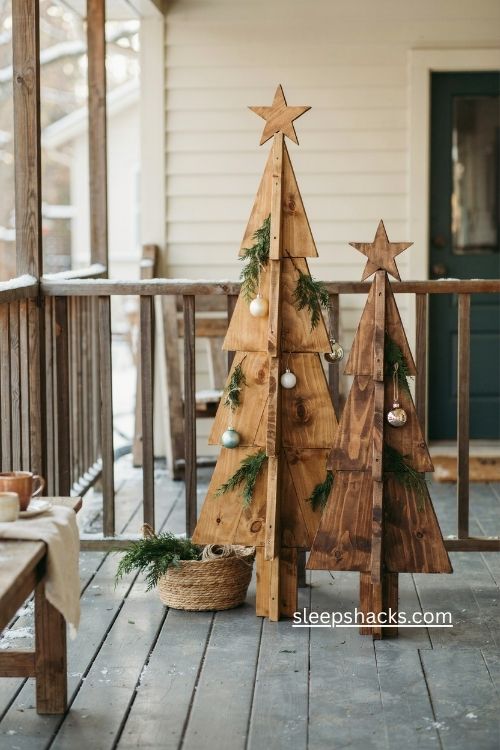
A warm stain gives a 2×4 tree that classic cabin feel. Golden oak leans a little boho and glowing, while a deeper brown looks rustic and traditional. Brush it on with the grain, let it soak in for a few minutes, and wipe off the excess with a clean rag.
Test your stain on a scrap end first, because pine can turn blotchy and every board soaks up color differently. Two thin coats look better than one heavy one. If you make two trees in different shades and set them side by side on the porch, you’ll get a pair that looks collected rather than matched. Wear gloves, because stain loves to hitch a ride on your hands.
6. Whitewashed Farmhouse Style
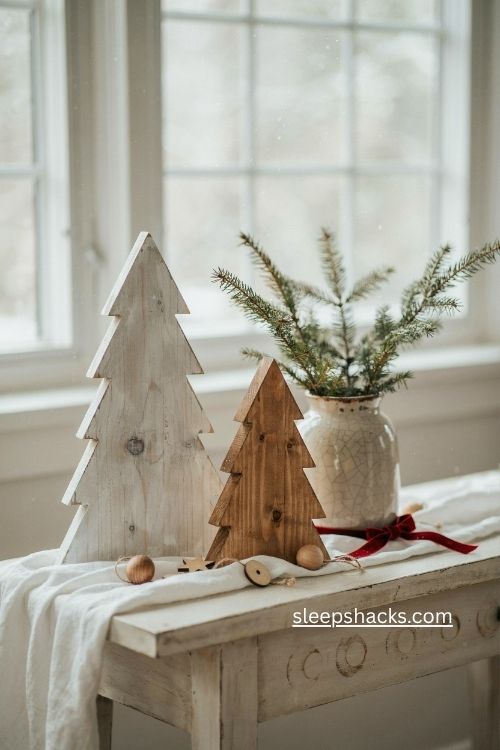
For a farmhouse look, brush on white acrylic paint and rub it back with a baby wipe so the grain still shows through. The result looks soft, snowy, and a little weathered, like a tree that’s been in the family for years. If you’d rather go crisp, solid white paint gives a clean, modern farmhouse finish instead.
Work in small sections so the paint doesn’t dry before you wipe it. Put a whitewashed tree beside a stained one on a console table, and you’ve got a cozy contrast for next to nothing. A simple red ribbon tied around the base adds one punch of color without much effort. It’s one of the most forgiving finishes for beginners.
7. Sage Green Wash
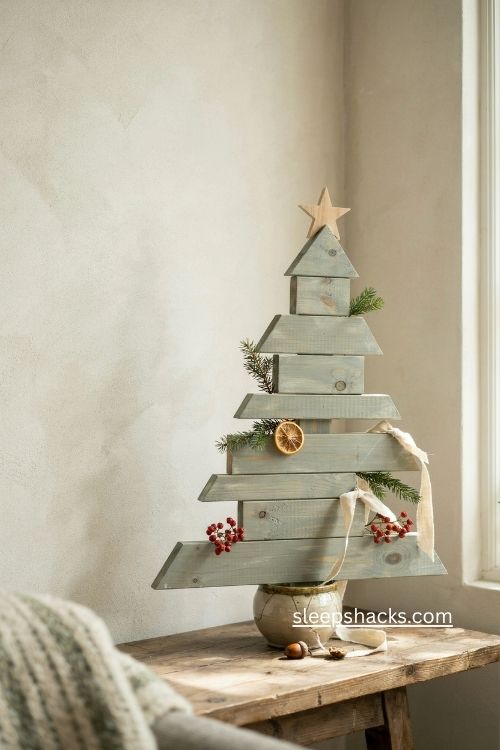
A green wash is the finish people ask about most. Mix a little water into green paint until it’s thin and see-through, brush it on, and wipe off the excess with a cotton rag. The wood grain glows through, and you get a soft, believable pine color without the plastic look of a solid coat.
Sage and olive shades look especially pretty on pine, and a sage wood stain does the same job with less mixing. Start with more water than you think you need, since you can always add a second coat. Always try the mix on a scrap piece first so you know exactly how dark it will dry.
8. A Matching Set in Three Sizes
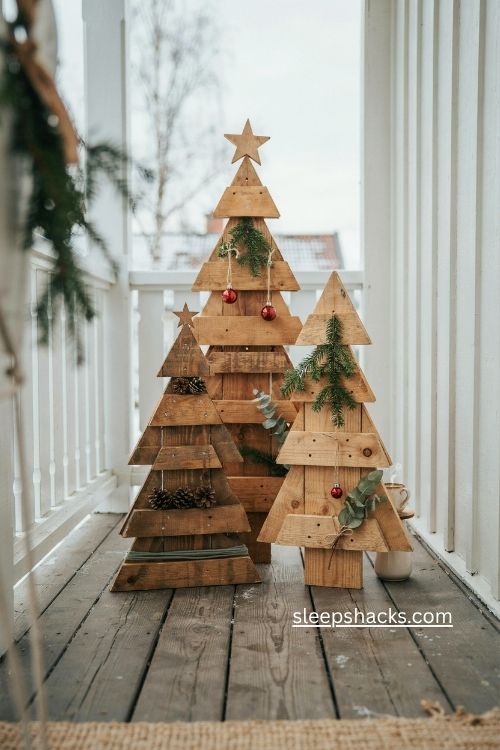
One tree is cute, but a trio in graduated sizes looks like a tiny forest. Printable plans cover 2, 3, and 4 foot versions, and you can group them on a porch step or along a fireplace mantel. Varying the height gives the whole display some movement.
One maker built a test tree with screws only, labeled every board, then used the layout to work out shorter and taller versions. That trick lets you check proportions before you commit to glue. Keep in mind that very small trees get tricky at the top, so lean on the printed plans for the tiniest size. Group them in odd numbers for the most natural look.
9. A Wreath Hung on the Front
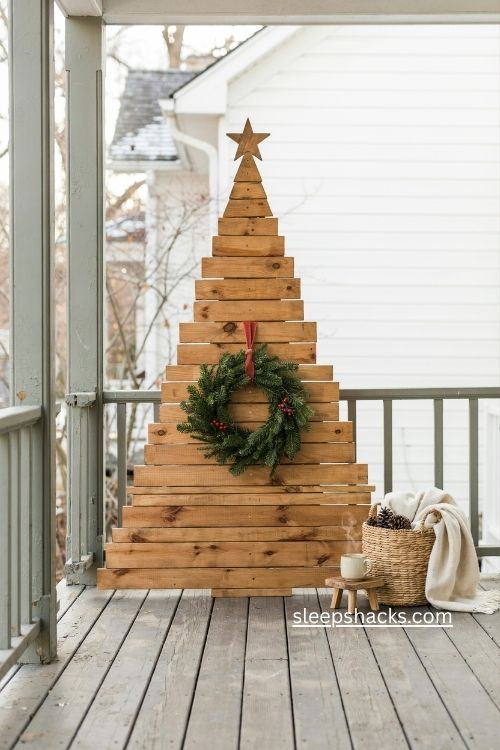
A small wreath hung on the front makes the tree look like a finished front-door welcome. An 8-inch wreath fits nicely on the 3-foot version and adds a bold circle against all those straight lines. Pick a simple evergreen one so the wood stays the star of the show.
To hang it, tap a tiny nail into the top of the tree, which you’ll barely notice once the wreath is up. A short loop of ribbon makes a pretty hanger. If you can’t stand the idea of a nail, a small removable adhesive hook can hold a lightweight wreath for the season. Hang it slightly off-center if you want a more playful look.
10. Wrapped in String Lights
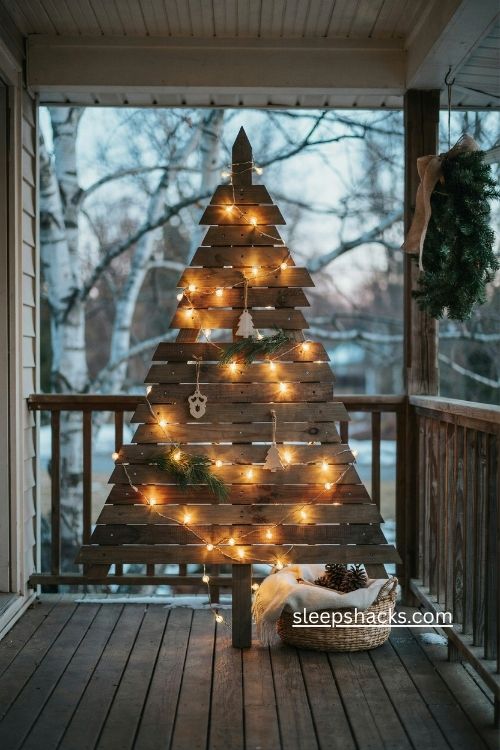
Lights are what make these trees glow, especially on a porch at dusk. Because the tiers are open, you can wrap a strand around the frame in a loose weave and let the warm bulbs peek through the gaps. Warm white looks cozy, while colored bulbs feel playful.
Tap small nails along the sides to hold a side-to-side weave in place, or a row along the bottom for vertical strands. Leave a little slack so the strand doesn’t tug at the wood. Use outdoor-rated lights if the tree will sit outside, and tuck the plug end behind the trunk. Test the lights before you wrap, because untangling a dead strand is no fun.
11. Little Shelves Between the Tiers

Here’s a clever upgrade a reader came up with: small shelves slotted between the tiers. Suddenly the tree becomes a display piece, with room for mini pumpkins, tiny ornaments, or little figurines tucked into each gap. It works especially well in a kid’s room or a hallway.
Cut each shelf from scrap and make them removable, so you can take them out when you want a simpler look. Measure the gap on your own tree before cutting, since small differences in your angles will change the fit. Sand the edges well so ornaments never snag, and keep the shelves light. A few mini pumpkins and a tiny wooden bird would look sweet there.
12. Ornaments and Presents at the Base
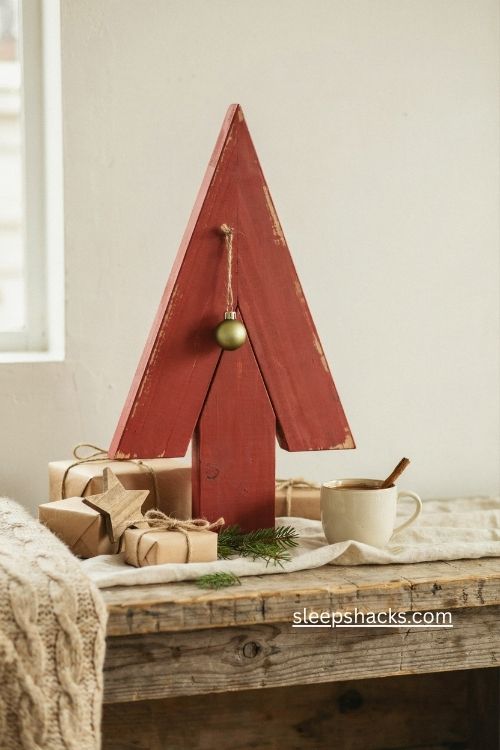
Paint a tree bright red, hang one ornament down the middle, and tuck a few fake presents at the bottom, and you’ve got a ready-made gift. Makers have given these to kids and coworkers alike, and they always get a happy reaction. It’s a sweet way to hand over something handmade.
Try painting them in pairs of different colors for siblings. Wrap tiny boxes in kraft paper and twine to sit at the base. If you’re gifting one, glue a small card to the back with the year, so it slowly becomes a keepsake that comes out of the box every December. A matching set of four makes a thoughtful gift for a whole family.
13. Slimmer Trees from 2×2 or 1×4 Boards
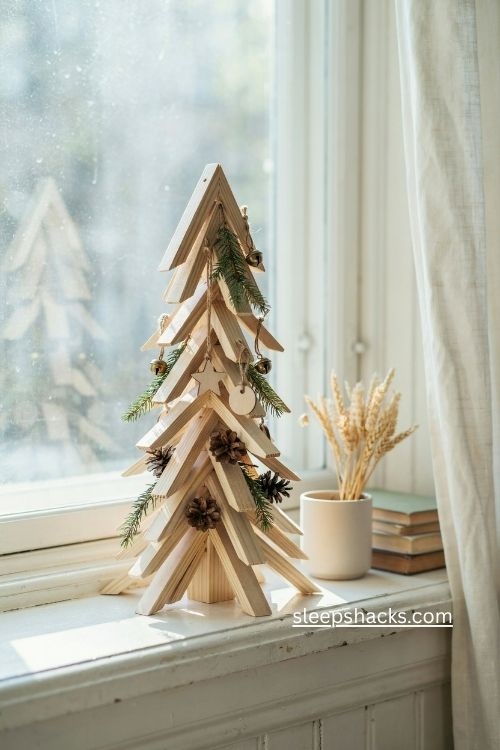
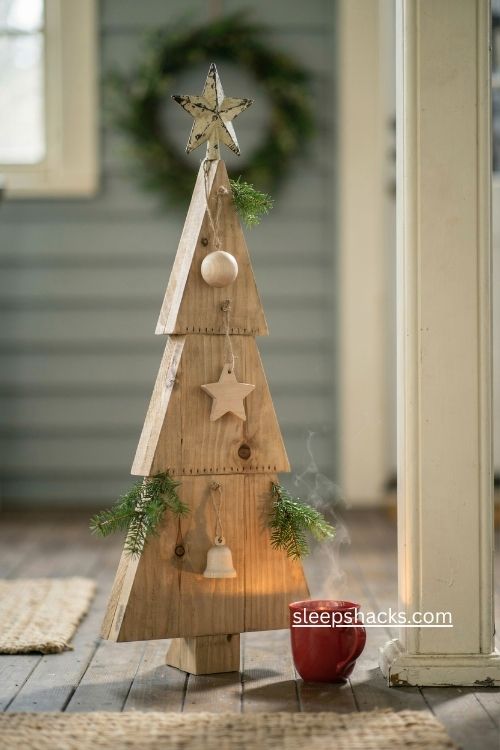
Don’t have 2x4s? One builder swapped in 1×4 boards with 8-inch legs, and another is planning a thinner tree from 2×2 scraps. Both ideas work, and the result is a lighter, more delicate tree that’s easier to carry and store. Dress them with garland, small bells, or pine cones.
Because narrower boards change how the pieces meet, do a dry layout before you glue anything. Keep the same angles and overlap, and test one tree before you cut a whole batch. A slim tree is perfect for a tight shelf, a windowsill, or the corner of a desk. Narrower trees also use less wood, so they’re perfect for your smallest scraps.
14. Make a Few to Sell or Give
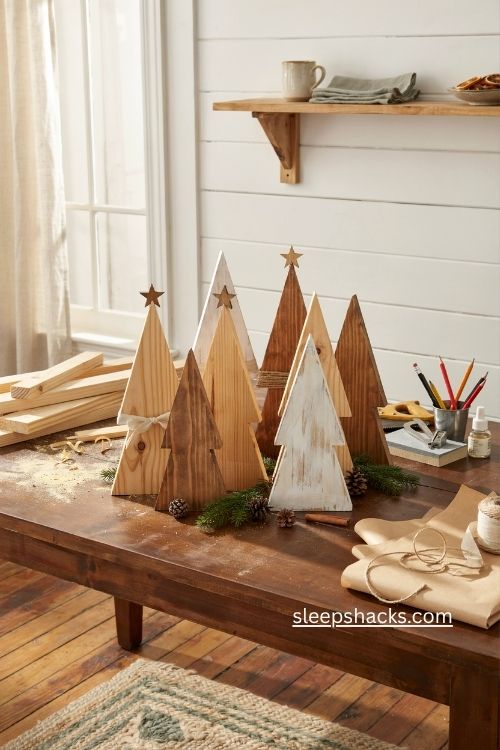
These trees sell. Plenty of woodworkers build a batch for craft fairs and holiday markets, since the materials are cheap, the build is quick, and each tree looks handmade in the best way. Mix up your finishes, natural, stained, and whitewashed, so there’s something for every kind of shopper.
Build a simple jig to speed up assembly, which is a huge help when you’re making a dozen. Cut all the parts at once and sand them in bulk. And if selling isn’t your thing, a handmade tree makes a lovely teacher or neighbor gift, wrapped in a plain ribbon. Photograph each finish for your listings, because buyers love seeing options.
Final Thoughts
There’s something deeply satisfying about setting a tree you built yourself on the porch and plugging in the lights. It doesn’t have to be perfect. A slightly crooked angle just means it’s yours, and the people who walk past it will still smile. Honestly, that little wobble is part of the charm.
So pour a cup of cocoa, put on some music, and take your time with the sanding. Whether you make one tree or twelve, you’re building a little piece of this Christmas that will come out of storage for years. I hope yours turns out beautifully, and that everyone wants one by next December.
Frequently Asked Questions
Q: How tall is a 2×4 Christmas tree?
The classic angled version made from one 8-foot 2×4 plus a short piece comes out around 34 inches tall. Printable plans also cover 2-foot and 4-foot sizes.
Q: What tools do you need to make a 2×4 Christmas tree?
For the angled tree you need a miter saw, a drill, and a sander, plus wood glue and trim head screws. The stacked version only needs a saw, sander, wood glue, a long clamp, and spray paint.
Q: Should you use glue or screws on a wood Christmas tree?
Use both on the angled tree, since glue gives the hold and screws pull the joints tight. Skip hot glue, and pre-drill your holes if you’re using regular screws instead of trim head screws.