

You scroll past a gorgeous handmade ornament online, and the price tag makes you wince. Or maybe you’ve tried a macrame tutorial, tangled yourself in forty inches of cord, and quietly put the whole thing back in the craft drawer. It happens to almost everyone.
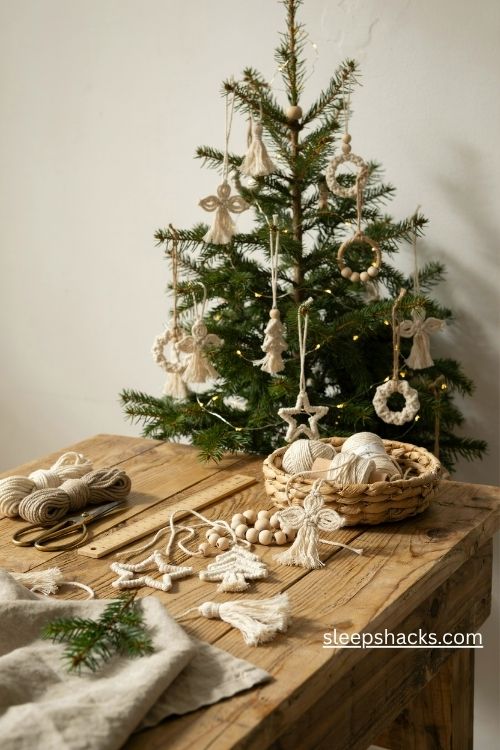
Here’s the good news: ornaments are the friendliest way to learn macrame. They’re small, they use very little cord, and a few basic knots go a long way. These 14 ideas start simple and build slowly, so you can make something pretty tonight and have a whole boho tree full by the weekend.
1. Mini Macrame Christmas Trees
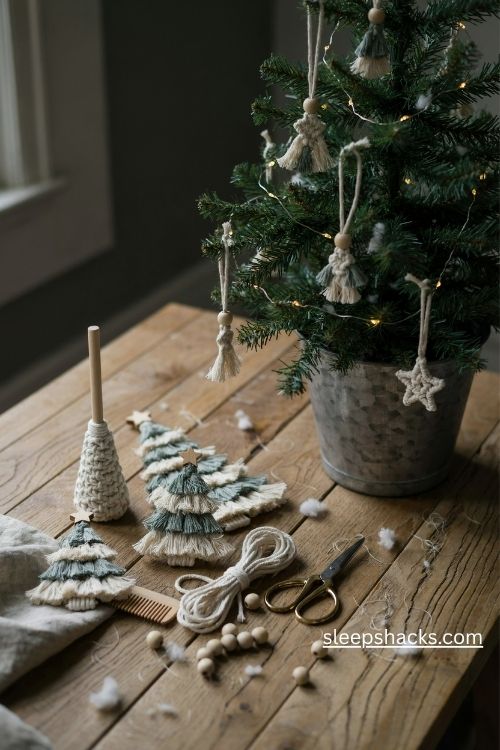
A tiny macrame tree is the project most people fall in love with first. You tie rows of short cord pieces onto a wooden dowel or a small cone, then trim the fringe into a triangle. The result looks soft, textured, and a little bit like a real fir covered in snow.
Use 3 mm cotton cord for a chunky feel and cut each strand about 6 inches long. Brush out the ends with a pet comb for a fluffy finish, then trim the edges so the shape stays crisp. Add a small wooden bead on top as a star and a loop of cord for hanging.
2. Simple Snowflake Ornaments
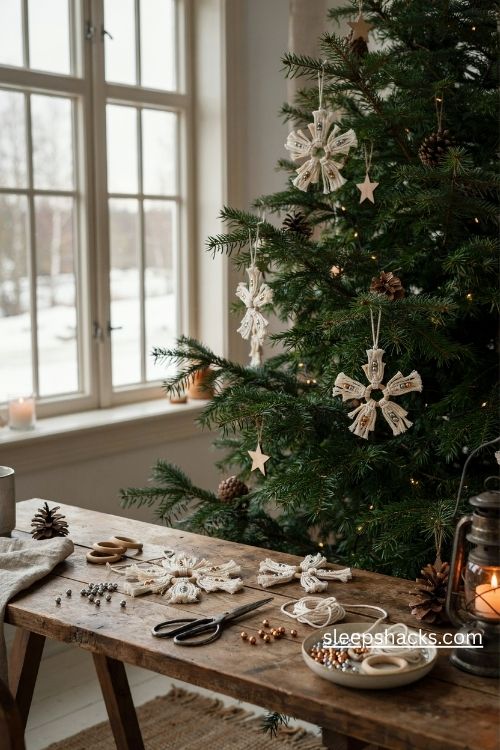
Snowflakes look complicated, but you can make one with a handful of lark’s head knots and a single wooden ring. Tie six short strands around the ring, spaced evenly, and let each one fan out like a point. Trim them to the same length, and you’ve got a delicate winter shape in about ten minutes.
For extra sparkle, thread a tiny silver or gold bead onto each strand before you knot the end. Use white or cream cord so it reads clearly against a dark green tree. A drop of fabric stiffener on each arm keeps the snowflake from drooping once it’s hung.
3. Boho Star Ornaments
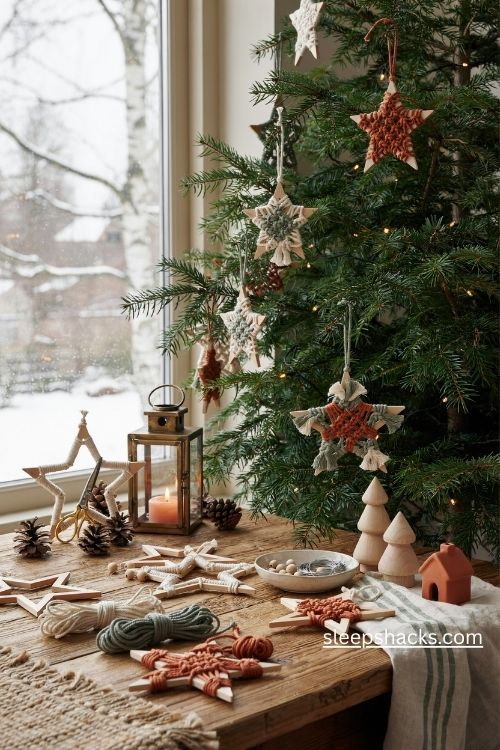
Stars are an easy way to bring that warm neutral look to the tree. Wrap cord around a star-shaped wooden frame or a cardboard cutout, then add a few rows of square knots through the center. The weaving gives it texture without much effort.
Natural beige cord pairs beautifully with a rustic or Scandinavian tree. If you’d rather make a bolder statement, try a deep terracotta or sage green. Use a thin piece of wire or a glue dot to hold the first knot in place so the star keeps its shape while you work through the rest.
4. Macrame Feather Ornaments
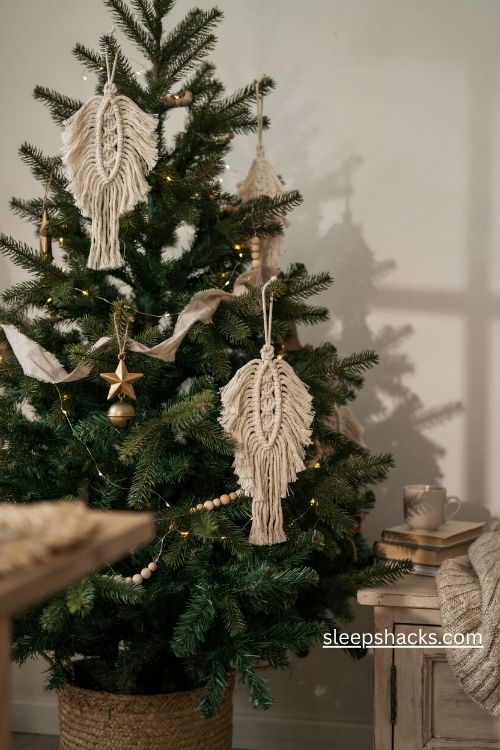
Feathers are one of the most satisfying shapes to make because the fringe does most of the work. Start with a short dowel or a thin bundle of cord, tie on a row of strands using lark’s head knots, and add a center spine with a gathering knot. Comb out the ends, and the whole thing turns into a soft plume.
Hang a single feather on its own, or group three in different sizes for a fuller look. They sit nicely on the branches of a pine tree and feel especially pretty when the lights are low. Keep the strands close in length for a clean, symmetrical finish.
5. Tiny Wreath Ornaments
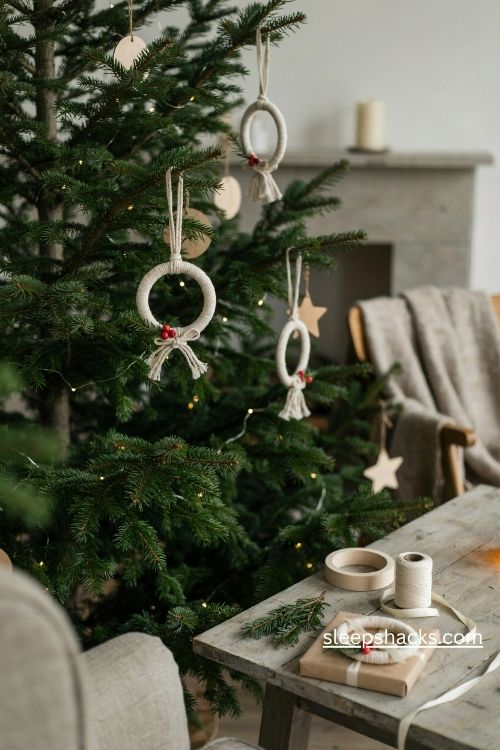
A mini wreath is basically a wooden ring dressed up in cord and a bit of greenery. Wrap the ring tightly with cotton cord, glue the end, and tie on a small bow or a bundle of knotted fringe at the bottom. It takes about fifteen minutes, which makes it a good evening project while a movie plays.
For a festive touch, add a few red berries or a sprig of faux pine. Choose a ring about 2 to 3 inches across so it hangs well without pulling down the branch. These also make sweet gift toppers, tied right onto a parcel with a pretty ribbon.
6. Bell Ornaments With Cord Fringe
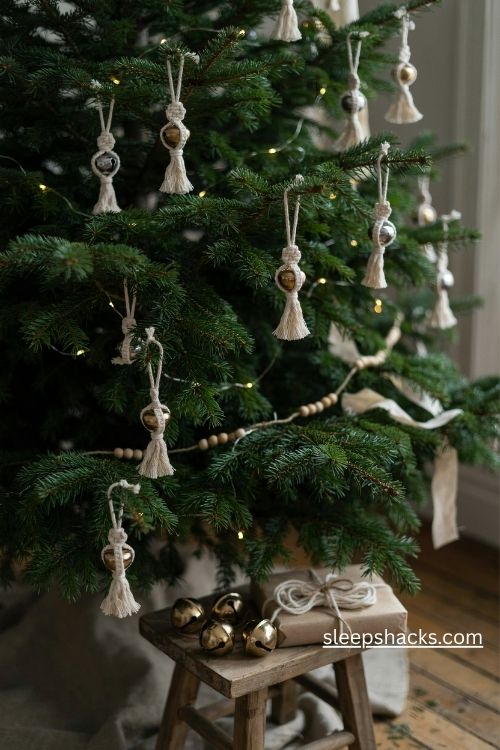
A small jingle bell wrapped in macrame feels like a little surprise when it moves. Thread the bell onto the center of a cord, tie a few spiral knots above it to form a hanger, and let the ends drop into short tassels. The soft sound when the branch shifts is lovely in a quiet room.
Gold bells look warm against cream cord, and silver ones look crisp with white. Keep the tassels short, around 2 inches, so they don’t muffle the bell. If you plan on giving these away, tie a tiny paper tag on one of the strands with the year written in pencil.
7. Candy Cane Wrapped Ornaments
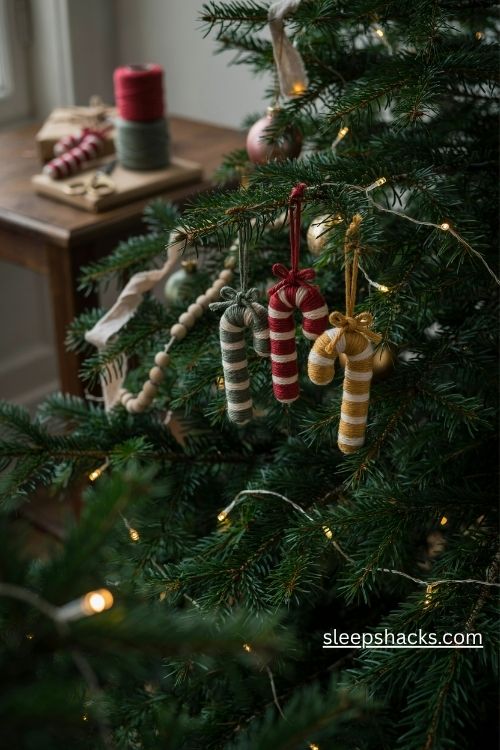
You don’t need a full macrame pattern to make something sweet. Wrap a plain wooden candy cane shape or a bent piece of wire with red and white cord, alternating colors every inch or so. The stripes come out neat and bright, and the whole thing feels playful.
Secure each color change with a small dab of glue on the back. If you’d like a more modern look, swap the red for deep forest green or mustard yellow. A small macrame bow at the top finishes the shape, and it stays put on the branch much better than a plastic candy cane ever would.
8. Macrame Angel Ornaments
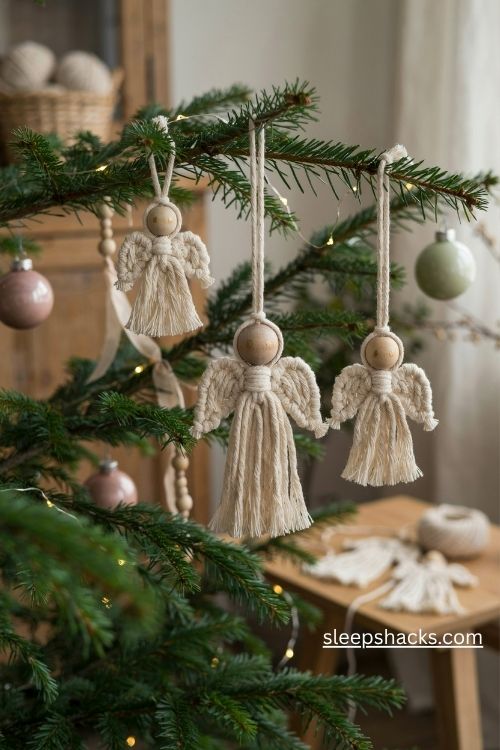
An angel makes a sweet gift, and it’s easier than it looks. Use a round wooden bead for the head, a cone of fringe for the body, and two small folded loops for the wings. Everything hangs from one loop of cord, so you don’t need to be fussy about balance.
Keep the wings slightly shorter than the body so the angel hangs straight and doesn’t tilt. A dot of gold paint on the bead gives a gentle halo effect. Make a small group in different sizes and cluster them on one branch for a gentle, almost heirloom look on your tree.
9. Wooden Bead and Rope Drops
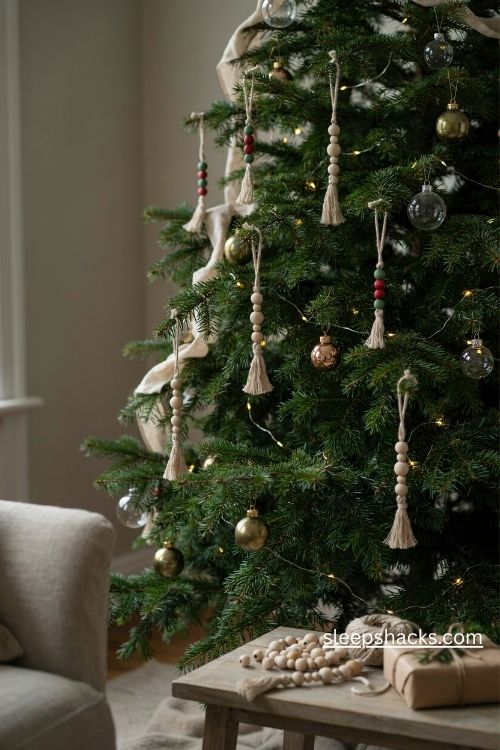
Sometimes the simplest ornament is the nicest one. Thread several large wooden beads onto a strand of cord, tie a knot between each one, and finish with a small tassel at the bottom. It’s a clean, elongated shape that looks great next to rounder ornaments.
Mix bead sizes for visual rhythm, such as one large, two small, and one medium. Natural wood suits a Scandinavian palette, while painted beads in red and green feel more traditional. Make several in different lengths and hang them at staggered heights so they catch the eye from every angle of the tree.
10. Macrame Gift Tags
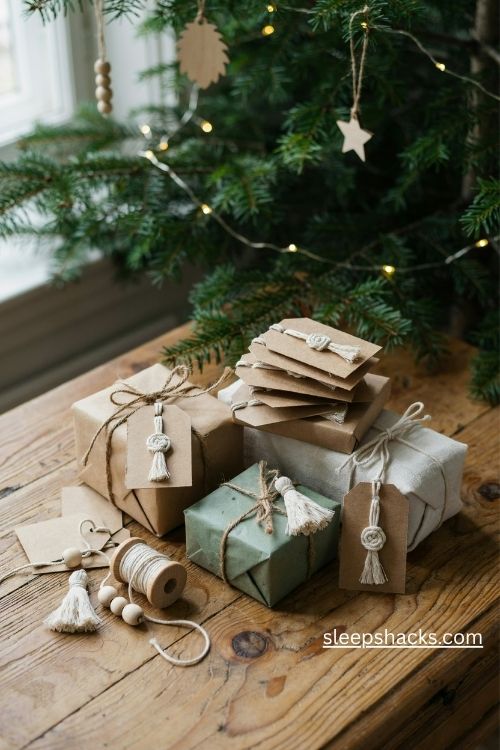
Gift tags are small, useful, and a perfect way to practice your knots. Cut a small rectangle from kraft paper, punch a hole in one corner, and loop a short length of macrame cord through it. Add a few spiral knots and a little tassel to finish.
Write the name in a neat pencil or white gel pen. The recipient can hang the tag on the tree after opening the present, so it becomes a keepsake, too. Stack three or four tags together on a wrapped box for a pretty, handmade look that costs almost nothing.
11. Rainbow Tassel Ornaments
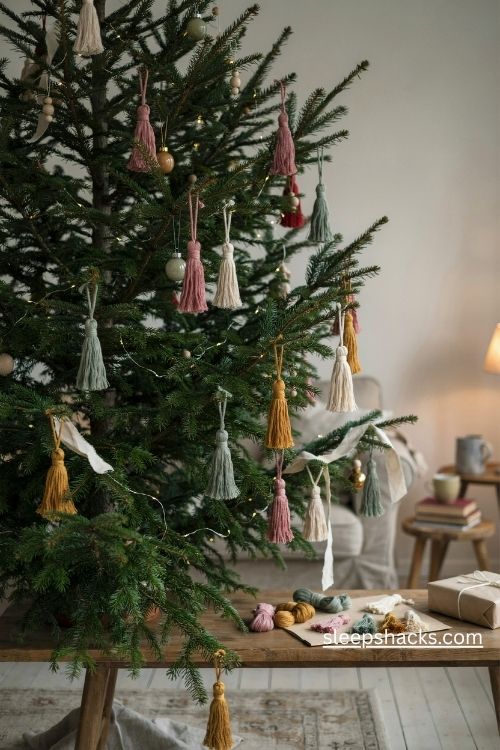
Tassels bring a burst of color to a tree that might otherwise feel muted. Wrap cord around a piece of cardboard about 4 inches long, slide it off, tie the top, and wrap a second piece of cord around the neck to form the head. Trim the bottom edge evenly.
Choose a mix of soft pink, mustard, sage, and cream for a gentle palette, or go bold with red, green, and gold. Hang a small cluster at different heights for a playful cascade. They’re light enough to hang from thin branches and sturdy enough to survive curious kids and pets.
12. Mitten and Stocking Ornaments
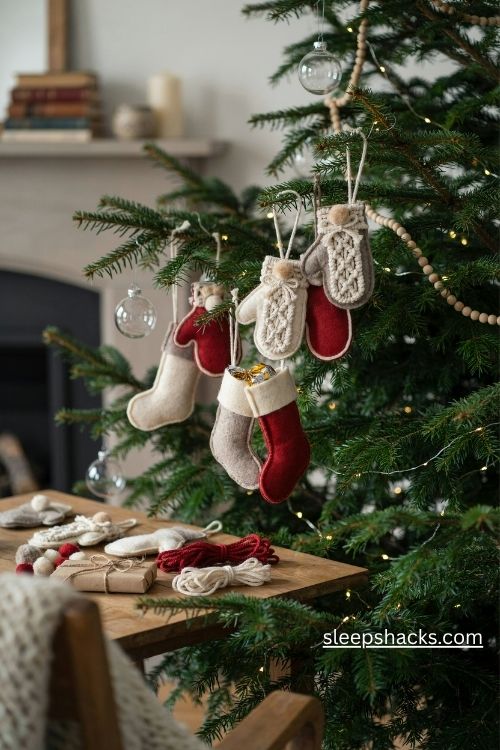
Tiny knitted-style mittens and stockings are cute, and macrame gives you a way to make them without needle or hook. Cut a simple shape out of felt, then stitch rows of knotted cord along the edge for a chunky border. Add a pom pom or a small bow near the cuff.
Cream felt with beige cord feels cozy and natural, while red felt with white cord feels classic. Fill each one with a tiny treat, like a wrapped candy or a folded note, and hang it on the tree. Kids love finding a little surprise tucked inside.
13. Embroidery Hoop Frame Ornaments
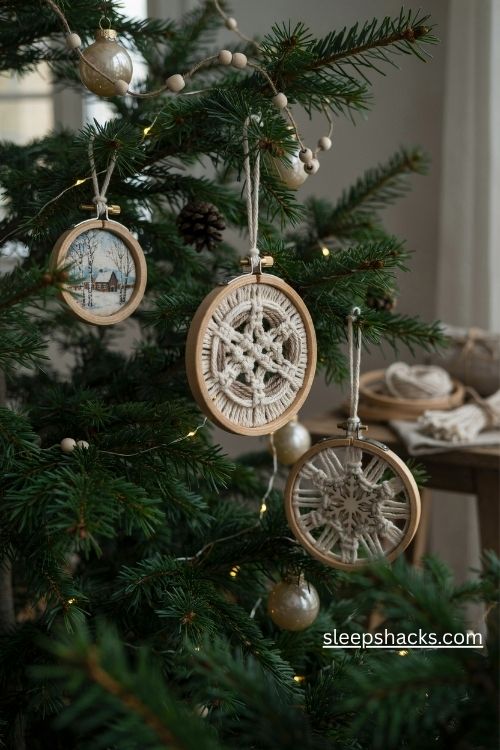
A small embroidery hoop turns into a frame for a woven or knotted design. Stretch a few lengths of cord across the hoop, then weave in more cord with simple over-under stitches to form a tiny wall hanging. It’s a great way to practice weaving before moving on to larger projects.
Use a 3 or 4 inch hoop so it hangs without bending the branch. Add a small tassel or a short fringe along the bottom edge for movement. Frame a tiny photo or a little paper cutout in the middle for a personal, keepsake-style ornament.
14. Hand-Dyed Cotton Cord Ornaments
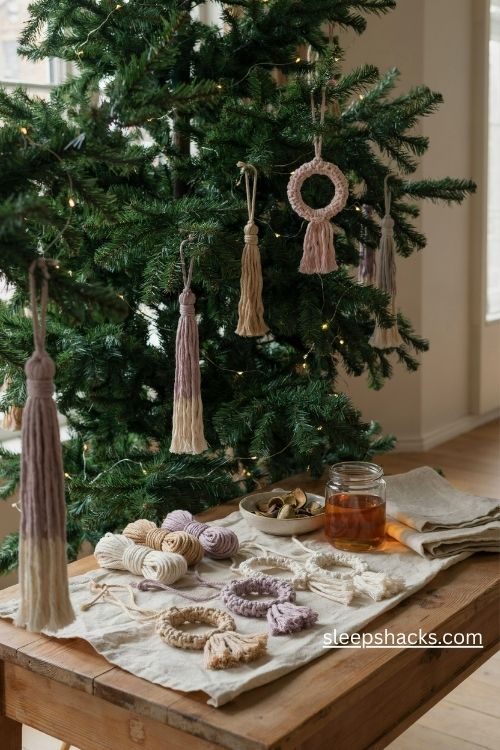
Color changes everything, and dyeing your own cord is easier than it sounds. Soak a hank of cotton cord in a warm dye bath of tea, avocado skins, or a small amount of fabric dye, rinse it well, and let it dry flat. The slight variations in shade give the finished piece a lovely, handmade depth.
Tea gives a soft beige, avocado skins create a gentle blush, and red cabbage can produce a dusty lavender. Try dipping just the ends of a tassel for an ombre effect. Once dry, use the cord for any of the ornaments above.
Final Thoughts
Making ornaments is really about slowing down. There’s something quietly happy about sitting at a table with a pot of tea, a pile of cord, and a pair of sharp scissors while the house smells like pine.
So make a few this season, even if they come out a little crooked. Those imperfect ones tend to become the favorites, the ones you pull from the box every December and say, “I remember making this.” I hope your tree ends up covered in small, soft pieces of your own evenings, and that you enjoy every knot along the way.
Frequently Asked Questions
What cord is best for macrame Christmas ornaments?
A 3 mm cotton cord is a great all-around choice because it’s soft, easy to knot, and brushes out nicely for fringe. Use thinner 2 mm cord for tiny details and thicker 5 mm cord for bolder, chunkier pieces.
How long does it take to make a macrame ornament?
Most beginner ornaments take between 10 and 30 minutes once you know the basic knots. Larger designs like feathers or woven hoops can take closer to an hour.
How do I keep macrame ornaments from fraying?
Wrap the ends with a small dab of clear craft glue or fabric stiffener, then trim them once dry. You can also tie a tight knot or wrap thread around the base of the tassel.