

Ribbon is the cheapest thing you can add to a Christmas tree, and it is also the one thing that can make a tree look expensive. A single strand of velvet weaving through the branches does more than fifty extra ornaments ever could.

The trouble is knowing where to start. These 13 ideas walk you through how to add ribbon to your Christmas tree, from simple bows and loops to mesh and wide ribbon, with clear steps for each one. Every idea says what it looks like, how hard it is, and what to buy, so you can finish in an evening and still like it in January. Most can be done after the ornaments are up, so you won’t need to start over.
1. How to Add Ribbon Bows to Your Christmas Tree
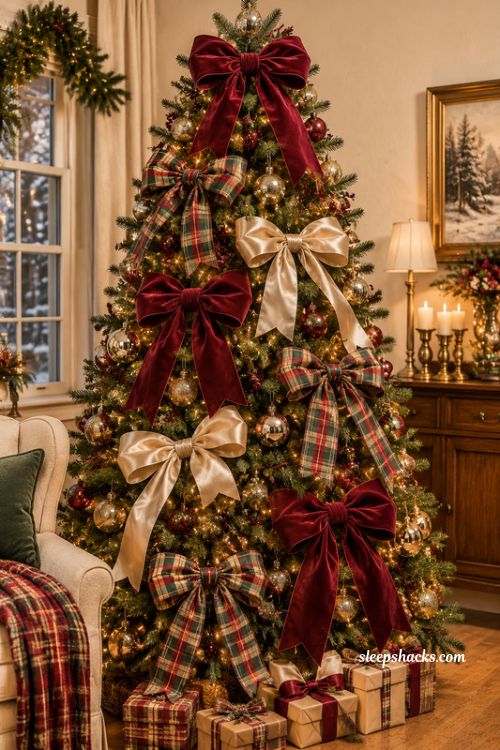
Make a full bow with long tails, then clip or wire it onto a branch so it sits flat against the tree like a gift tied to the needles. Space the bows in a loose zigzag from top to bottom, and let the tails drape over the branches below. Velvet, plaid, and satin all hold a bow well.
Wired ribbon makes the job easy, since you can reshape the loops after tying. Fasten each bow with a green pipe cleaner or floral wire, twisted around a sturdy branch. Roughly one bow per foot of tree height works well, at six to eight inches across. Thin ribbon bows can look lost on a full tree, so choose a wider width.
2. Easy Tuck-In Ribbon for Beginners
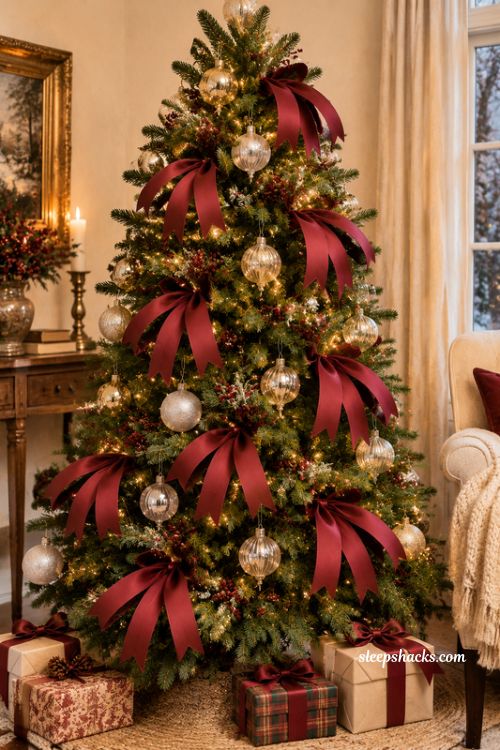
Cut ribbon into lengths about as long as your forearm, fold each in half, then push the folded middle deep into the branches so only two soft ends show. The ribbon seems to grow out of the tree itself. Place the pieces between ornaments in clusters of three, all in one color.
There is no tying, no wire, and no measuring. It takes about fifteen minutes on a medium tree, so it suits first-timers and anyone short on time. Choose a stiffer ribbon like grosgrain so the ends hold their shape. If your branches are very sparse, drape the ribbon instead, because a bare spot has nothing to grip.
3. How to Add Ribbon After Ornaments Are Up
If the ornaments are already hung, add ribbon last, so you can see exactly where the gaps are. Thread the ribbon behind ornaments, over branch tips, and through any spot where the tree looks thin. Pick a color that already appears in your ornaments so the ribbon ties everything together.
Go slowly and keep glass ornaments from knocking together. A second person to hold the spool saves a lot of tugging. This method is perfect if you decide on ribbon halfway through, since nothing has to come down. It takes about thirty minutes, and the ribbon should stay loose, never pulled tight across the branches.
4. How to Add Mesh Ribbon to Your Christmas Tree
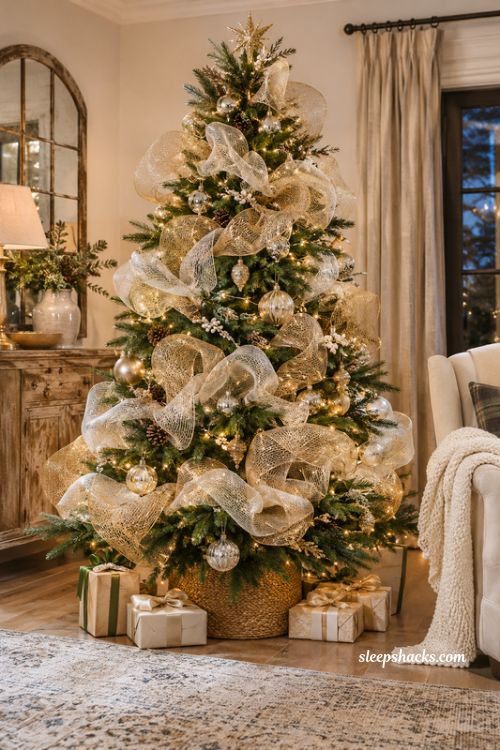
Mesh ribbon comes in wide rolls with a wired edge, and it puffs into airy clouds when you gather it. Fluff it along a branch, scrunch it every few inches, and secure each pouf with wire so it floats like a cloud. Gold or silver mesh glitters in the lights, while white or cream looks like drifting snow.
Mesh gives a lot of volume for a modest price, and one roll goes a long way on a tall tree. It suits full trees, where the fluffy shapes can fill gaps. It tangles easily, so cut it into sections before you start and keep the spool away from pets. On slim trees, use less so it doesn’t look busy.
5. How to Add Ribbon Loops to Your Christmas Tree

Loops are bows without the knot. Cut ribbon twelve to fifteen inches long, fold it into a loop, then wire the ends together and attach it to a branch so the loop stands out. Build rows of loops in one color along the branch tips, and they look like petals.
Loops are faster than bows, and each one comes out identical, which gives a neat, tailored finish. Stiff, wired ribbon keeps the shape best. A dozen loops can cover a small tree in about fifteen minutes. They suit people who want polish without practice, though a large tree needs more loops than you might expect, so buy extra ribbon.
6. How to Add Wide Ribbon to Your Christmas Tree
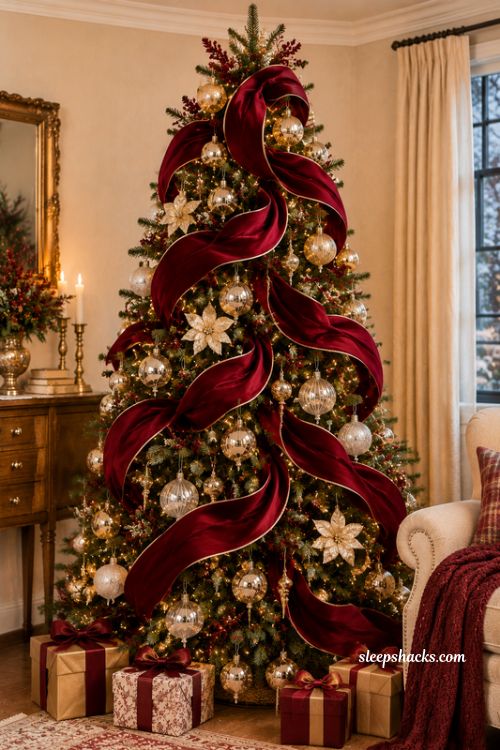
Wide ribbon, three inches or more, makes a bold statement. Tuck one end at the top of the tree, then let the ribbon fall in a long, wavy cascade over the branches, tucking it behind a branch every foot or so to hold the waves. It looks like a flowing river of fabric.
Wide ribbon costs more per yard, so choose a wired edge and measure the tree before you cut. It suits tall, full trees, where the width won’t swamp the branches. On a small tabletop tree, wide ribbon overpowers everything else, so go narrower there. Add lights first so the ribbon doesn’t hide them.
7. Horizontal Ribbon Swags Around the Tree
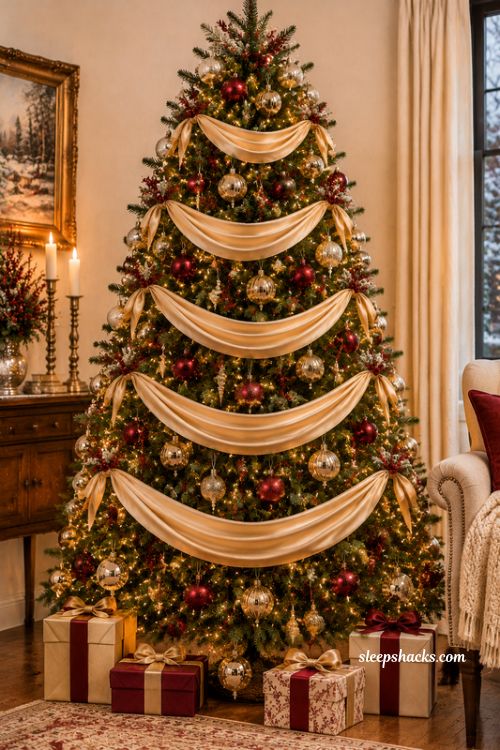
Instead of up-and-down streamers, run ribbon in soft horizontal swags, looping from branch to branch around the whole tree. Each swag sags in a gentle curve four to six inches deep, like bunting at a party. Anchor each end with a short piece of wire and let the middle drop.
Swags give a classic, polished look, a bit like a department store window. They work best with ribbon that drapes well, such as satin or velvet. Work from the top down so each row sits neatly on the one above. It takes patience, about forty minutes, and it suits anyone who likes a tidy, formal tree.
8. Spiral Ribbon Wrap From Top to Bottom
Start at the top and wind the ribbon around the tree in a slow downward spiral, tucking it behind branches every few inches so it follows the shape. The ribbon appears and disappears as it winds, like a path through a forest. Keep a consistent gap of about a hand’s width between turns.
This is the quickest way to cover a whole tree, and it looks good at any size. A helper can pass the spool around while you hold the end. Choose ribbon with some body so it doesn’t flop between branches. Hang the lights first, because ribbon laid over them can hide the glow.
9. Ribbon Bow Tree Topper
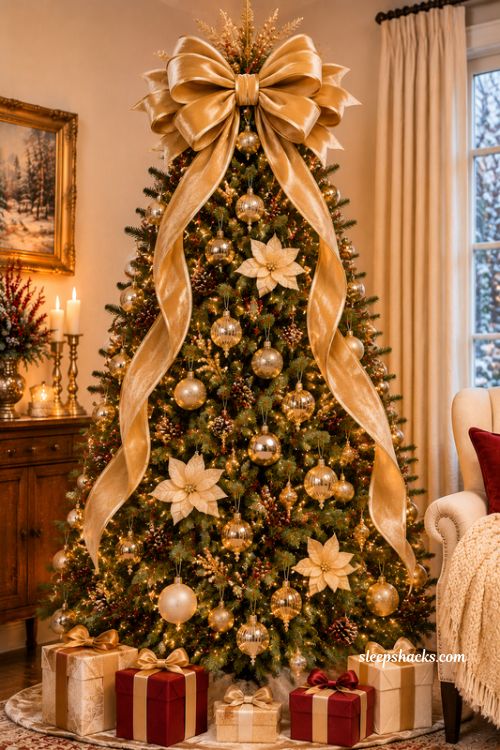
Make a large bow with loops about eight inches across and long tails, then wire it to the top branch so the tails stream down each side. A wired bow keeps its perky shape. Add a few small ribbon loops behind it to make a fuller starburst.
A bow topper often costs less than a star or angel, and it has a warm, homemade look. Match its color to the other ribbon on your tree so the whole thing feels planned. If the top branch is thin or bendy, tape a bamboo skewer along it for support. Keep the tails clear of hot bulbs.
10. Choosing Ribbon Width, Color, and Texture
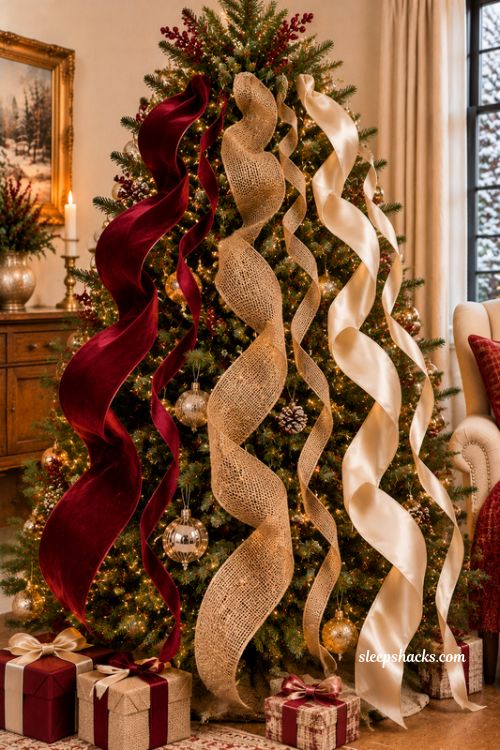
Hold a few ribbons against your tree before you cut anything. Narrow ribbon, about an inch wide, gets lost on a big tree, while ribbon around three inches can overwhelm a small one. Velvet looks rich, burlap looks rustic, and satin gives shine. Lay each swatch over a branch and step back to see it from across the room.
As a rule, use two ribbon types at most so the tree stays cohesive. Buy a little more than you think you need, since a mismatch is harder to fix than a leftover roll. This ten-minute test also saves money, because it stops you buying rolls you will never use.
11. Securing Ribbon With Floral Wire and Pipe Cleaners
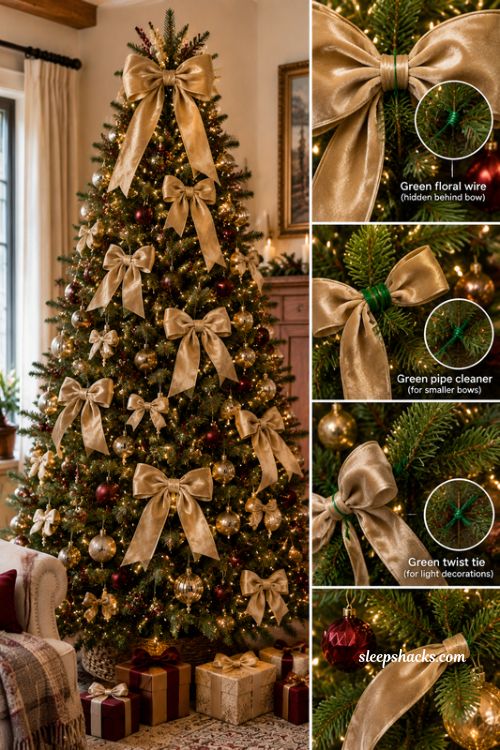
Floral wire, green pipe cleaners, and twist ties blend into the branches and hold ribbon firmly. Wrap the wire around the middle of a bow or loop, twist it around a branch two or three times, and trim the extra. Green wire practically vanishes against artificial pine needles.
This stops ribbon from slipping down when someone brushes past the tree. A small spool of floral wire costs little and lasts through many seasons. It is especially useful on heavily decorated trees and in homes with curious pets. Always trim the wire ends short so they don’t poke, which matters if children will be close.
12. Ribbon Streamers Cascading From the Topper
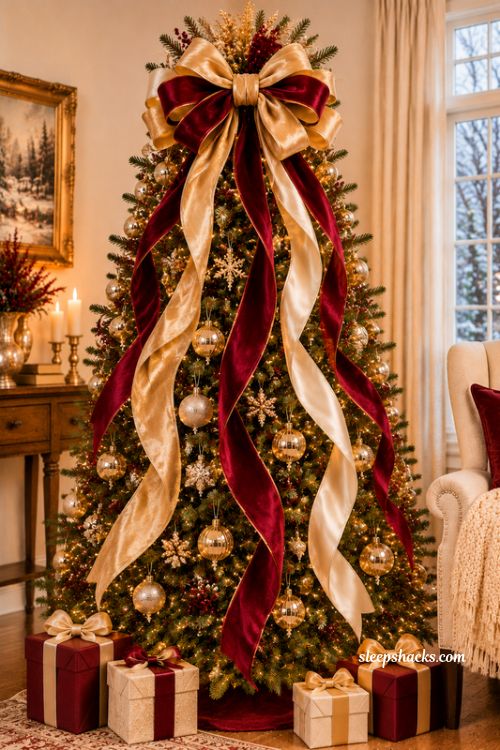
Attach three or four long ribbon tails under the topper and let them hang down the front of the tree, pinned with wire every foot or so. They flow like waterfalls in slightly different lengths, which draws the eye upward. Use two or three coordinating shades for more depth.
This works well when you want height and drama without adding more ornaments. Each tail needs roughly two yards on a six-foot tree, but measure with a piece of string first. Streamers look especially pretty on narrow trees. On very full ones they can disappear, so choose ribbon with a wired edge to keep them visible.
13. Layering Two Ribbons Together for Depth

Lay a narrow ribbon on top of a wider one in a contrasting texture, such as thin gold satin over wide plaid, and treat the pair as one when you bend or tie. The stack gives richness in a single bow or swag, and the wider ribbon frames the narrow one like a border.
Layering costs a little more, but it makes basic ribbon look designer. Choose colors that share one tone, like cream and gold, so they don’t clash. It suits trees that need a finishing touch. Test a scrap pairing first, since some combinations look heavy once they are tied.
Final Thoughts
Think of ribbon as the last stitch in a tree you have already put your heart into. It doesn’t need to be perfect, and it won’t be, because branches are never perfectly even. That unevenness is part of what makes a tree look lived in and loved.
So put on some music, grab a pair of scissors, and start with whichever method felt easiest. By the time the last bow is tucked in, you will probably be standing back with a cup of something warm, smiling at your own handiwork.
Frequently Asked Questions
Q: How much ribbon do I need for a Christmas tree?
It depends on the tree and the method, so wrap a piece of string around the tree the way you plan to place the ribbon, then measure that string and buy a little extra.
Q: Should I add ribbon before or after the ornaments?
Add it after the lights and before the ornaments for the neatest look, though tucked or draped ribbon also works well once the ornaments are up.
Q: What kind of ribbon is best for a Christmas tree?
Wired ribbon holds its shape best, and velvet, satin, and grosgrain all look good, so pick one that suits the width and style of your tree.