

Store-bought Christmas trees are fine, but there’s something about a handmade fabric one that just feels warmer. Maybe it’s the texture, maybe it’s the fact that no two ever turn out exactly alike, but fabric christmas trees diy projects have a charm that plastic can’t touch.
They’re small enough for a dorm room, sturdy enough to survive curious cats, and forgiving enough that a first attempt still looks intentional. If you’ve got a bag of fabric scraps sitting in a closet somewhere, this is the project that finally puts them to use. Here are fifteen ways to build, style, and stretch a fabric tree into something that feels genuinely yours.
1. Build On A Simple Foam Cone
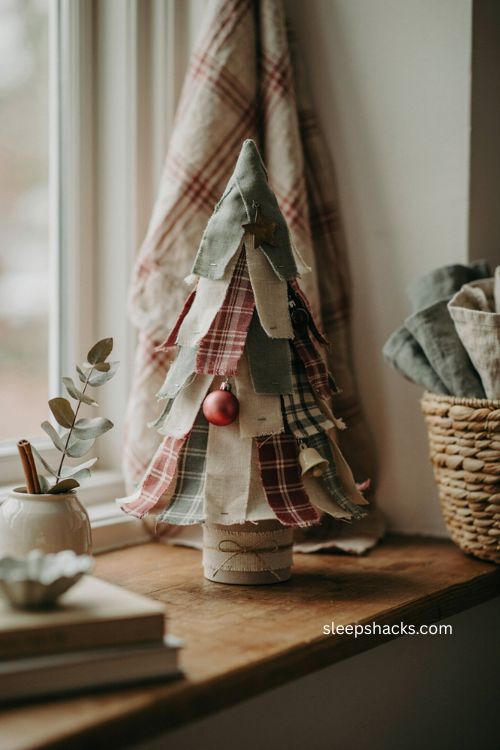
A plain foam cone from the craft store is the easiest base for a fabric tree, and it costs almost nothing. Pick a size based on where the finished tree will live — a six-inch cone works for a shelf, while a taller one makes a nice standalone centerpiece. The foam holds pins well, which matters more than it sounds like it would, since most of this project relies on pinning rather than gluing. Once the cone is wrapped, it becomes surprisingly sturdy and can handle being bumped or knocked without falling apart.
2. Pick Felt For The Best Texture
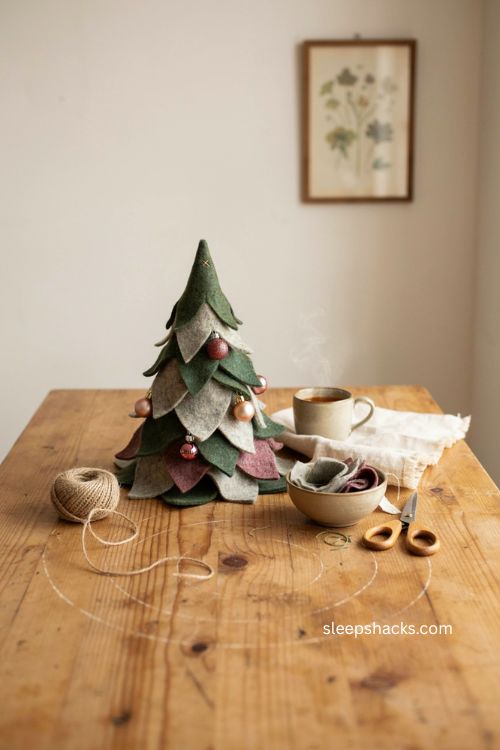
Felt is the go-to fabric for a reason — it has enough body to hold a shape without fraying at the edges, which means you can skip hemming entirely. A quarter to a half yard usually covers a medium-sized cone with room to spare. Wool-blend felt drapes a little differently than the craft-store acrylic kind, giving a softer, more layered look once it’s wrapped. If you’re new to this project, felt is the most forgiving fabric to practice with before trying anything trickier.
3. Skip The Sewing Machine Entirely
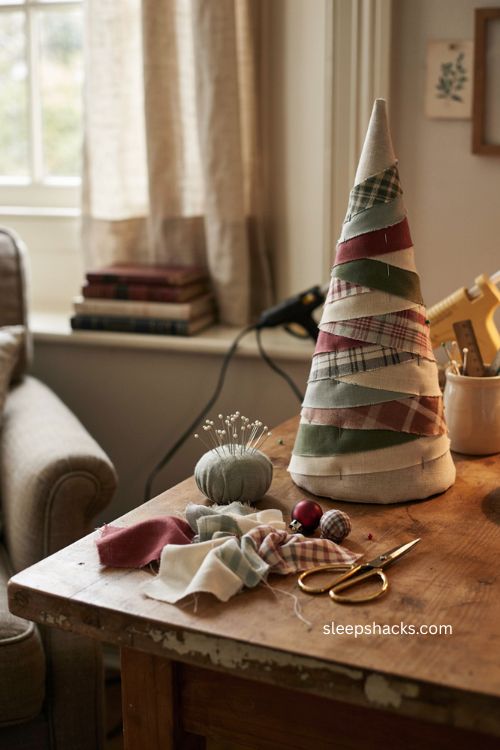
One of the best things about this project is that it doesn’t require a single stitch. Straight pins hold everything in place as you wrap, which means the whole tree comes together in under an hour without threading a needle once. This makes it a great weekend project for beginners, or something to do while half-watching a movie. If you’d rather avoid visible pins, a low-temp glue gun works too, though pins give you the freedom to adjust as you go.
4. Wrap In Layers Like Shingles
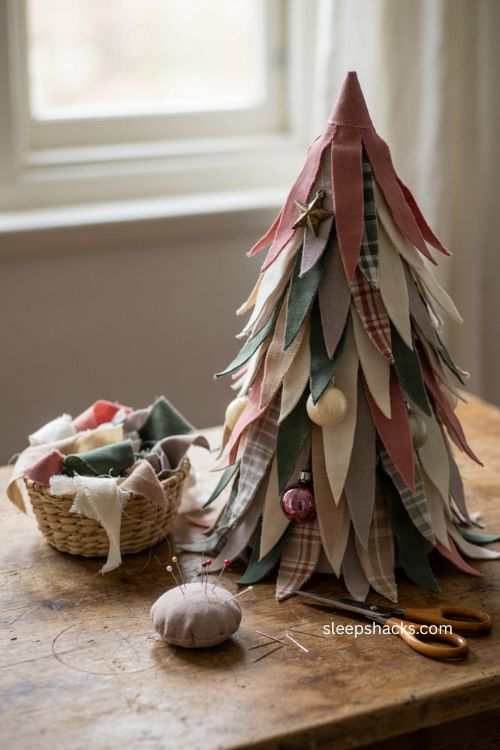
The trick to a full, realistic-looking tree is wrapping fabric strips the way shingles overlap on a roof. Start at the base with a strip pinned so a bit hangs over the bottom edge, then wind upward, angling each new layer slightly higher and pleating as you pin. Each layer should overlap the one below it so no foam peeks through. This shingled technique is what gives the finished tree its fluffy, dimensional shape instead of looking flat or stiff.
5. Use Fabric Scraps For A Patchwork Look
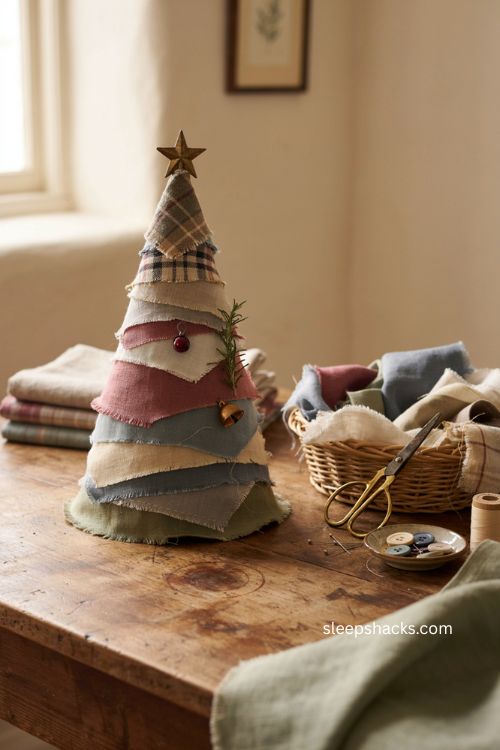
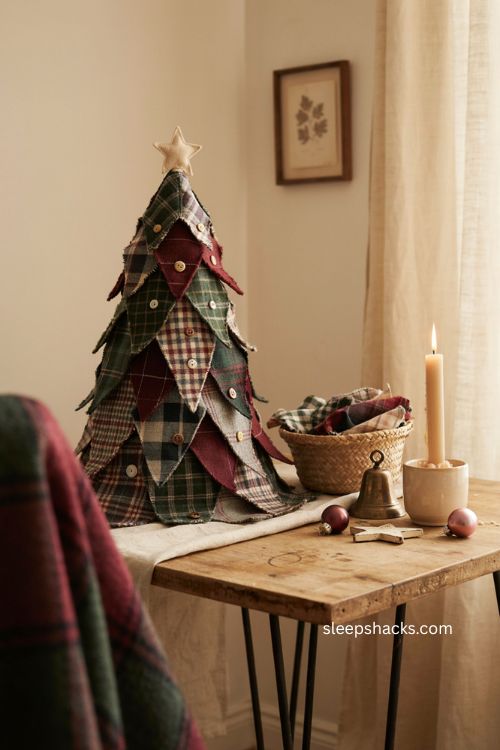
If you’ve got a basket of leftover fabric from other projects, this is the perfect place to use it. Mixing several coordinating scraps instead of one solid fabric gives the tree a cozy, patchwork character that feels a little more handmade than a single-fabric version. Group similar colors together in sections rather than scattering them randomly, so the tree still reads as cohesive from across the room. It’s also a satisfying way to use up fabric that’s too small for anything else.
6. Add A Tiny Tree Skirt
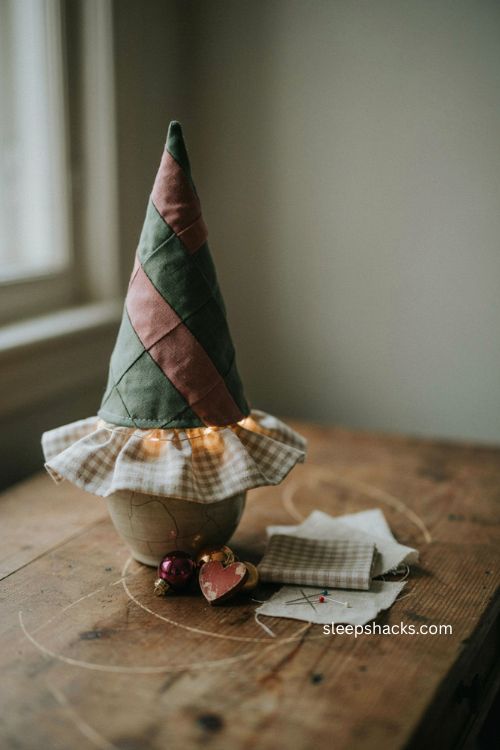
A small circle of muslin or gingham tucked around the base finishes the whole look and hides any rough edges where the tree meets its pot. Cut a simple circle a few inches wider than the base, snip a slit to the center so it slides around the stem, and pin it in place however looks best. Tucking a strand of battery-operated lights underneath the skirt adds a soft glow that peeks out from under the fabric, which is a small detail that gets noticed every time.
7. Mix Patterns For A Bolder Statement
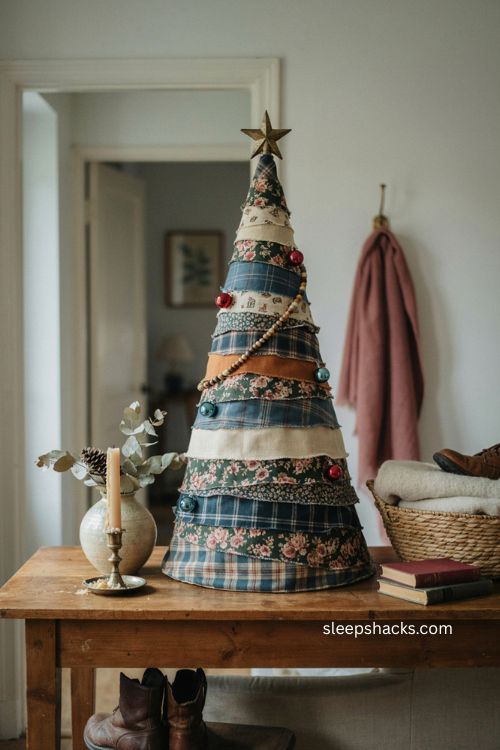
A tree made entirely from patterned fabric — florals, plaids, even a novelty print — turns into a real conversation piece rather than a background decoration. Choose two or three patterns that share a color family so the mix feels curated instead of chaotic. Alternating patterned strips with a solid neutral between them helps break up busier prints without losing the personality. This version works especially well as a statement piece on an entryway table where it’ll actually get noticed.
8. Go Mini For A Desk Or Shelf
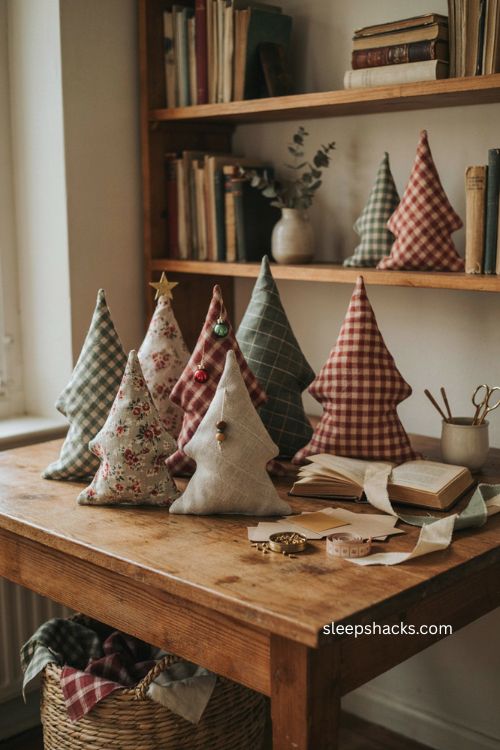
Not every fabric tree needs to be a centerpiece. A three or four-inch cone makes an adorable mini version for a work desk, a bookshelf, or a bathroom counter, and uses only scraps of fabric to complete. These tiny trees are also the easiest to make in bulk if you’re putting together a set for multiple rooms. Because they’re so small, even a wonky first attempt at wrapping still ends up looking charming rather than obviously imperfect.
9. Scale Up For A Floor Statement
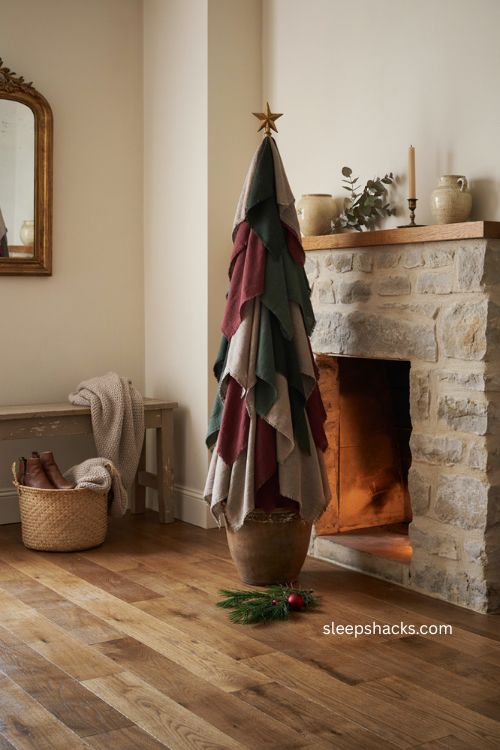
On the opposite end, a floor-standing version built on a two or three-foot cone makes a genuine style statement in an entryway or beside a fireplace. This size needs a slightly sturdier base, like a weighted planter filled with sand or dried beans, so the finished tree doesn’t tip. Wrapping this size takes more fabric and more patience, but the payoff is a piece that looks like it came from a boutique rather than a craft table.
10. Top It With A Handmade Star
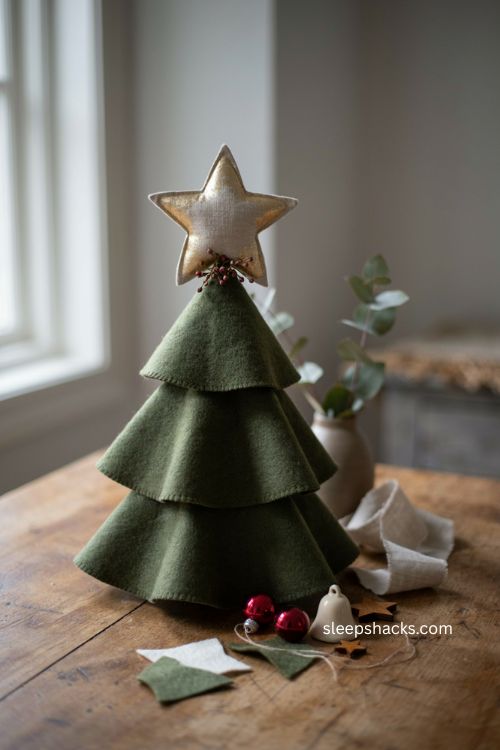
A simple star cut from cardstock, painted or covered in fabric, gives the tree a finished silhouette without much extra effort. Cutting two matching star shapes and gluing them together around a toothpick or floral pick creates a sturdy topper that pushes right into the foam. Metallic paint or a dusting of glitter on the star adds a bit of shine that contrasts nicely against a matte felt tree. This tiny detail is what makes the project look complete rather than unfinished.
11. Tuck In A Strand Of Mini Lights
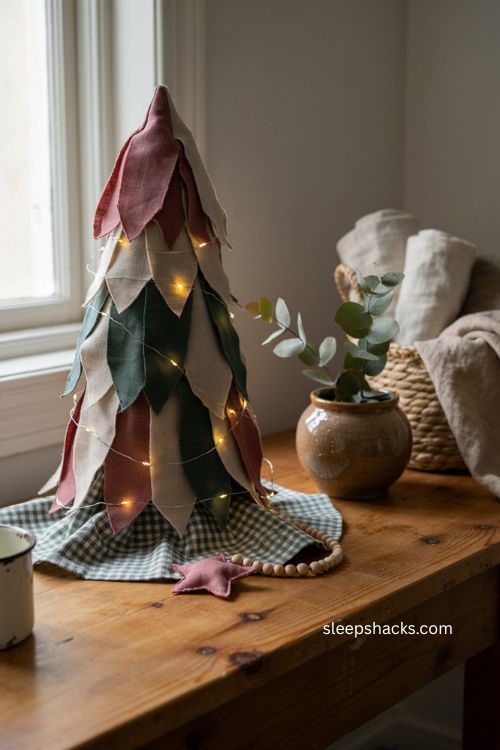
Battery-operated mini lights threaded gently between the wrapped layers add warmth without needing an outlet nearby. Weave the strand loosely as you go, or tuck it in after the tree is finished by sliding it between the fabric folds. Warm white bulbs give the most realistic glow, especially peeking out near the base under the tree skirt. Just be sure to use battery-powered strands rather than plug-in ones, since fabric this close to a heat source needs to stay cool.
12. Embellish With Buttons Or Pom-Poms
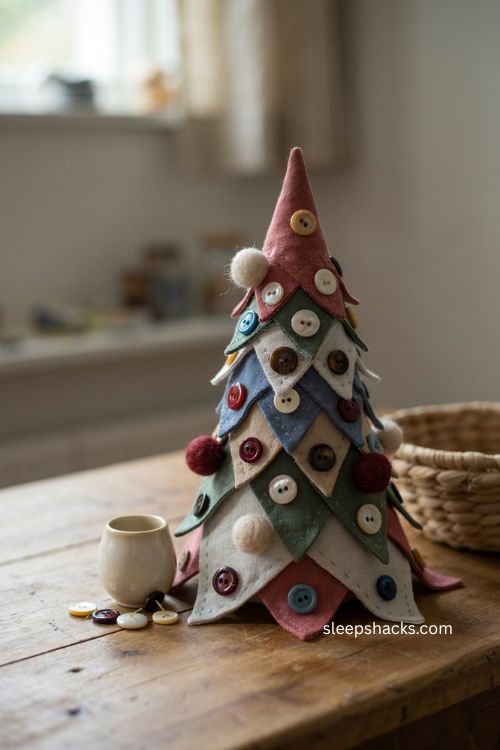
Small embellishments pinned or glued onto the finished tree give it extra personality without much added effort. Mismatched vintage buttons scattered across the layers mimic tiny ornaments, while a scattering of felt pom-poms adds a playful, textured pop of color. Keep embellishments to one or two types so the tree doesn’t start feeling cluttered — a handful of buttons in coordinating colors usually reads better than a dozen different trinkets competing for attention.
13. Finish The Edges With Ribbon Trim
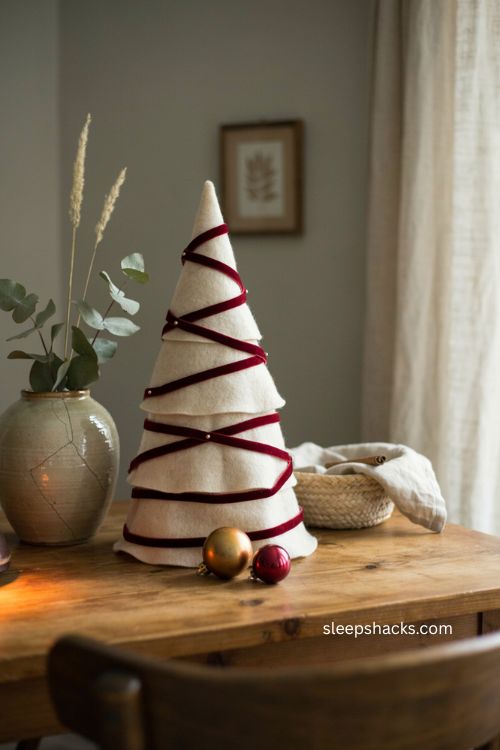
A thin ribbon spiraled loosely around the finished tree, pinned at intervals, adds a polished edge that ties the whole piece together. Grosgrain or velvet ribbon in a contrasting color works especially well against felt, giving the tree a slightly more formal, gift-wrapped feel. This is an easy way to dress up a plain single-color tree without adding a second fabric, and it takes only a few extra minutes once the base wrapping is done.
14. Style A Trio Of Different Heights
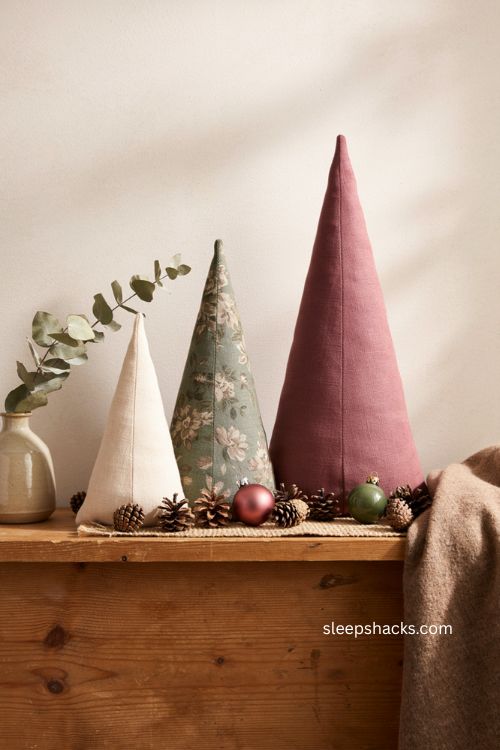
A single fabric tree looks sweet, but three of them grouped together in graduating heights make a much bigger visual impact on a mantel or console table. Vary the fabrics slightly between the three — maybe two in coordinating solids and one in a subtle print — so they read as a set rather than three unrelated pieces. Clustering them close together with a few pinecones or ornaments scattered at their base fills out the arrangement nicely.
15. Make A Batch As Handmade Gifts
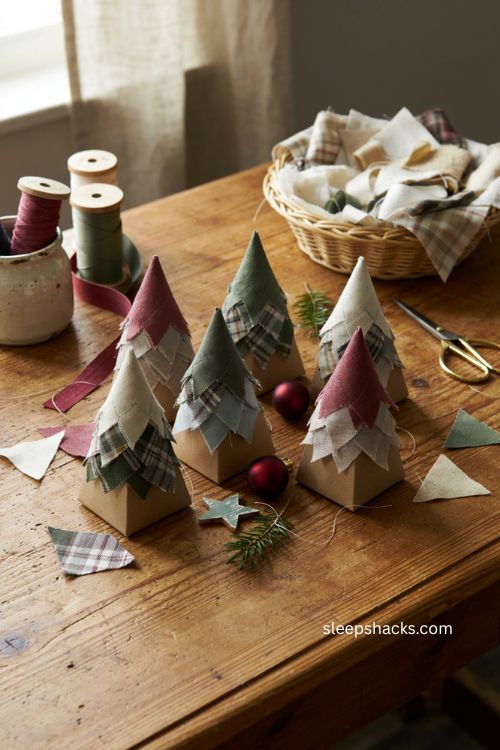
Once you’ve made one, the process goes quickly, which makes this an easy project to repeat as small handmade gifts. A mini tree tied with a ribbon and tucked into a gift bag feels far more personal than something bought off a shelf, and the materials cost is low enough to make several without much investment. Teachers, neighbors, and coworkers tend to love a small handmade touch like this during the holidays, and it’s a nice way to use up fabric scraps before the new year.
Final Thoughts
What makes fabric christmas trees diy projects so worth trying isn’t just the finished result — it’s how forgiving the whole process is. There’s no perfect way to pleat a strip of felt, and a slightly wonky wrap only adds to the handmade charm. Start with one small tree to get a feel for the wrapping technique, then experiment with scraps, patterns, and sizes once you’re comfortable. By the time the holidays roll around, you might find yourself with a whole little forest of them scattered across shelves, tables, and gift bags.
Frequently Asked Questions
Q: What fabric works best for a DIY Christmas tree?
Felt is the easiest to work with since it holds its shape and doesn’t fray, though patterned cotton scraps work well for a patchwork look.
Q: Do I need to sew a fabric Christmas tree?
No — most versions are held together entirely with straight pins, making it a beginner-friendly, no-sew project.
Q: How much fabric do I need for a fabric Christmas tree?
A quarter to a half yard typically covers a medium cone around 12 to 13 inches tall, though mini versions use only small scraps.