

A Christmas arch is the single fastest way to make a house feel like the holidays have arrived. Not a tree, not a wreath. An arch. It frames a doorway, a porch, or a hallway, and it tells everyone who walks through that something special is happening.
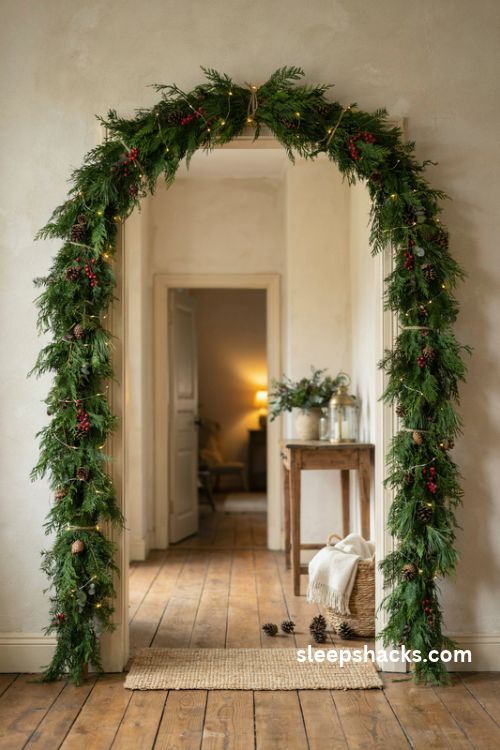
The best part is that you can build one yourself, usually for under a hundred dollars and in a single afternoon. You don’t need power tools or fancy skills, just PVC pipe, a metal frame, or even a tension rod, plus garland and lights. Here are 15 DIY arch ideas, indoor and outdoor, to match every space and skill level. Grab a tape measure and pick your favorite.
1. Tension Rod Garland Arch
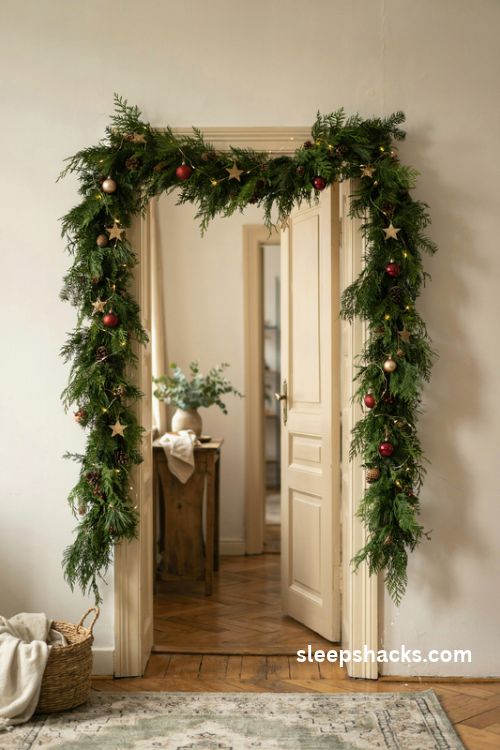
This is the easiest arch you’ll ever make. Slide a tension rod into the top of a doorway, thread a full evergreen garland over it, and let both ends droop into soft, uneven curves. Add a few ornaments and a small star garland, and you’re done in about twenty minutes.
Because the rod holds itself in place by pressure, there are no nails or adhesives involved, which makes it ideal for rentals. Look for a rod rated for ten pounds or more, and add battery-powered twinkle lights for a soft evening glow. Secure the garland to the rod with green floral wire so it doesn’t slide. Hang it on the inside of the frame so the door can still open outward.
2. PVC Pipe Front Porch Arch
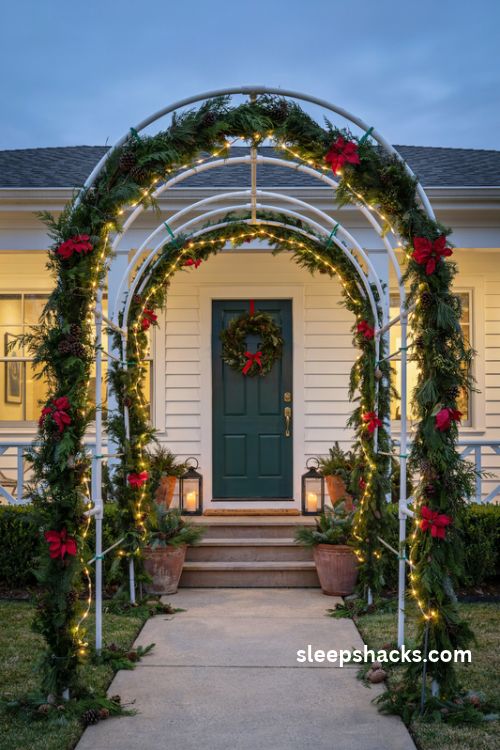
PVC pipe is the secret behind many of those showstopping outdoor arches. Use one-inch and one-and-a-quarter-inch pipes, slide the thinner pipe into ground-mounted pieces, and bend it into a graceful curve over a sidewalk or front steps.
Wrap the frame in garland with zip ties, then add rope light and a few clipped-on poinsettias for color. The total cost is often under a hundred dollars, depending on size. Anchor the base with rebar stakes pushed into the soil so wind doesn’t topple it. Test the fit before you decorate, and cut zip tie tails short so nobody scratches a hand on the way through.
3. Metal Arch Frame with Evergreen
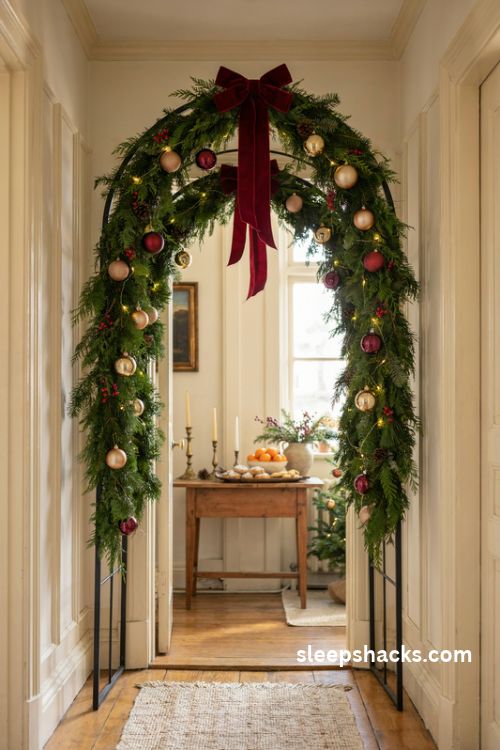
A store-bought metal arch, often sold for weddings or garden use, becomes a stunning Christmas piece with minimal effort. Wrap evergreen garland up one side, over the top, and down the other, securing it with green pipe cleaners every few inches.
Tie the arch to the wall with a wide ribbon so it stays steady, and hide the knots behind a big bow. Add oversized ornaments in clusters, and let ribbon streamers fall from the top. Place it in a hallway, between rooms, or in front of a table of treats. Hot glue loose ornaments in place if you have pets or kids, and fluff the garland until it looks full and soft. The frame folds flat for storage.
4. Ornament Cascade Arch
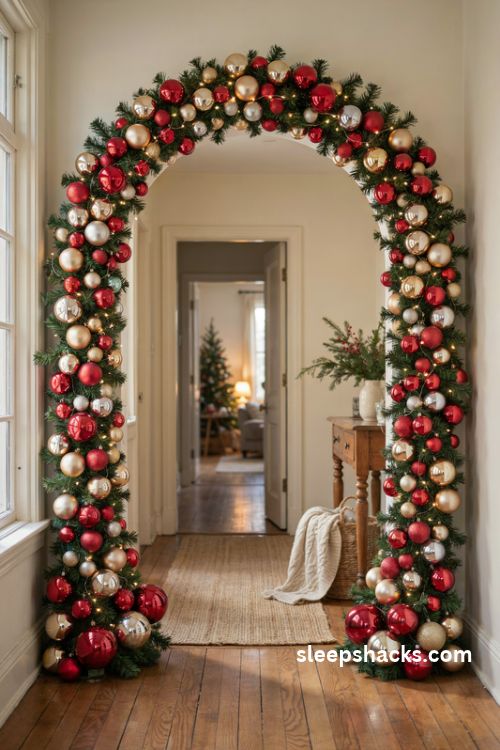
Build an arch made almost entirely of ornaments. Start with a PVC frame, drill small holes along its length, and thread zip ties through them so you can attach inexpensive garland and a generous scatter of shatterproof ornaments.
Dollar store ornaments in red, gold, and silver keep costs low, and removing the caps lets you attach them directly with a bit of glue or wire. Mix sizes, and cluster the largest ones near the base for visual weight. The finished arch can hang at a porch entrance or stand in a hallway. Cut zip tie ends short and check that each ornament is firmly attached so nothing falls on guests passing underneath. Plan an afternoon of work.
5. Rope Light and Poinsettia Arch
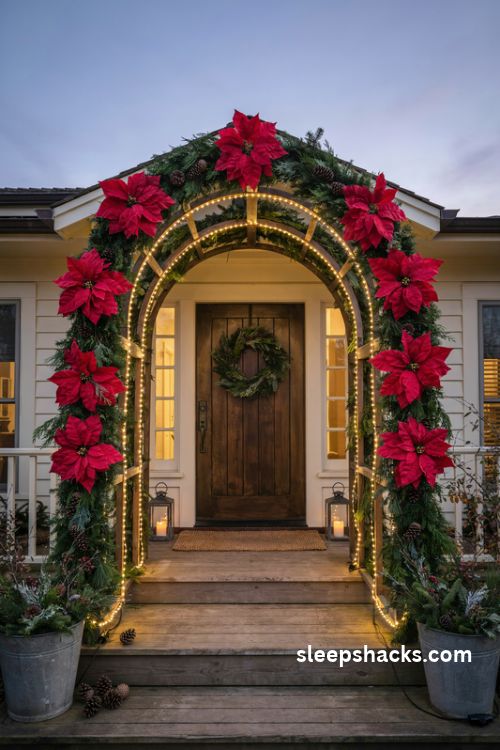
Rope lights give an arch a clean, glowing outline that you can see from the street. Zip tie a strand along your frame, wrap garland loosely over it, and clip large faux poinsettias at even intervals.
White rope light looks crisp and classic, while warm white feels softer and more traditional. Space the poinsettias about a foot apart for a rhythmic look, and tuck a few pinecones between them. Choose three or four large blooms per side. Plug the arch into a timer so it switches on at dusk automatically. Use outdoor-rated lights if the arch lives outside, and keep cords tidy by running them along the base of the frame.
6. Giant Ornament Garland Arch
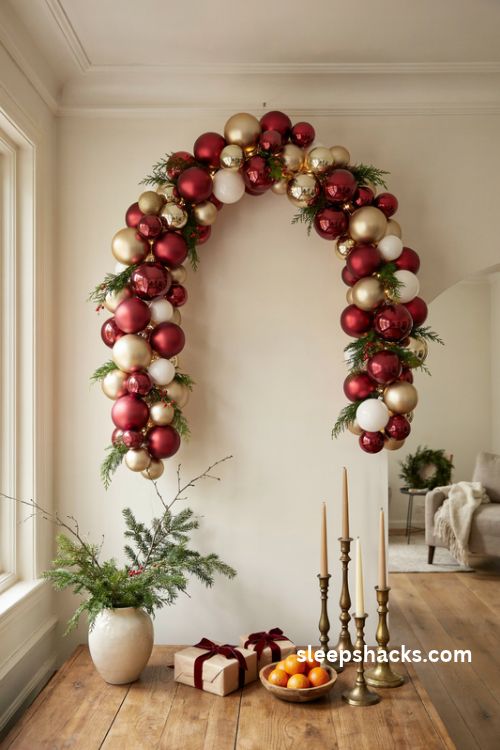
A balloon garland made of ornaments instead of balloons is a trendy twist. Attach clusters of different-sized plastic ornaments to a flexible strip or long wire, and curve the whole thing into an arch above a door or table.
Choose two or three colors, such as red, gold, and cream, and vary the sizes from two inches to six inches for a full, organic shape. Fill gaps with faux greenery and a few berry picks. Hot glue works well on plastic ornaments, and a plastic arch kit can hold the weight. Plan on roughly fifty ornaments for a four-foot arch, and keep a few spares handy. It makes a gorgeous backdrop for photos.
7. Pool Noodle Candy Cane Arch
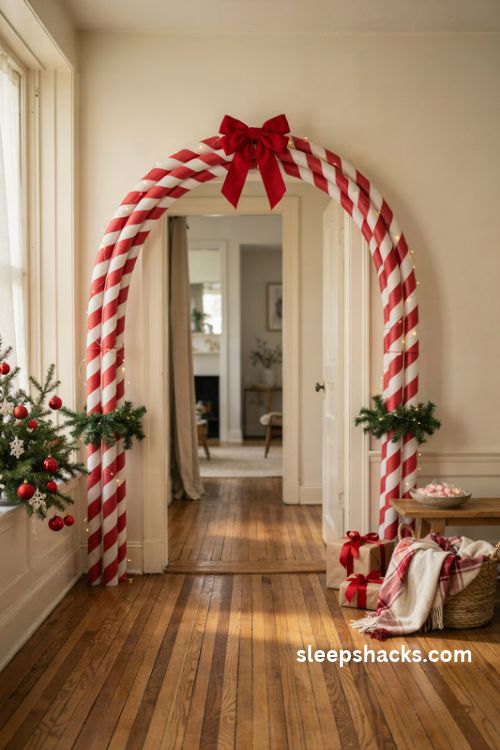
Pool noodles are lightweight, cheap, and surprisingly useful. Bend two or three noodles into an arch shape, connect them with a PVC or wire core, and wrap the whole thing in red and white ribbon to create a giant candy cane archway.
Cover joints with extra ribbon or garland, and add a big red bow at the top. It’s perfect for a kid’s party or a playful front hall, and it costs only a few dollars per noodle. Slide a rigid wire through the center so the noodle keeps its curve, and tape the ends together securely. Indoor use is best, since noodles can fade in direct sun. Add a white light strand for extra sparkle at night.
8. Garden Arbor Christmas Makeover
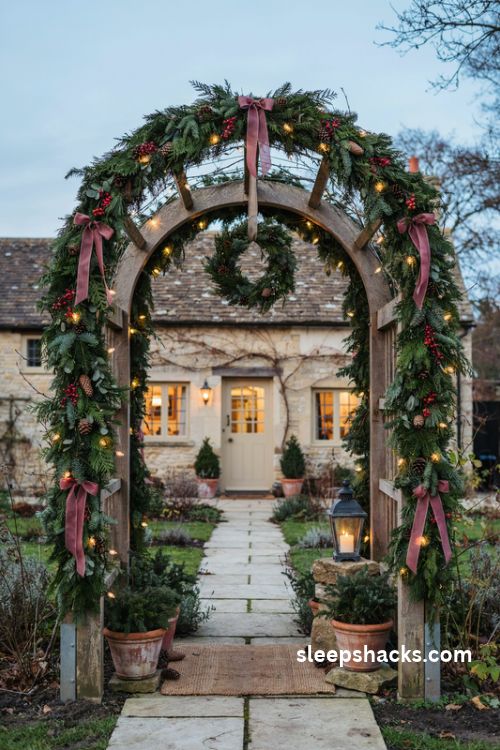
If you already own a garden arbor or trellis, you’re halfway there. Move it near your door or into the entryway, and weave garland, lights, and ribbon through its slats until it looks like a wintry gateway.
Wooden arbors give a rustic feel, while metal ones feel more elegant. Dust off cobwebs first, then attach the garland with floral wire, and add a lantern or small wreath at the center for a focal point. Pinecones and berry sprigs make a natural accent. Outdoors, secure the base with stakes and use waterproof lights. When the holidays end, remove the decorations and your arbor goes back to the garden, ready for spring.
9. Half Hoop Wreath Arch
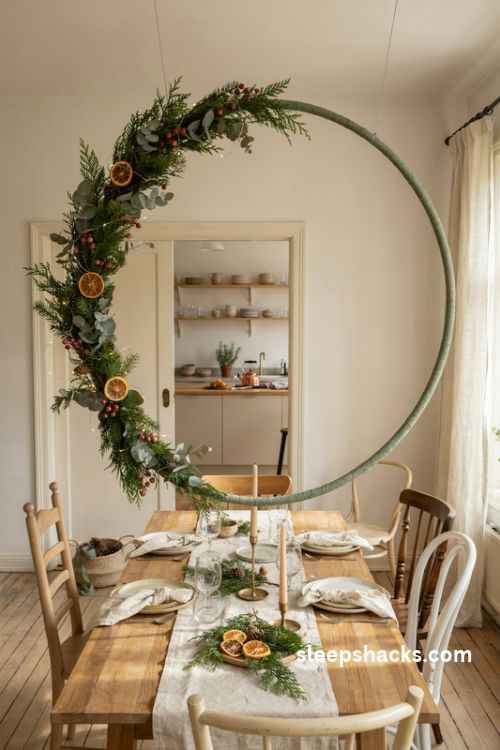
Hula hoops make a surprisingly good base. Cut one in half with a utility knife or use a full hoop mounted above a door, then wrap it in garland, ribbon, and lights to create a wide, graceful curve.
Wrap the hoop in floral tape first so the garland grips it. Add dried citrus slices, berry sprigs, and eucalyptus for a natural look, or ornaments and bows for something brighter. A hoop suspended from the ceiling with clear fishing line looks like it’s floating, which feels magical above a dining table. Choose a hoop around thirty-six inches wide, and make sure it hangs level before decorating. Keep the garland light so the hoop doesn’t tilt.
10. Snowflake and Icicle Light Arch
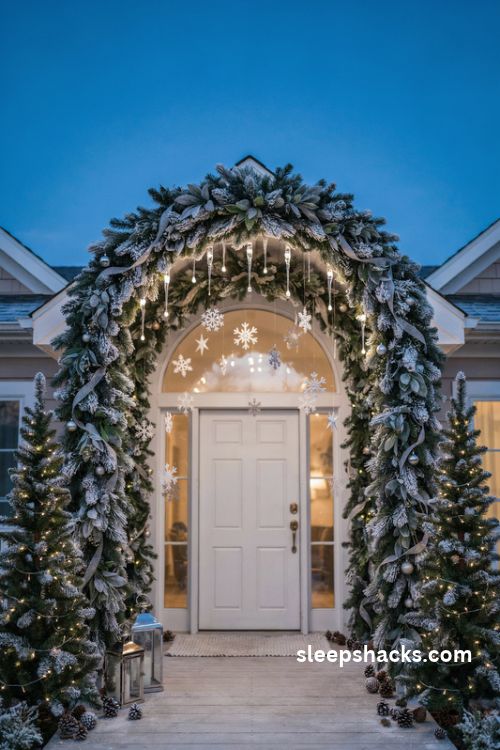
Create a frozen entrance with white snowflakes, icicle lights, and silvery garland. Hang icicle strands along the arch so they drip down like melting ice, and add paper or acrylic snowflakes at different heights.
Cool white lights give the most convincing wintry look. Stagger the strand lengths for realism, and use clear hooks or small cup hooks for hanging. Wrap the top with frosted garland for soft texture, and add silver ribbon for shine without clutter. Pair this with a white doormat and a pair of frosted trees for a complete cold-weather scene. Plug the lights into a surge protector for safety, and keep decorations lightweight.
11. Ribbon and Bow Cascade Arch
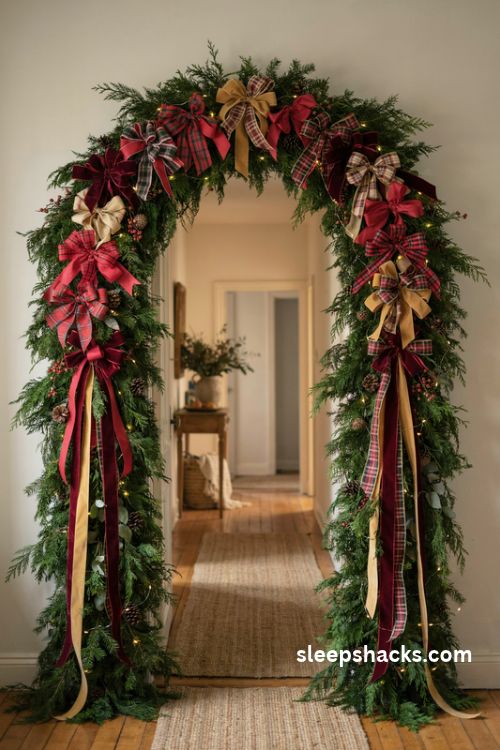
When you want maximum drama for minimum cost, ribbon does the work. Tie dozens of wired bows in red, plaid, and gold along a garland-covered frame, and let long tails fall like waterfalls on each side.
Cut ribbon in lengths of about thirty inches for bows with generous loops, and attach each with floral wire. Make the bows ahead while watching a show. Use two or three different widths for visual interest, and add velvet ribbon in a deep color for richness. Spread bows evenly, but vary the sizes so the arch doesn’t feel too uniform. Press the ribbon flat before tying, and trim tails at an angle for a polished finish.
12. Cedar and Citrus Arch
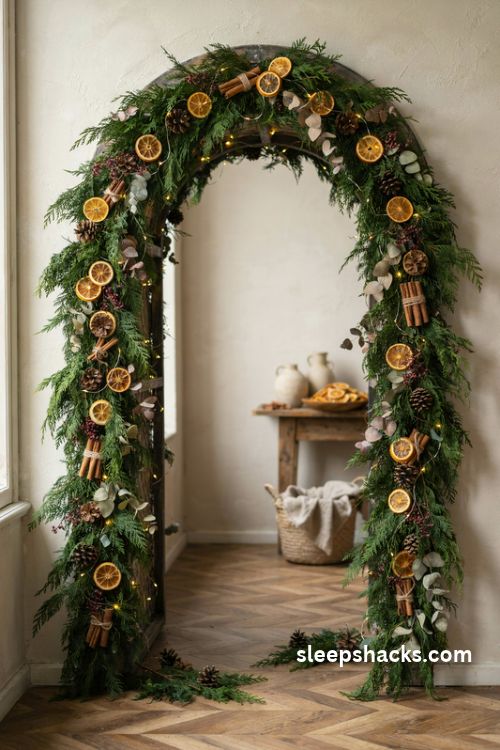
Fresh cedar garland, dried orange slices, and cinnamon sticks make an arch that smells as good as it looks. Weave them together on a metal or wooden frame, and add a few pinecones and berry picks for contrast.
Slice oranges about a quarter inch thick, then dry them in a low oven, around 200 degrees, for about three hours until firm. String them with twine or wire them onto the garland. The scent lasts a few weeks indoors. Mist the cedar lightly every few days to keep it fresh, or swap in faux greenery for long-lasting use. Warm amber lights bring out the rustic tones of the citrus.
13. Hallway Light Canopy Arch
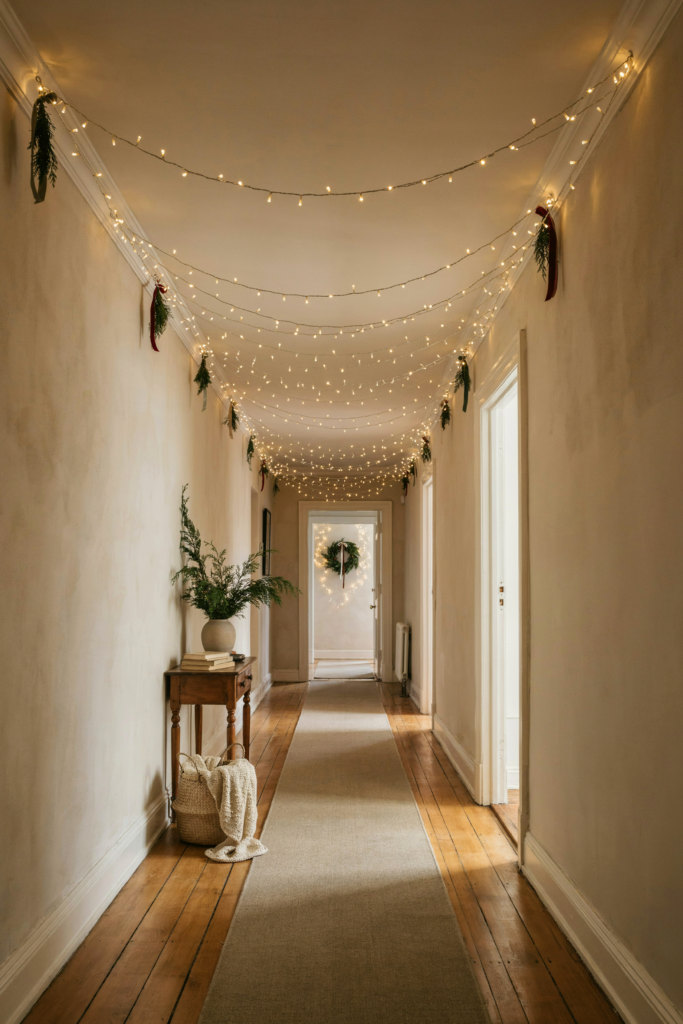
Turn a plain hallway into a glowing tunnel. Hang strands of warm white fairy lights from small hooks along the ceiling in repeating arcs, so the lights dip and rise like soft waves.
Space the hooks about two feet apart, and use removable adhesive hooks if you rent. Add small pieces of greenery or ribbon at each hook to disguise the attachment points. Battery lights with a timer mean no cords across the floor. It’s a gentle, romantic look that works in apartments and long entry halls, and it takes under an hour. Choose a warm tone throughout, and test the lights before hanging so you don’t have to fix strands in the air.
14. Gingerbread Candy Arch
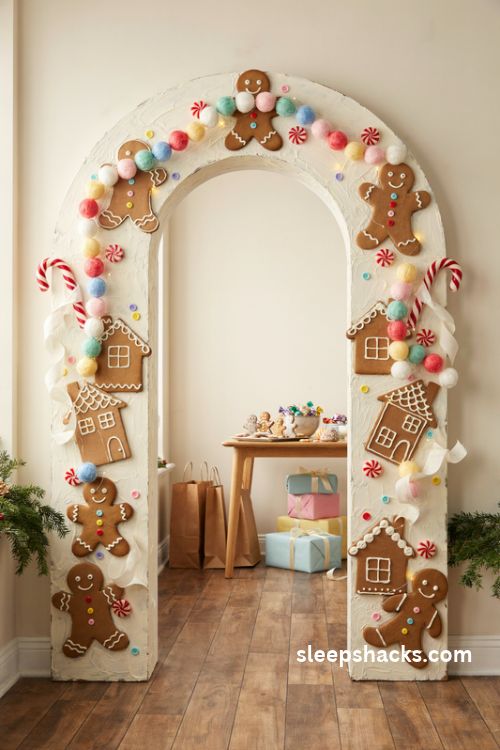
Build a sweet entrance using cardboard cut into gingerbread shapes, giant faux candy pieces, and frosting-white paint squiggles. Mount the pieces on a simple frame, and the doorway becomes the entrance to a candy house.
Kids can help paint cardboard shapes in brown and white, then glue on gumdrop-colored pom poms and button candies. Use poster board or foam board for lightweight pieces, and seal painted shapes with clear spray so they hold up. Attach everything to a PVC or wooden frame with hot glue and zip ties. Add a gumdrop garland along the top. This is a perfect party or classroom project, and plan an afternoon for painting and drying.
15. Photo Backdrop Arch
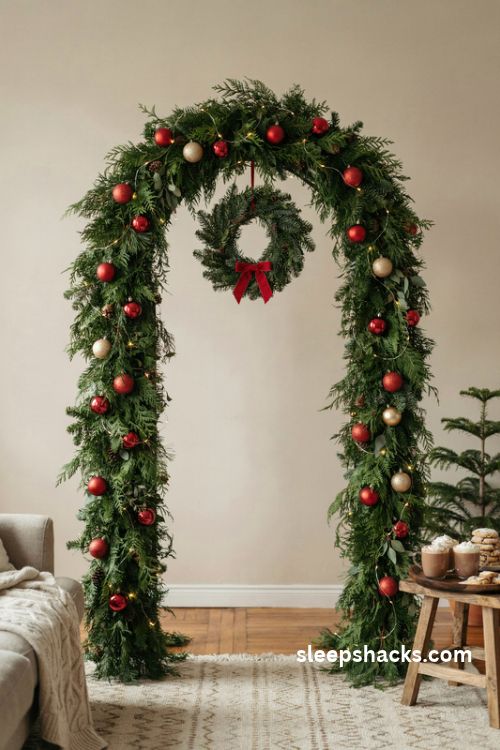
Make an arch built for photos. Set a sturdy frame against a plain wall, cover it in full greenery and ornaments, and add a hanging sign or wreath at the center. Place warm lights behind the camera and one soft strand around the arch.
Leave about three feet of open floor in front so groups can stand together, and place a rug underneath for warmth. Use matte decorations to avoid camera glare, and keep colors consistent, like red and gold or white and silver, so photos look cohesive. A small table beside the arch can hold hot chocolate and cookies. Test the lighting with a few practice shots before guests arrive. After the party, the frame folds away easily.
Final Thoughts
Here’s your one small job for this week: pick a spot and measure it. Walk to the doorway, porch, or hallway where an arch would look best, and write down the width and height on your phone.
That single number decides almost everything, from the materials you’ll buy to the garland length you’ll need. Once you have it, choose one idea from this list and put it on your shopping list tonight. Keep it simple the first time. Most of these projects take an afternoon, which means you could be standing under your own arch by the weekend, with the lights on and the kettle warm.
Frequently Asked Questions
Q: What do I need to make a DIY Christmas arch?
A frame such as PVC pipe, a metal arch, or a tension rod, plus garland, lights, ribbon, and zip ties or floral wire to hold everything in place.
Q: How much does a DIY Christmas arch cost?
Most projects run between twenty and one hundred dollars, depending on the size and decorations. Dollar store ornaments and reused garland keep costs low.
Q: How do I keep an outdoor Christmas arch from blowing over?
Anchor the base with stakes or rebar driven into the ground, or weigh it with sandbags hidden behind garland. Use outdoor-rated lights and avoid heavy pieces on the top.