

There’s a particular kind of joy in opening the mailbox in December and finding an envelope that clearly took someone time and care. A handwritten card sitting between the catalogs and the bills has a way of stopping you for a second — you notice the paper, the little details, the thought behind it. That’s really the whole appeal of good Christmas card ideas: they don’t need to be perfect, they just need to feel like a real person made them. Whether you’ve got glitter, glue, and an afternoon to spare, or just a stack of old magazines and twenty free minutes, there’s a design ahead that will fit right into your December.
1. Snow Globe Photo Card
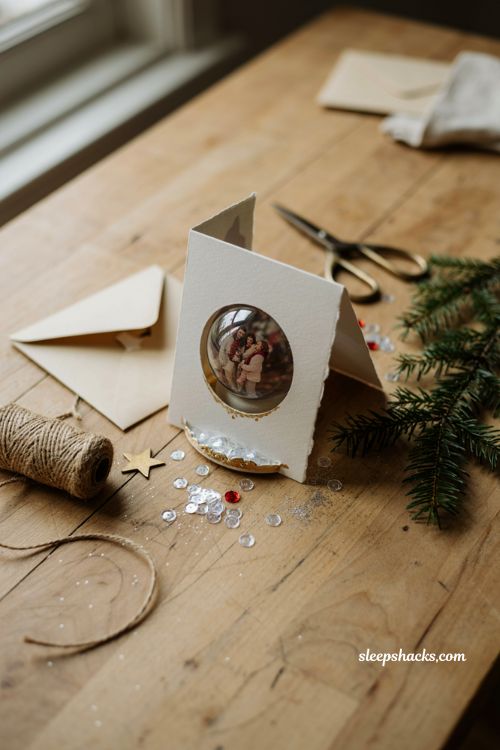
Start with a plain fold-over card and cut a small circle out of the front to act as a snow globe window. Slide a favorite photo behind the opening, then draw a simple curved base underneath it in silver or gold marker. The detail that makes this one feel special is a scattering of loose sequins or fine glitter tucked around the photo before you glue the layers shut, so they shift and catch the light every time someone picks the card up. It turns a flat photo card into something people actually want to keep on display, long after the holidays wrap up.
2. Fabric Scrap Patchwork Card
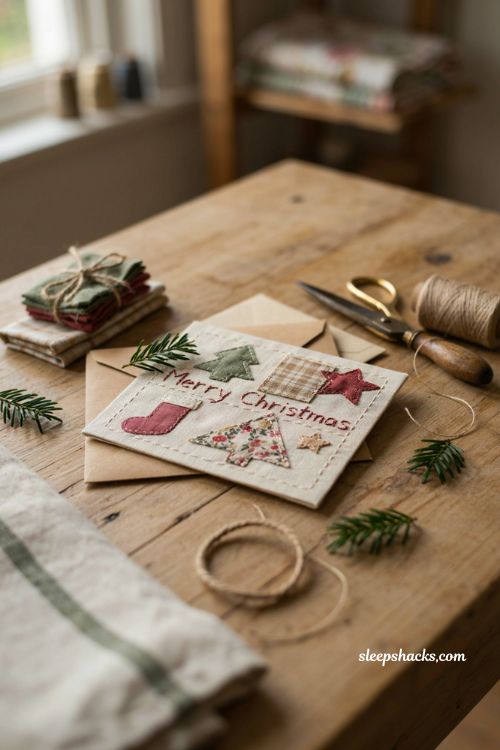
Dig through your sewing basket or an old shirt you were going to toss, because small fabric scraps make surprisingly rich-looking cards. Cut simple shapes — a tree, a star, a stocking — from a few coordinating prints, then glue them onto plain cardstock in a patchwork layout. Leave a little fraying at the fabric edges instead of trimming it perfectly clean; that rough texture is what gives the card its handmade charm. A single line of running stitch along the border, even a wobbly one, adds a stitched-together warmth that printed cards can’t fake.
3. Hand-Embroidered Thread Card I
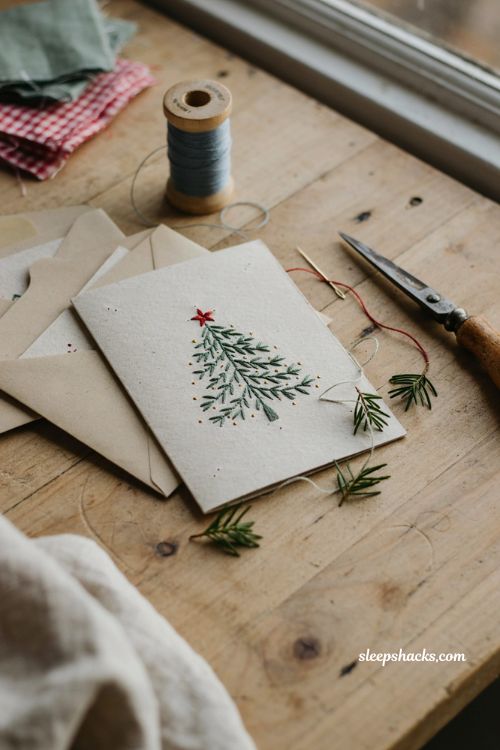
f you already know your way around a needle, embroidery floss turns plain cardstock into something that looks almost too nice to mail. Punch small guide holes with a pushpin first, tracing a simple outline like a tree, snowflake, or star, then stitch through the holes with two or three strands of floss in a color that pops against the paper. Keep the design small and a little loose rather than perfectly even. A slightly imperfect stitch line reads as handmade in the best way, and it holds up far better in an envelope than anything glued or 3D.
4. Watercolor Wreath Card
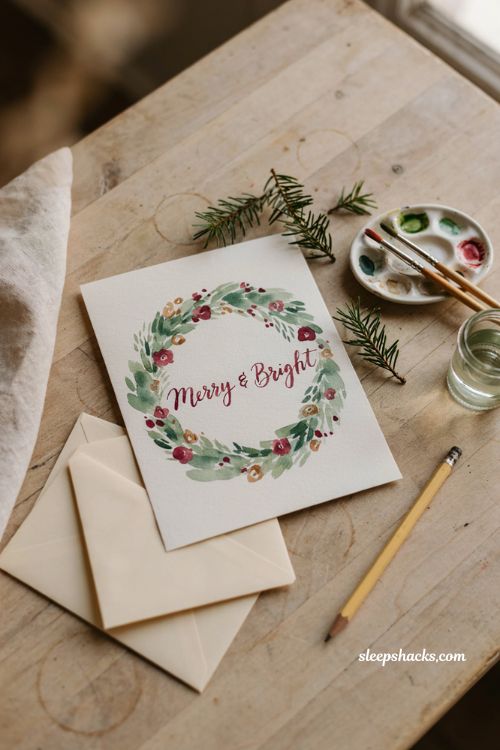
A loose watercolor wreath is one of the fastest ways to make a card look intentional rather than rushed. Paint a rough circle of green in two or three shades, letting the colors bleed into each other a bit instead of trying to control every brushstroke, then dot in a few red or gold “ornaments” once the base layer has dried. The unevenness is actually the point here — a slightly uneven, watery wreath looks far more like art than a stiff, perfectly traced one. Add the greeting in simple handwriting once everything is completely dry so the ink doesn’t smear.
5. Washi Tape Tree Card
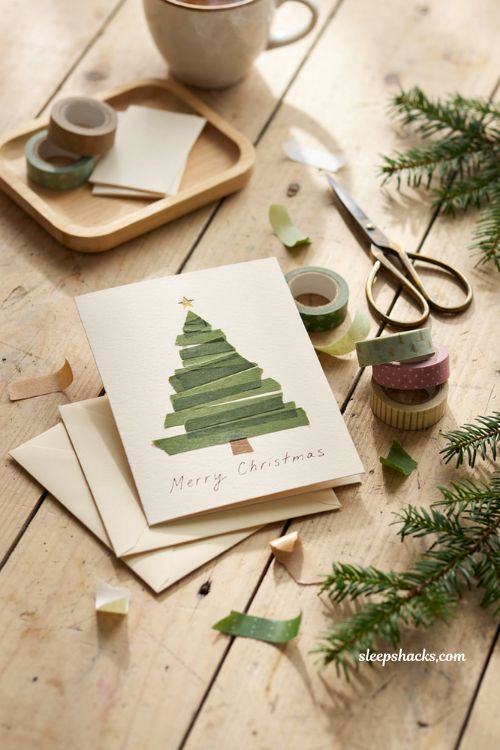
This is the one to reach for when you’re short on time but still want something that looks put-together. Layer strips of green washi tape in decreasing lengths down the front of a plain card to form a triangle tree shape, then finish with a small strip of brown at the base for a trunk. A tiny gold star sticker or a hand-drawn star on top finishes it off. Because there’s no drying time and almost no mess, this design is easy to make a whole stack of in one sitting, which makes it a good option once your card list gets long.
6. Fingerprint Wreath Card
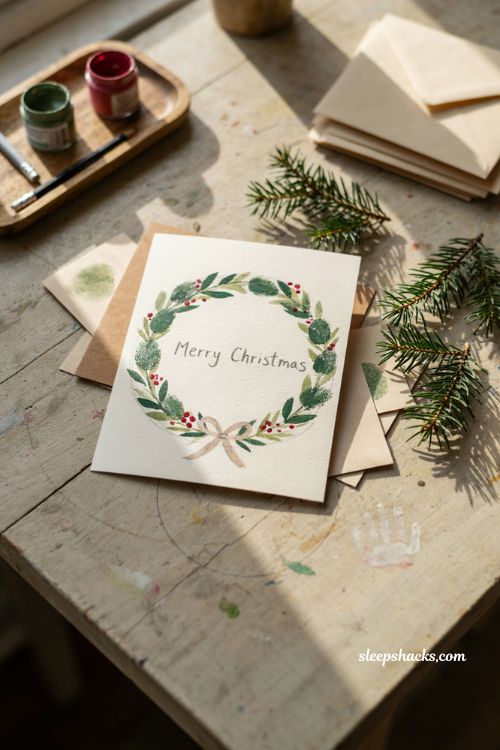
This one is built for small hands and short attention spans. Dip little fingertips in green paint and press them in a circle on the card front to build up a wreath shape, then let it dry before adding a few red fingerprint “berries” and a small ribbon drawn or glued at the bottom. Sketching a faint pencil circle as a guide beforehand keeps the wreath looking round instead of scattered. It’s messy in the best way, and it produces a keepsake that grandparents in particular tend to hold onto for years.
7. Pop-Up Poinsettia Card
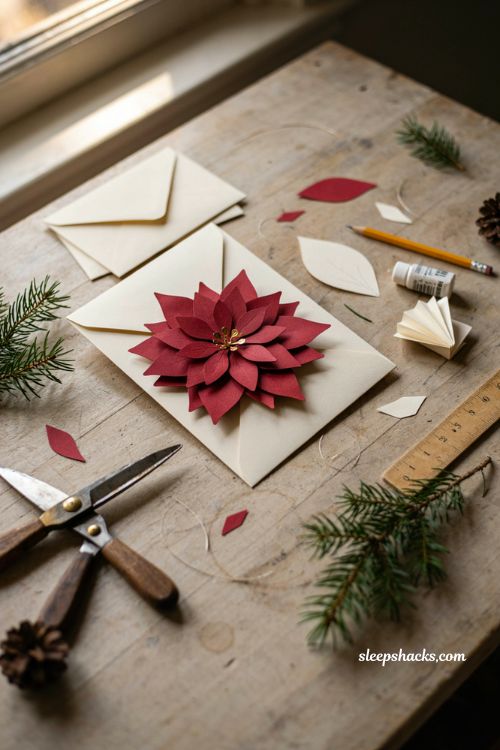
For a card with a little more wow factor, a pop-up poinsettia adds a 3D moment when the card is opened. Cut several layered petal shapes from red or white cardstock, fold small accordion tabs on the back of each layer, and attach them to the inside of the card so the flower springs forward as it opens. It takes patience to line up the tabs evenly, so it helps to test the fold on scrap paper first. Once you’ve got the technique down, though, you can reuse the same template for the whole batch.
8. Photo Wreath Card
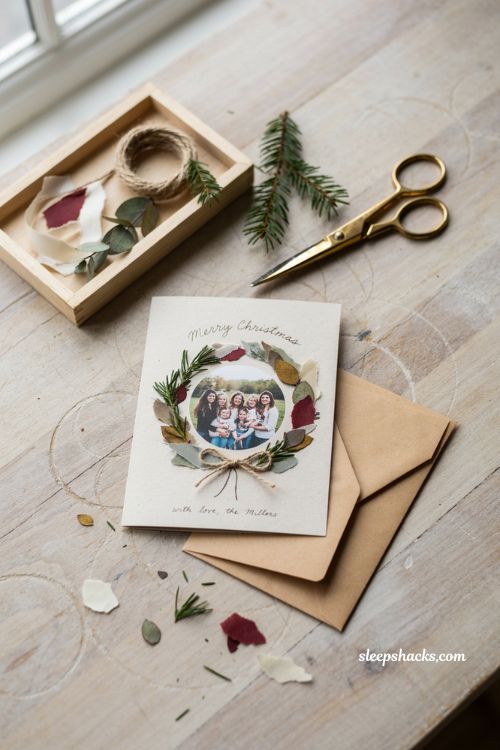
Instead of a standard rectangular photo card, cut your favorite family photo into a circle and glue it to the center of the card front. Ring the photo with a wreath made from small snips of dried greenery, ribbon scraps, or even torn paper leaves, gluing them so they slightly overlap in one direction like a real wreath. A small bow at the bottom of the circle finishes the look. This one is worth the extra step if you’re already printing photo cards, since it instantly looks more custom than a plain printed photo strip.
9. Button Snowman Card
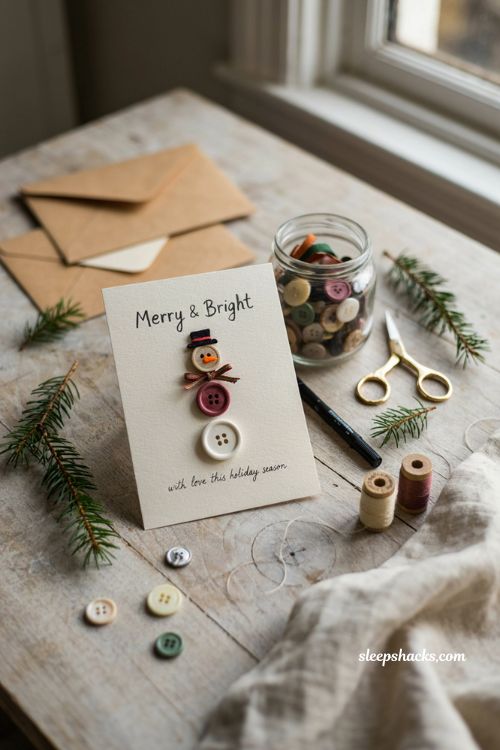
Buttons are an easy way to add texture and dimension without much effort. Glue three buttons of graduating size down the front of the card to form a snowman’s body, then add a tiny black top hat cut from felt or cardstock and a scrap of ribbon for a scarf. A fine-tip marker fills in the coal eyes and carrot nose. Raiding a jar of mismatched buttons for this project is part of the fun, since no two snowmen end up looking quite the same.
10. Upcycled Magazine Collage Card
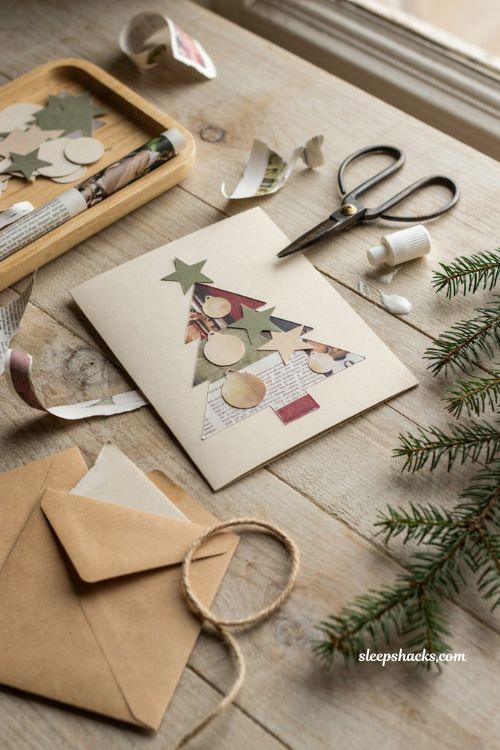
Before you recycle last month’s magazines or catalogs, tear out a few pages with interesting colors or textures. Cut simple holiday shapes like trees, stars, or ornaments from the pages and layer them onto plain cardstock for a collage effect. Sticking to a limited color palette, even just red, green, and gold accents, keeps the finished card from looking too busy despite the mismatched paper sources. It’s one of the more eco-friendly options here, since you’re giving paper that would otherwise be tossed a second life as a keepsake.
11. Year-in-Review Card
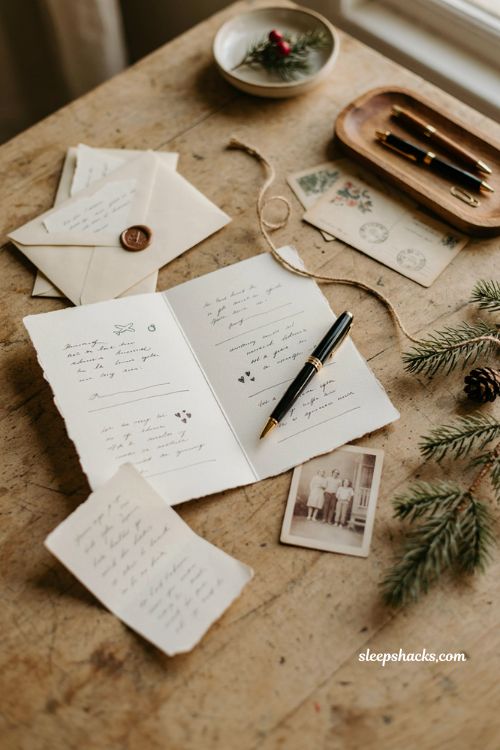
Rather than a generic greeting, use the inside of the card as a mini family update. Jot down three or four short highlights from the past year — a move, a trip, a milestone — instead of writing a full page of dense text that people skim past. Handwriting it, even briefly, feels far more personal than a printed newsletter insert. Friends and family who only hear from you once a year tend to genuinely appreciate this small window into what’s actually been happening, rather than a generic “wishing you the best” line.
12. Family Recipe Card
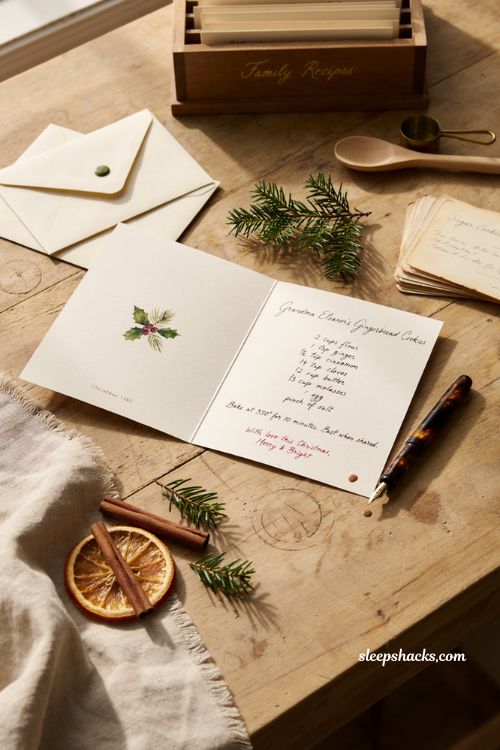
If there’s a dish you’re known for during the holidays, write it out by hand on the inside of the card as your gift to the recipient. Keep it short and focused, just the ingredient list and a few key steps, and consider adding one small personal note about why the dish matters to your family. Over a few years of sending these, a loved one can end up with a whole handwritten collection of your holiday recipes. It’s a card that gets used again every December instead of thrown away after the season ends.
13. Ornament Keepsake Card
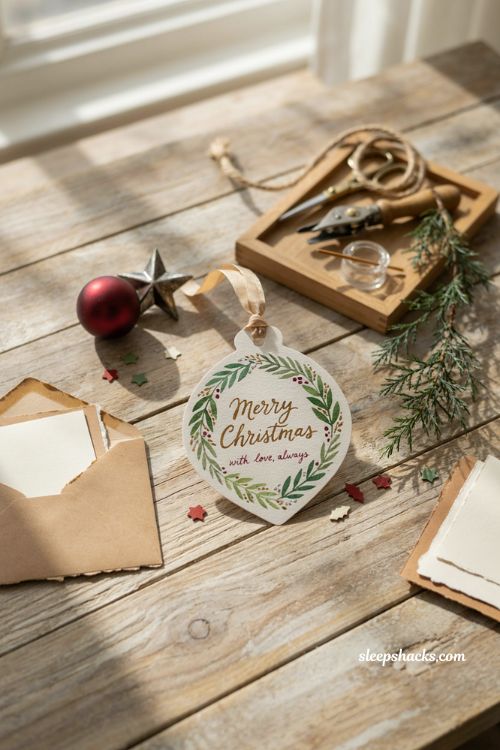
Design your card so the front panel can be cut free and turned into an actual tree ornament once the holidays are over. Punch a small hole near the top before you finish decorating it, then thread a loop of ribbon or twine through once everything is dry. Sturdier cardstock works best here, since it needs to hold up hanging on a tree in future years rather than just sitting flat in an envelope. It’s a small way of making sure your card doesn’t just get read once and recycled.
14. Scratch-Off Surprise Card
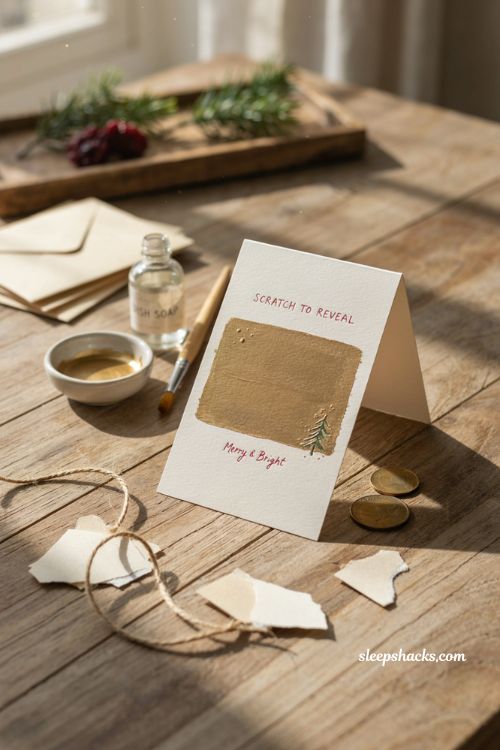
Add a little mystery by hiding a short message or a small illustration under a homemade scratch-off panel. Mix a small amount of dish soap into acrylic paint, paint a rectangle over your hidden message, and let it dry completely before mailing. The recipient scratches it away with a coin to reveal what’s underneath, whether that’s a simple “Merry Christmas” or a small doodle. It takes a bit of trial and error to get the paint mixture right, so it’s worth testing one card before you commit to making a whole batch.
15. Puzzle Piece Card
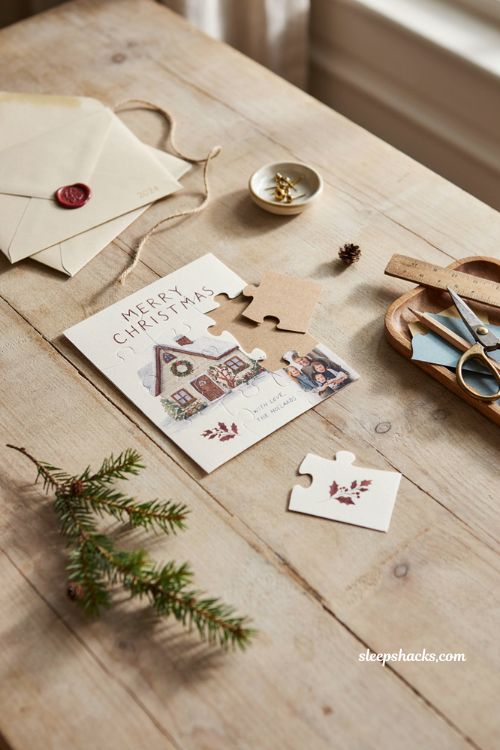
For a card that turns into a small activity, print or draw your design onto sturdy cardstock, then cut it into six or eight simple puzzle pieces before mailing them in an envelope together. The recipient has to piece the picture back together to see the full greeting or photo underneath. Keeping the cut lines simple — straight edges rather than intricate curves — makes the puzzle easier to reassemble without frustration. It’s a fun option for kids on your list or for anyone who’d get a kick out of a card that isn’t just opened and set aside.
Final Thoughts
You don’t need to make all fifteen of these to have a meaningful stack of cards this year — pick the one or two that actually match the supplies you already have on hand. A washi tape tree takes minutes; a pop-up poinsettia takes a whole afternoon, and both are equally worth sending. Not every idea here will suit every person on your list, but even a small handful of handmade cards mixed in with store-bought ones tends to stand out the most in someone’s mailbox. That’s really the point of making your own in the first place.
Frequently Asked Questions
Q: What is the cheapest way to make Christmas cards at home? Plain cardstock, old magazines, and craft supplies you already own — like buttons, ribbon scraps, or leftover paint — can cover almost every idea on this list without buying anything new.
Q: How far in advance should I start making DIY Christmas cards? Starting in mid-November gives you enough time to make a full batch without rushing, especially for designs like embroidery or pop-up cards that take longer to assemble.
Q: What supplies are useful to have on hand for homemade Christmas cards? A stack of plain cardstock, basic craft glue, scissors, a few paint colors, and some ribbon or washi tape will cover the majority of designs without needing anything specialized.