

A Halloween village is one of those decorations that completely changes how a room feels once the lights go down and every tiny window starts to glow.
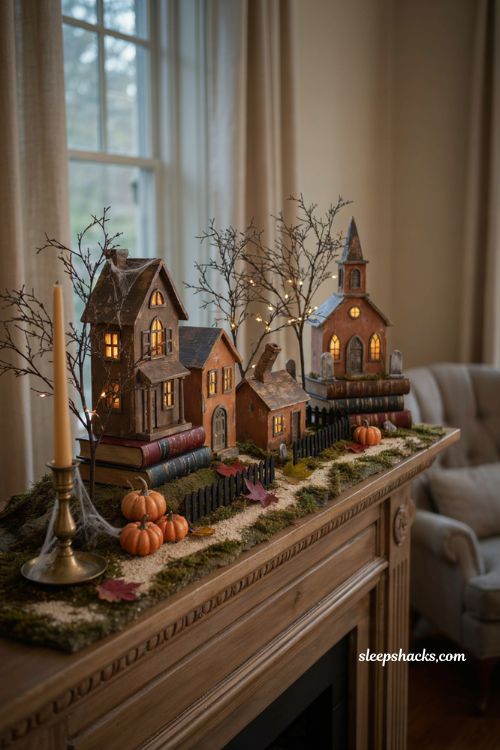
What starts as one little house on a shelf has a way of turning into an entire haunted town within a couple of seasons, and that slow build is honestly part of the fun. Whether you’re working with a foam-carved platform, a set of painted wood blocks, or thrifted ceramic buildings given a spooky makeover, there’s a version of this hobby that fits your budget and your patience level. Here are fifteen ideas to help you build a Halloween village that actually looks like it belongs on a magazine mantel.
1. Carved Foam Landscape Base
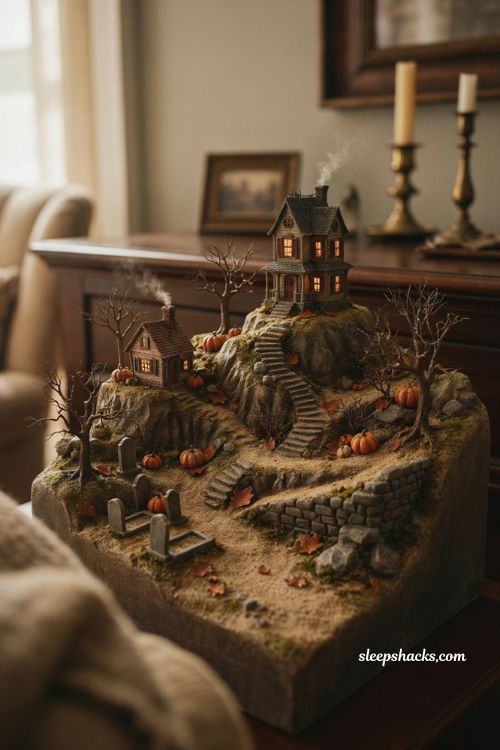
Building your village on a base of dense pink XPS foam, rather than a flat board, lets you sculpt actual hills, staircases, and cliff edges for your buildings to sit into. A basic hot knife and sculpting tool can carve rough shapes first, then refine details like stone walls or empty graves once the layout feels right. Covering the finished carve with a layer of fine aquarium sand glued down before painting adds a surprisingly realistic ground texture. This is the most involved option on the list, but it’s also the one that turns a simple shelf display into something closer to a diorama.
2. Painted Wood Craft Houses
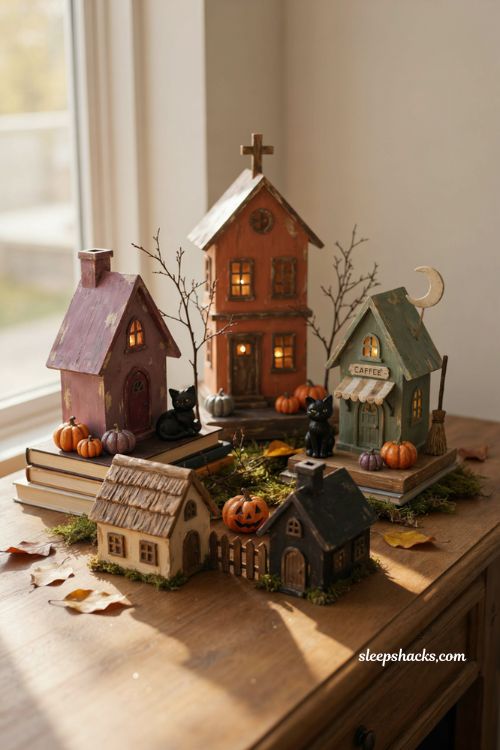
A set of plain unfinished wood houses, transformed with spray paint and a few detail brushes into a haunted hospital, a vampire’s home, or a witch’s café, is one of the most beginner-friendly ways to start a village collection. Because each house is painted individually, you can add one or two new buildings every year without needing to match an exact style from a previous set. Kids tend to love helping with this step, since the shapes are forgiving and mistakes just add character. This approach also stores flat and light, which matters if your village needs to pack away into a small box come November.
3. Bright Ombré Wood Block Village
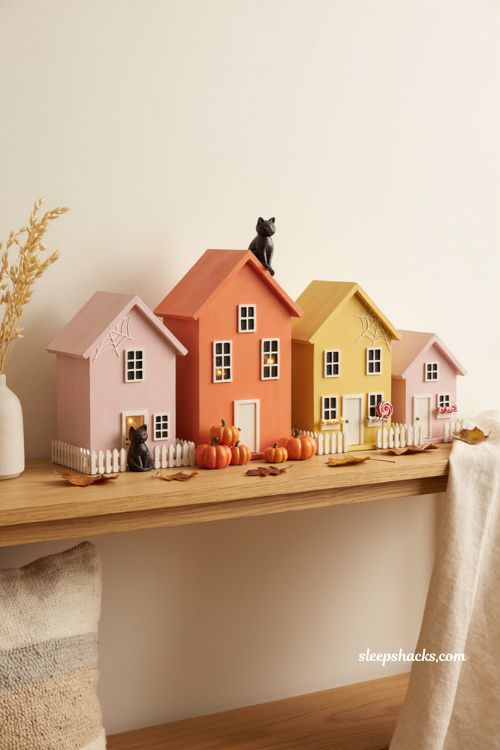
Skipping the typical black-and-orange palette entirely in favor of pink, orange, and yellow ombré shades gives a village a completely different, almost candy-colored personality. Simple cut lumber pieces sanded smooth and finished with black and white paint pens for windows and spiderwebs keep the detailing sharp against the bright base coats. Gluing every piece onto one shared baseboard rather than displaying them separately makes the whole thing easier to move and store as a single unit. This is a strong pick if your existing Halloween decor already leans more playful than scary.
4. Pink-and-Orange Ghost Village
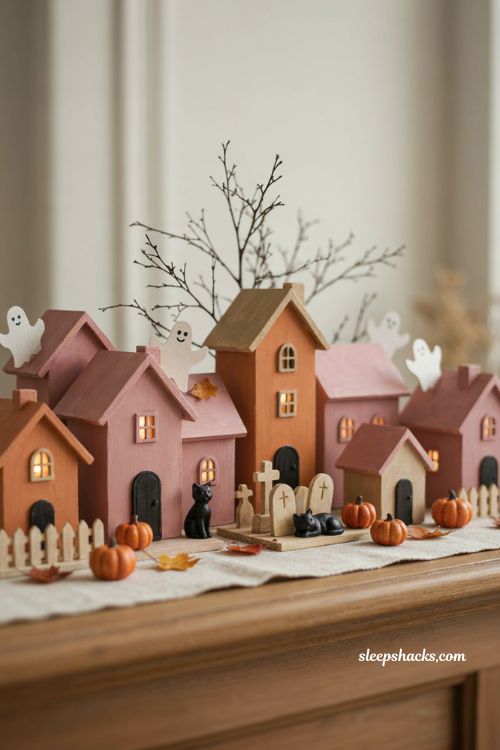
Little ghost cutouts peeking over each rooftop, paired with a small handmade graveyard tucked between the buildings, brings a softer, slightly whimsical energy to an otherwise classic Halloween village layout. This style works well as a gateway project if you’re not ready to commit to a full-scale ombré or carved-foam build. Keeping the color palette to just two or three shades throughout keeps a busy scene from feeling visually overwhelming. It’s also an easy one to photograph for Pinterest, since the color story reads clearly even in a small thumbnail image.
5. Minimal Unfinished Wood and Paper Village
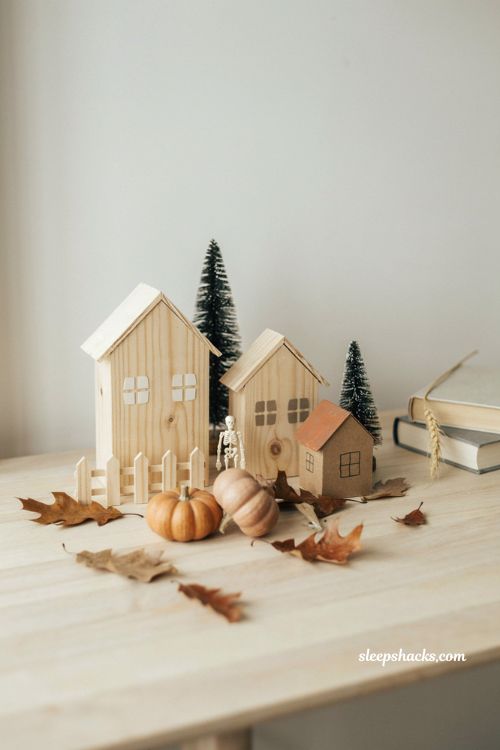
For a quieter, less overtly spooky take, combining unfinished wood houses with patterned scrapbook paper, black bottle brush trees, and small pumpkin or skeleton accents creates something closer to autumn decor than a full haunted town. This approach tends to suit homes where Halloween décor needs to blend into an existing neutral or fall-toned interior. Because the materials are simpler, it’s also one of the faster builds on this list if you’re short on time. This style photographs especially well in natural daylight, since the muted palette doesn’t rely on dramatic lighting the way darker villages do.
6. Mod Podge Scrapbook Paper Houses
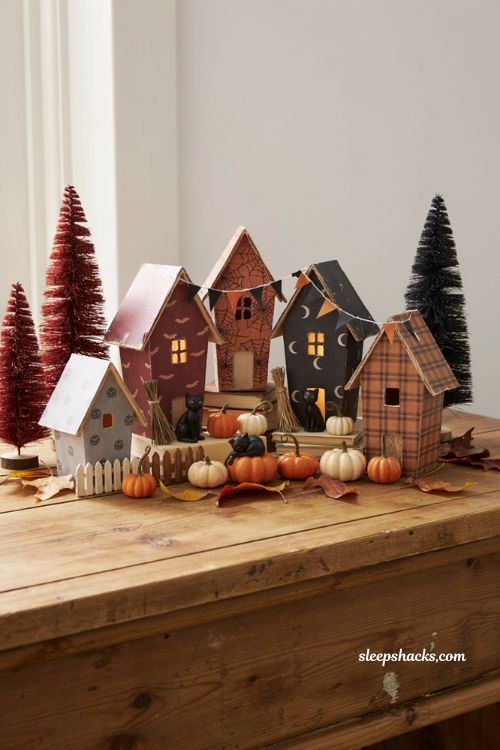
Wooden birdhouses covered in Halloween-print scrapbook paper using Mod Podge give you a layered, almost collaged look without any painting skill required at all. Adding small handmade extras, a tiny witch broom, a bunting banner strung between rooftops, pushes the display from simple to genuinely detailed. This technique is particularly forgiving for anyone newer to crafting, since uneven paper edges can just be trimmed or tucked under after the glue dries. It’s also an easy project to do in a single afternoon, start to finish.
7. Popsicle Stick Haunted House
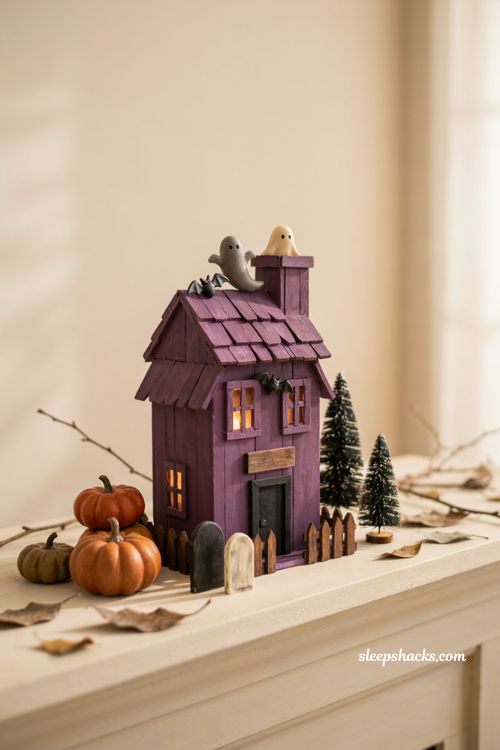
A single haunted house built entirely from jumbo craft sticks, painted purple and black, then finished with foam cutout ghosts, bats, and a tiny handmade sign, proves you don’t need a whole village to make an impact. This is one of the most budget-friendly ideas on the list, often built almost entirely from dollar store supplies. Because it’s a single structure rather than a full set, it’s also the easiest option to start and finish in one sitting. Pairing it later with additional houses in a similar style turns it into the first building of a growing collection.
8. Fairy-Light Filled Birdhouse Village
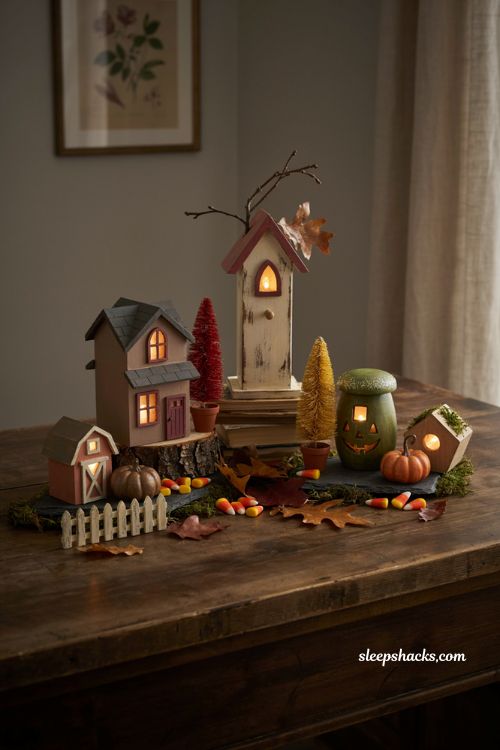
Tucking small battery-operated fairy lights inside each birdhouse before finishing the exterior with paint, sandpaper shingles, or glittery details gives your village a genuine warm glow rather than relying only on painted-on window details. Scattering faux fall leaves and candy corn around the base of the buildings ties the whole scene together with a cozy, harvest-adjacent feel. This works particularly well displayed somewhere the room lights get dimmed in the evening, since the interior glow becomes the real star of the display. Building one new lit house each year keeps the project manageable while still growing the collection steadily.
9. Kid-Painted Family Village
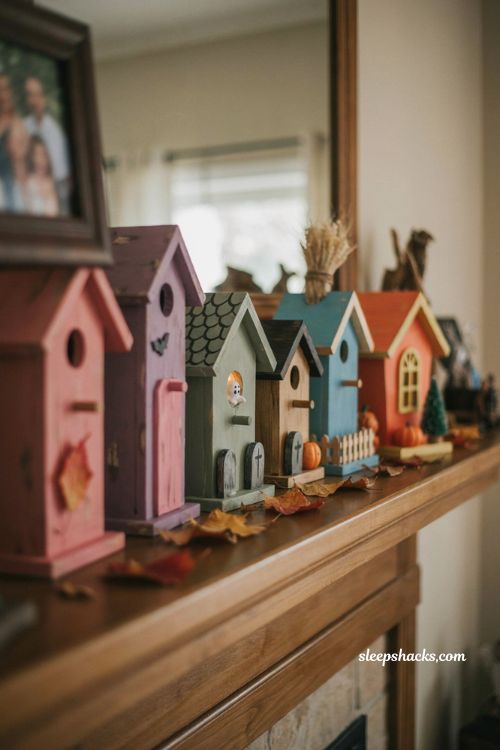
Letting kids paint their own birdhouses for the village, then adding a few sneakier details like bats after they’ve gone to bed, creates a display that’s part family project and part surprise reveal every October. This approach tends to produce a wonderfully mismatched, personal-feeling village rather than a uniform, catalog-style one. Keeping a “new house every year” tradition going means the collection becomes a kind of visual timeline of the family’s Halloweens. It’s also one of the more meaningful builds on this list if the goal is spending time together rather than achieving a flawless finish.
10. Thrifted Christmas Village Makeover
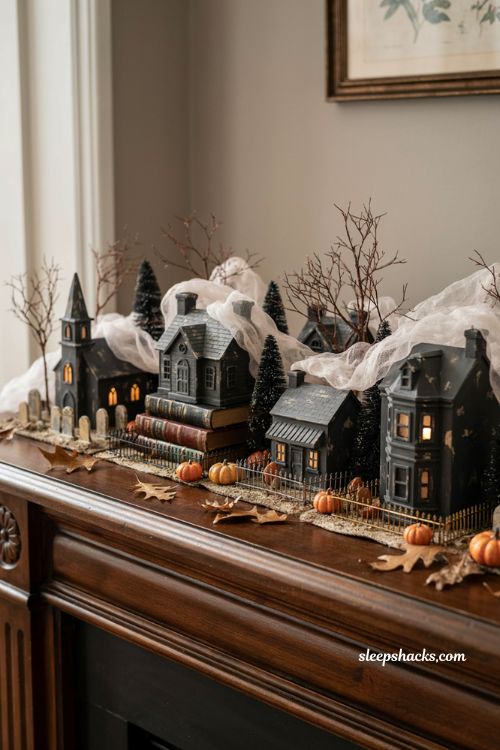
Buying secondhand ceramic Christmas village buildings and giving them a single coat of matte black chalk paint, then draping the finished pieces in spooky cheesecloth, is easily the smartest budget hack for anyone wanting a polished village without buying new pieces. Because the underlying structures were already detailed for a Christmas display, the architectural bones tend to be sturdier than many budget Halloween-specific options. This project can often be finished in an afternoon, since most of the work is just painting and light styling. It’s a great choice if you already have unused holiday village pieces sitting in storage.
11. Cardstock Silhouette Village
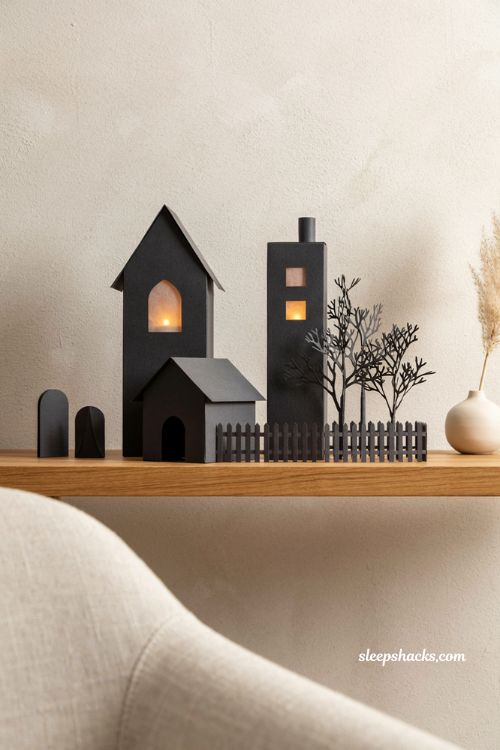
Cutting an all-black paper village from cardstock and vellum, using a printable template or cutting machine file, creates a sleek, graphic display that looks almost architectural compared to a typical painted wood village. Lighting each building from within using small LED tealights makes the silhouette glow through the vellum windows, especially effective once the room is dark. This is a strong option if storage space is tight, since paper structures fold flat much more easily than wood or ceramic pieces. It’s also one of the more modern-looking styles on this list, fitting well into a minimalist home.
12. Scrap Wood and Peg Doll Village
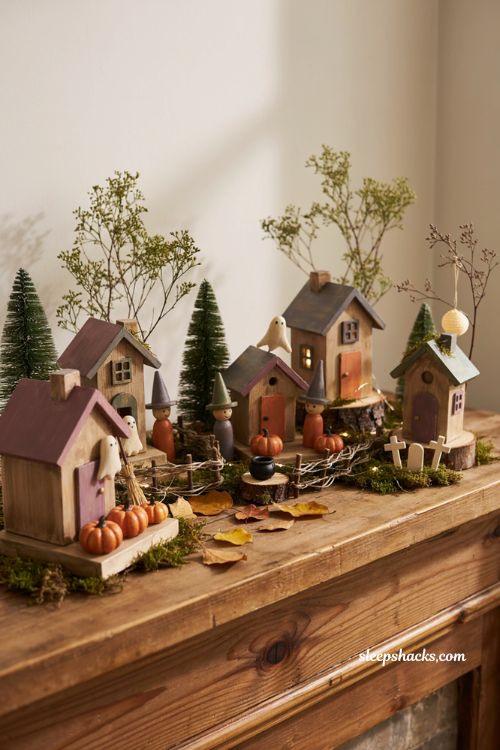
Built from leftover scrap wood and hand-drawn house shapes, paired with small wooden peg dolls painted into witches, ghosts, and other Halloween characters, this style leans intentionally loose and imperfect rather than polished. It’s a genuinely accessible entry point if you’re working with materials already sitting in a garage or craft bin. The peg doll characters add a small-scale storytelling element that a village of buildings alone doesn’t quite achieve. This is a good weekend project for involving kids at every step, from painting the houses to naming the tiny residents.
13. All-Black Dollar Store Village
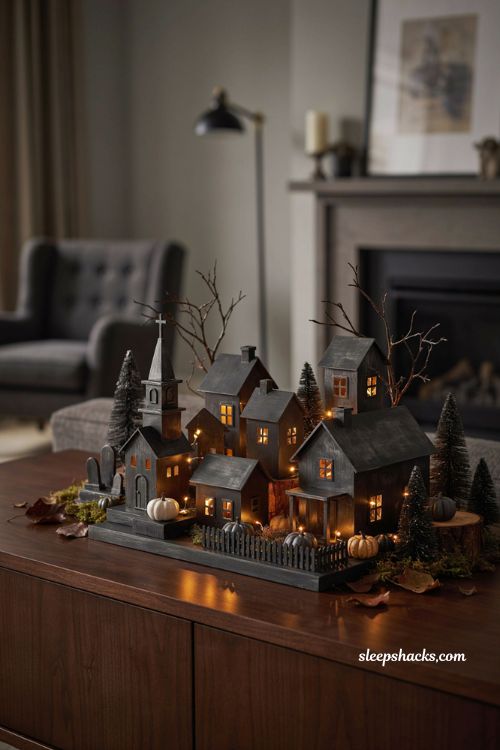
Mixing galvanized metal pieces with Dollar Tree wood cutout houses, then spraying everything a uniform flat black and filling each piece with battery-operated fairy lights, creates a moody, glamorous display for very little cost. Because the base color is neutral black rather than orange or purple, this village is also easy to swap into a softer pastel or pink palette later just by repainting. The uniform color keeps a mismatched set of cheap materials looking cohesive rather than cluttered. This is one of the most budget-conscious builds here that still reads as genuinely elevated once it’s lit up in a dark room.
14. Welcome Sign Village Centerpiece
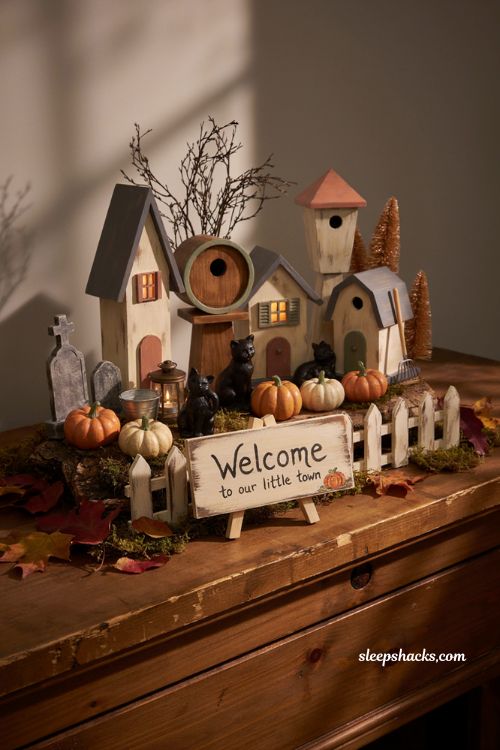
Adding a hand-painted “Welcome” sign to a cluster of wood birdhouses gives the whole village a clear focal point and a sense of place, rather than just a row of individual buildings. This detail is a small addition time-wise but adds a surprising amount of personality and narrative to the finished scene. It’s also a forgiving project to work on gradually, a little at a time, if energy or time is limited during the season. Positioning the sign slightly forward of the buildings, rather than tucked behind them, makes sure it reads clearly as the anchor of the whole display.
15. Layered Multi-Tier Platform Display
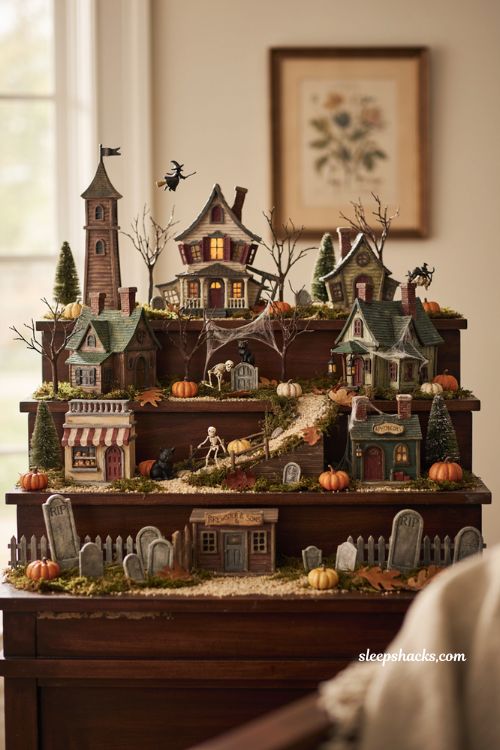
For anyone with several buildings already in their collection, arranging them across a tiered or stepped platform rather than a single flat surface adds real depth and makes even a modest number of houses feel like a fuller scene. Staggering heights lets smaller accessories, tombstones, pumpkins, tiny figures, tuck naturally into the gaps between levels rather than sitting flat and exposed. This is less about building new pieces and more about styling what you already own more thoughtfully. It’s often the single easiest upgrade to make an existing village feel dramatically more finished without buying anything new at all.
Final Thoughts
Every Halloween village on this list started the exact same way: with one house, a little paint, and no real plan for how big it would eventually get. That’s honestly the appeal of this whole hobby, it grows slowly, one shelf and one October at a time, until you look up one year and realize you’ve built an entire haunted little town. Pick whichever style speaks to you, start with a single building, and let the rest come together over the seasons ahead. Sometimes the best decorations are the ones you’re still adding to years later.
Frequently Asked Questions
Q: What’s the cheapest way to start a Halloween village display?
Thrifted Christmas village buildings repainted black, or a single popsicle stick house built from dollar store supplies, are both budget-friendly entry points that cost under twenty dollars.
Q: What’s the best base material for a carved Halloween village platform?
Dense pink XPS foam is preferred over standard white foam since it holds finer sculpted detail and creates a sturdier, less crumbly platform for buildings to sit on.
Q: How do you light a Halloween village display?
Small battery-operated fairy lights or LED tealights tucked inside each building create a warm glow through windows, especially effective once the surrounding room lights are dimmed.