

Every woodworker has the same corner in the garage: a box of offcuts, short boards, and odd little pieces that feel too good to throw away and too small to use. In December, that box suddenly becomes the best craft supply you own.
That is the magic of a scrap wood Christmas tree. It costs almost nothing, it looks handmade in the best possible way, and no two come out alike. These 14 scrap wood Christmas tree ideas cover plans, painted trees, ornaments, porch displays, outdoor versions, and trees with lights. Each one tells you what to picture, what it takes, and who it suits, so you can empty that box and end up with something you are proud to put out.
1. Simple Stacked Scrap Wood Christmas Tree DIY

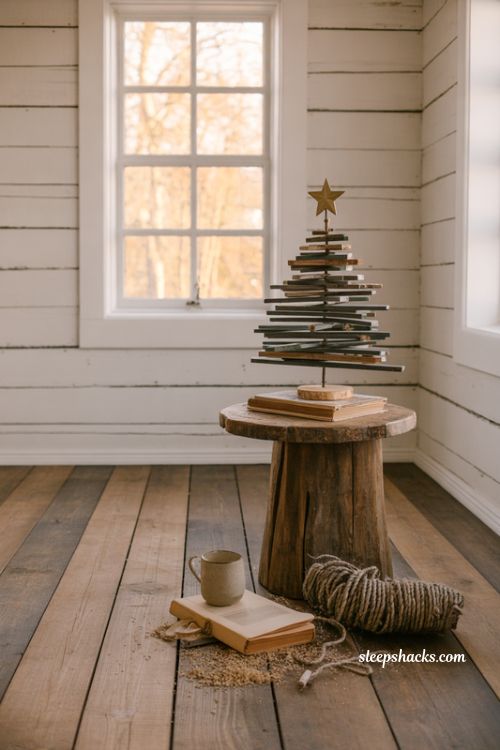
Picture short boards of different lengths stacked in layers, longest at the bottom and shortest at the top, glued and nailed to a centre post. The ends stick out unevenly, giving the tree a rough, branchy shape. A small star sits on the peak.
Sort your scraps by length before you start, so each layer steps down neatly. Wood glue plus small finishing nails holds everything firmly. It takes about two hours and suits beginners with a drill and a saw. Sand rough ends lightly, but leave some character, because the weathered look is the whole appeal.
2. Scrap Wood Christmas Tree Plans for Beginners
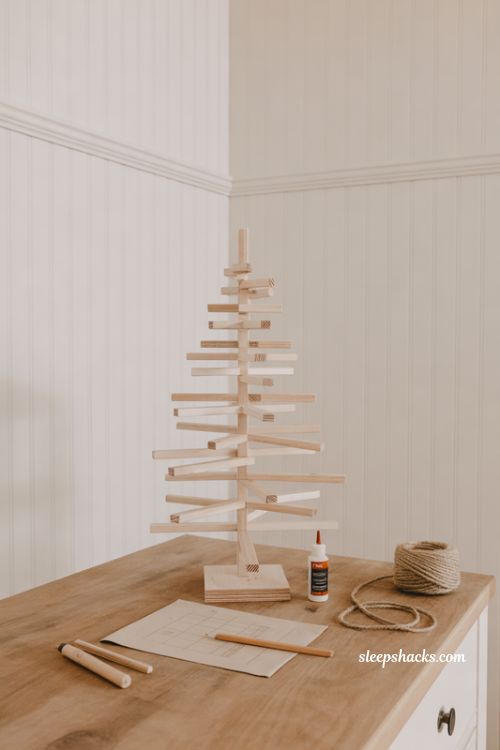
A basic plan uses one long board as the trunk, then adds pairs of shorter boards across it, each pair a little shorter than the one below. Mark the centre of each board with a pencil, so every piece sits straight. The finished tree is flat, tidy, and about two feet tall.
Draw the plan on paper first and test the layout on the floor before you glue anything. It takes about ninety minutes. This suits anyone who prefers a clear recipe. Keep spacing even, about half an inch between boards, so the shape looks planned rather than accidental.
3. Painted Scrap Wood Christmas Tree in Green and White
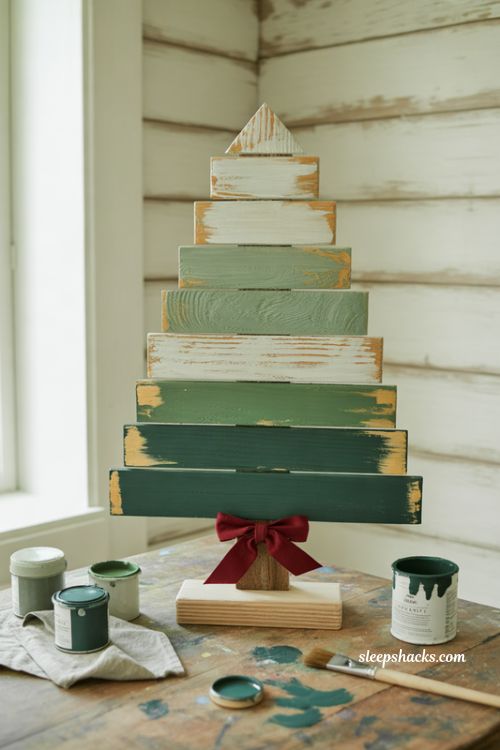
Brush each board in a different shade of green, from pale sage at the top to deep forest at the base, then dry-brush a little white over the edges so it looks frosted. The grain shows through, and the colour feels soft and layered. A tiny red bow at the trunk adds a pop.
Craft paint in small pots is cheap, and a rag wipes away extra for a washed look. It takes about two hours with drying time. This idea suits crafters who love colour, and kids can help paint. Seal with a light coat of matte spray if the tree will stay out for the whole season.
4. Scrap Wood Christmas Tree Front Porch Display
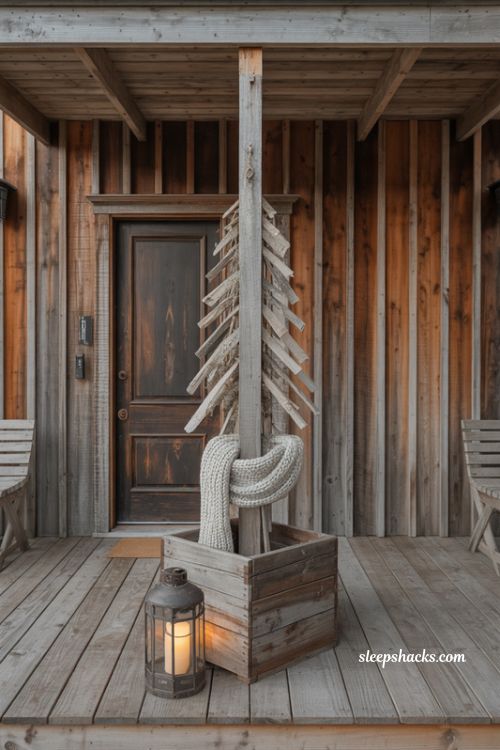
Build a tall, freestanding tree from long offcuts leaned together in a triangle, with a centre pole for strength, and place it beside the front door. Add a lantern at its feet and a woollen scarf wound around the trunk. The tree looks like a welcome sign made of wood.
Use exterior screws and a clear outdoor sealer, since rain and frost are hard on bare wood. It takes about half a day. This suits houses with a covered porch and anyone with a good pile of scraps. Anchor the base to a planter or heavy board, so wind can’t tip it over.
5. Scrap Wood Outdoor Christmas Tree With Lights
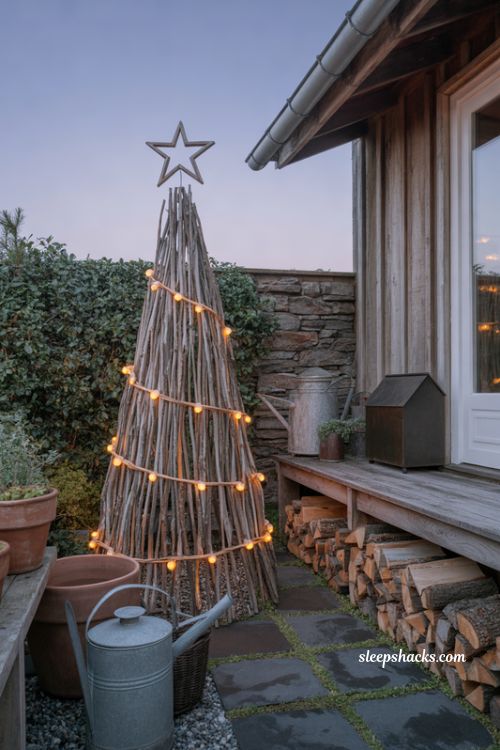
Make a tall, open tree frame from thin strips, then wrap outdoor-rated lights around it from top to bottom. At night the frame disappears and the lights trace a bright triangle in the garden. A star at the top finishes the shape.
Use LED lights labelled for outdoor use, and keep plugs under cover or in a weatherproof box. It takes about three hours and suits gardens, driveways, and balconies. The wood needs a coat of sealer to survive winter. Check wiring each week for damage from rain or animals.
6. Scrap Wood Christmas Tree Ornaments

Cut small slices, stars, and tiny trees from thin offcuts, drill a hole through each, and thread a loop of twine. Paint a few in red, white, and green, and leave the rest natural. Hung on a real tree, they look like little woodland toys.
A jigsaw or coping saw cuts curves, and sandpaper smooths the edges. A dozen ornaments take about two hours, and the cost is almost nothing. They suit crafters who love handmade gifts. Use pine or similar soft wood for easy cutting, and wear a dust mask when sanding.
7. Mini Scrap Wood Christmas Trees for Shelves
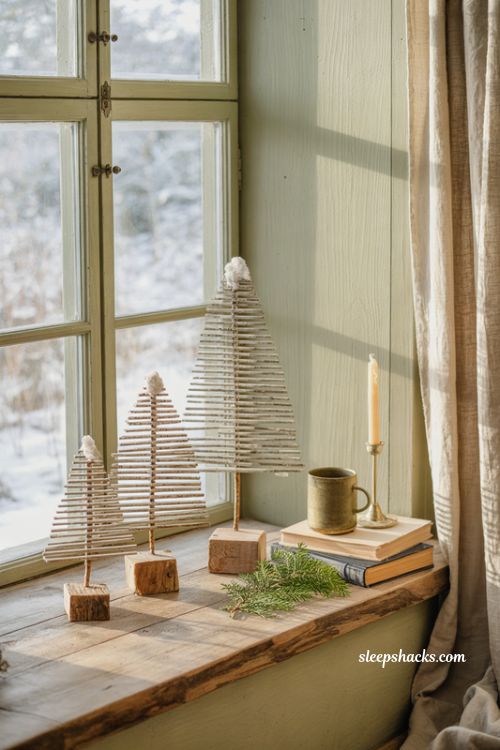
Cut three or four tiny boards in graduated lengths, glue them onto a short stick, and stand the tree on a small base block. Make a trio in different heights and set them on a shelf or windowsill. The row looks like a miniature forest.
Offcuts under six inches long are perfect here, since you can use pieces too small for any other project. It takes about an hour for a set of three. This idea suits small spaces and last-minute gifts. Add a dab of white paint on each tip for a snowy touch.
8. Rustic Natural Scrap Wood Tree With Burlap Bow
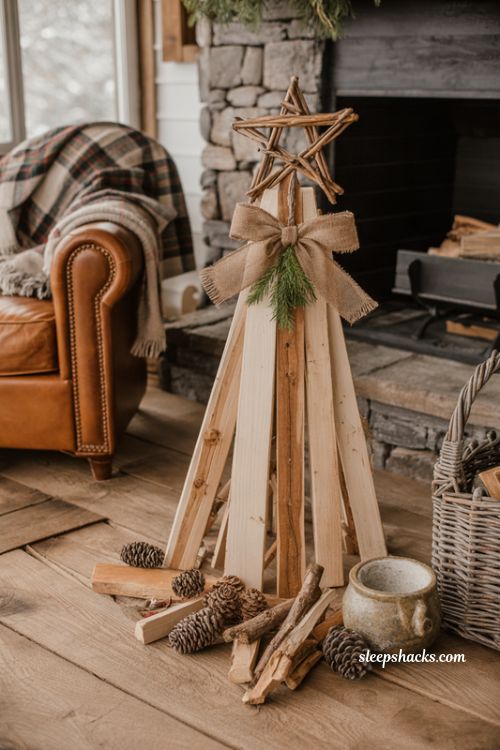
Leave the wood bare and unfinished, then tie a burlap bow around the trunk and tuck a sprig of pine behind it. The warm brown tones and rough texture make the tree look like it belongs in a cabin. A twine-wrapped star finishes the top.
Natural wood pairs well with burlap, twine, and pinecones, which all cost little. It takes about thirty minutes once the tree is built. This suits rustic, farmhouse, and cabin styles. Wipe off dust before you add decorations, and keep the burlap away from candles.
9. Scrap Wood Tree With String Lights Behind the Boards
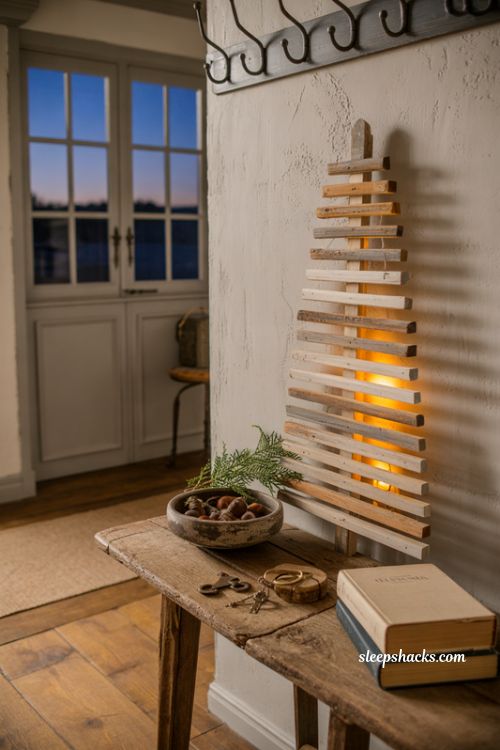
Fix a string of warm white lights to the back of the tree before you attach the boards, so the glow leaks through the gaps and around the edges. The wood looks lit from inside, like a lantern shaped like a tree. A small plug-in timer keeps it neat.
Use LED lights, which stay cool against the wood. Leave a half-inch gap between boards so the light can escape. It takes about two hours. This suits mantels, consoles, and anyone who wants the tree to double as a light. Tuck cords out of sight with a few small clips.
10. Reclaimed Fence Board Christmas Tree
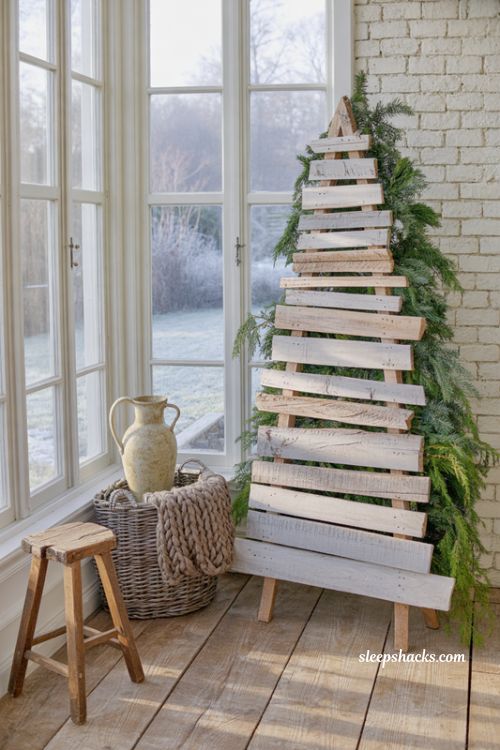
Cut old fence boards to length, keeping the weathered grey surface and any nail holes, then stack them into a tree shape. The faded boards look soft and silvery, like driftwood. A few strands of greenery tucked behind make the colours pop.
Old fence boards often come free from neighbours or builders. Check for rusty nails, and pull any out before cutting. It takes about three hours and suits people who love aged materials. Wear gloves, because weathered wood can leave splinters.
11. Colourful Scrap Wood Tree Using Offcut Paint Samples
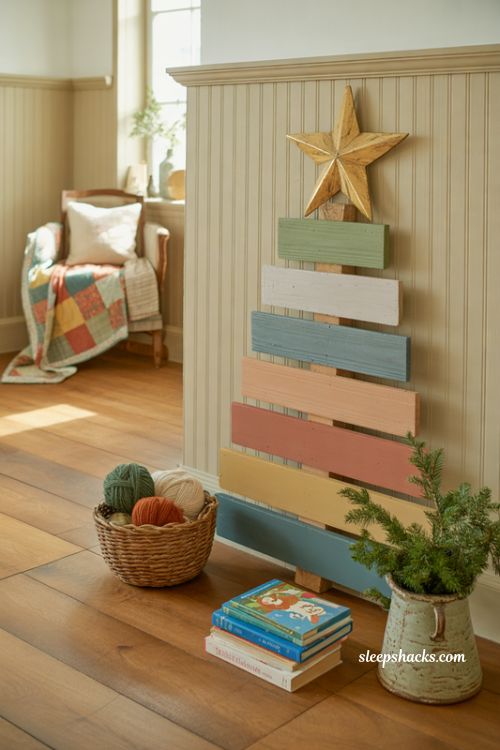
Paint each board a different cheerful colour, using leftover paint from past projects, then arrange them in a stepped tree. The result looks like a bright quilt, with every colour sitting side by side. A gold star at the top ties it together.
Sample pots from the paint shop are cheap, and mixing small amounts makes new shades. It takes about two hours plus drying time. This idea suits families with children, and anyone who likes colour. Keep the palette within one family, such as blues and greens, if you want a calmer look.
12. Scrap Wood Tree With Hooks for Ornaments

Fit small cup hooks along the front of each board, then hang lightweight ornaments, ribbon bows, and tiny wreaths. The wooden tree becomes a display board that changes each year. A few dried orange slices add colour and scent.
Mark each hook position with a pencil before drilling, so the spacing looks even. Choose pieces that weigh little, because thin boards can bend under heavy glass. It takes about forty minutes after the tree is built. This suits families who like to redecorate.
13. Layered Scrap Wood Wall Tree
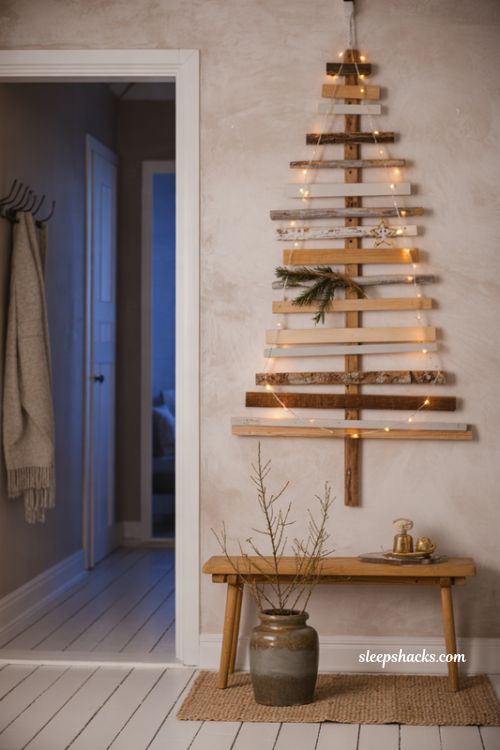
Fix short offcuts to the wall in stepped rows, forming a tree shape from the bottom up, and leave small gaps between them. Hang a string of lights across the gaps and tuck in a few ornaments. At night the wall looks like a modern art piece.
Use removable adhesive hooks for light pieces, or screws for heavier ones if you own the home. It takes about an hour and takes up no floor space. This suits apartments and entryways. Plan the layout on the floor first, then copy it to the wall.
14. Scrap Wood Christmas Tree Crafts for Kids
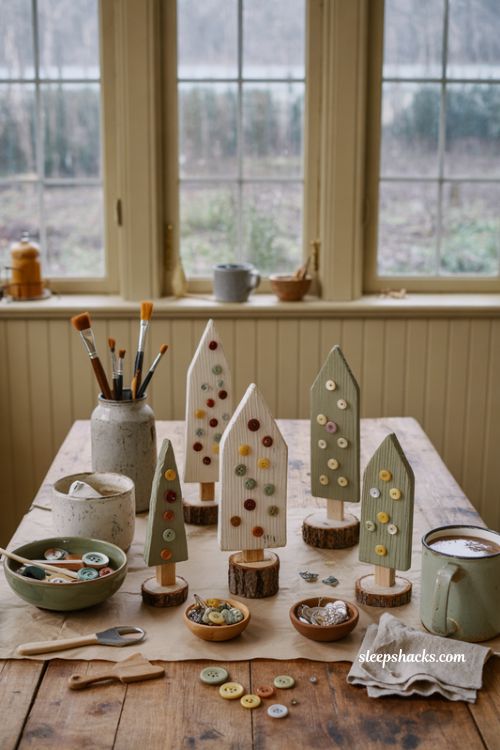
Let children glue small wooden pieces into tree shapes on a base board, then paint them with washable craft paint and decorate with buttons, sequins, and tiny pom-poms. The results look joyful and wonky, and every tree is different.
Use a child-safe glue and pre-sanded wood to avoid splinters. A craft takes about forty-five minutes, so it suits rainy afternoons and classrooms. Cover the table first, and let the paint dry before anyone carries it away.
Final Thoughts
Real talk: a tree made from leftover wood won’t look like it came from a shop, and that is exactly why people stop to look at it. Every crooked cut and mismatched board is a little sign that a person made it, on purpose, for a particular room.
So open that box in the garage, pick the pieces that look the most interesting, and start with the first one. The tree doesn’t need to be tall or perfect. It only needs to be yours.
Frequently Asked Questions
Q: What wood is best for a scrap wood Christmas tree?
Pine and similar softwoods are easiest to cut and sand, but any clean offcuts can work for a simple tree.
Q: How do I make a scrap wood Christmas tree last outdoors?
Use exterior screws, seal the wood with a clear outdoor sealer, and store the tree under cover when it is not on display.
Q: Do I need special tools to make a scrap wood Christmas tree?
A saw, a drill, wood glue, and sandpaper are enough for most designs, and a jigsaw helps with curved ornaments.