

You walk past a stack of old pallets behind a shop or garage, and for most of the year they look like junk. In December, though, those same grey boards start to look like a tree waiting to happen.

That is the charm of a pallet wood Christmas tree. It costs very little, it looks handmade in the best way, and it fits almost any space. These 13 ideas cover plans, measurements, small versions, stands, skirts, fences, and ways to decorate the finished tree. Each one tells you what to picture, how much effort it takes, and who it suits, so you can pick a project and have a tree ready to light by the weekend.
1. Basic Pallet Wood Christmas Tree DIY
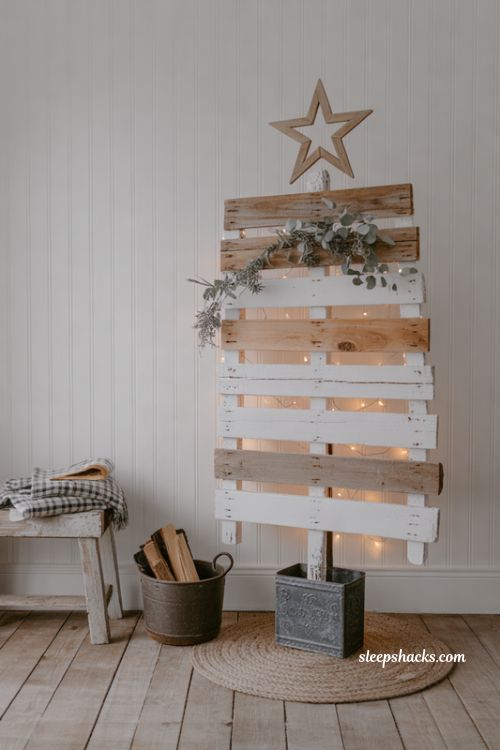
Picture a flat, standing tree made from pallet boards cut in stepped lengths, longest at the bottom and shortest at the top, all fixed to two upright strips at the back. The weathered grain shows clearly, and gaps between boards let the light peek through. A small wooden star sits on the peak.
Use a saw, a drill, and screws instead of nails, which can split old wood. It takes about two hours once you have the boards. This is the easiest project here, so it suits beginners with basic tools. Wear gloves and sand any rough edges before you start decorating.
2. Pallet Wood Christmas Tree Plans and Measurements
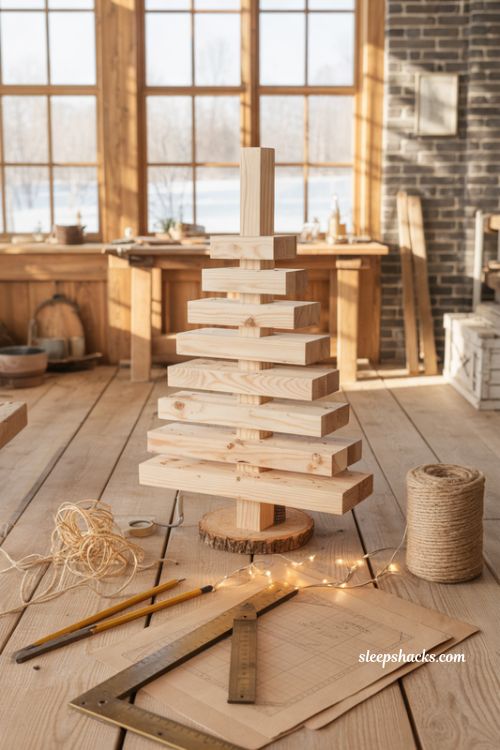
A simple plan starts with seven or eight boards, cut from about thirty inches at the base down to about six inches at the top, each one a few inches shorter than the last. Space them evenly, so the sides slope in a clean line. The trunk piece sits at the bottom, about four inches tall.
Draw the shape on paper first, then mark each board with a pencil before you cut. Taller trees need longer boards and a sturdier back frame. It takes about an hour of planning and two of building. This idea suits people who like a clear recipe. Double-check each length twice, since cut wood can’t grow back.
3. Small Pallet Wood Christmas Trees for Tabletops
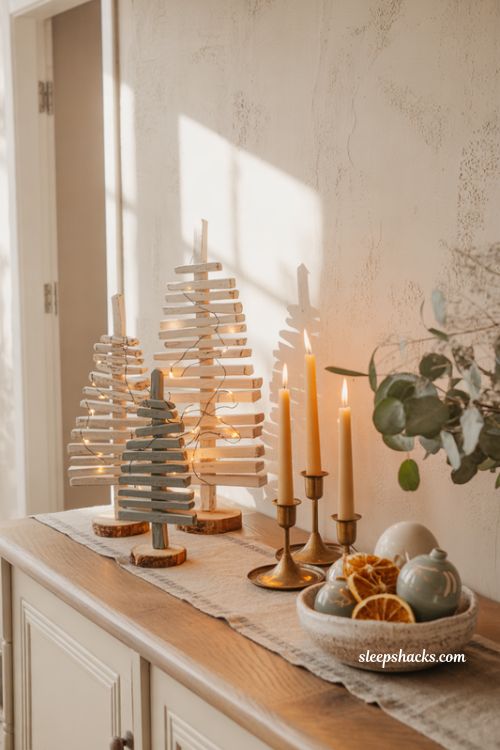
Make a mini version about twelve to eighteen inches tall, cut from thin slats that are easy to handle. Stand it on a console, windowsill, or dining table, and tuck a tiny string of battery lights behind it. The small size looks neat beside candles or a bowl of ornaments.
Thin pallet slats are lighter and quicker to cut than thick planks, so this project takes about an hour. It suits small flats and anyone who wants a handmade gift. Make three in different heights for a charming group. Sand the edges well, since little hands may pick them up.
4. Wall-Mounted Pallet Wood Tree With String Lights
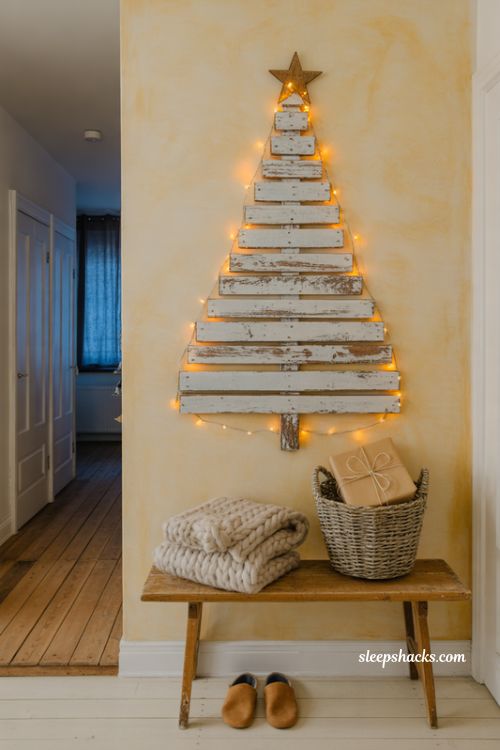
Fix the stepped boards flat against a wall, spaced slightly apart, and thread warm white lights across the gaps. At night the glow spills around each board and the whole tree seems to float. A small star at the top finishes the shape.
Use wall plugs and strong screws, and mount on a stud when you can. This version takes up no floor space, so it suits apartments, hallways, and homes with pets that love to climb trees. Renters should check with the landlord, because the wall will need holes. Hang a light strand with a plug close by so cords stay tidy.
5. Pallet Wood Christmas Tree Stand
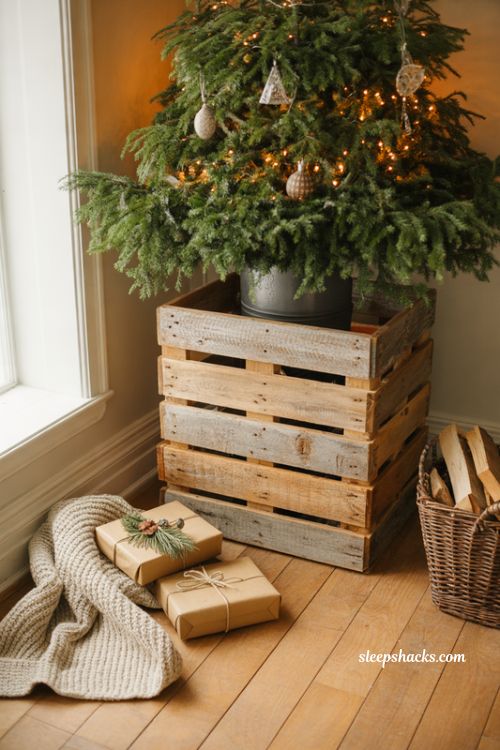
Build a simple square box stand from four short pallet boards, with a hole in the top for the trunk of a real or artificial tree. The stand sits flat on the floor and hides the metal base. The rustic wood looks warm against green needles.
Cut the pieces to fit your tree stand with at least two inches to spare, and screw the corners together. It takes about ninety minutes and costs almost nothing. It suits anyone who wants a handmade base without buying a basket. Keep the sides wider than the metal stand so water, if you use a real tree, can’t leak onto the floor.
6. Pallet Wood Christmas Tree Skirt
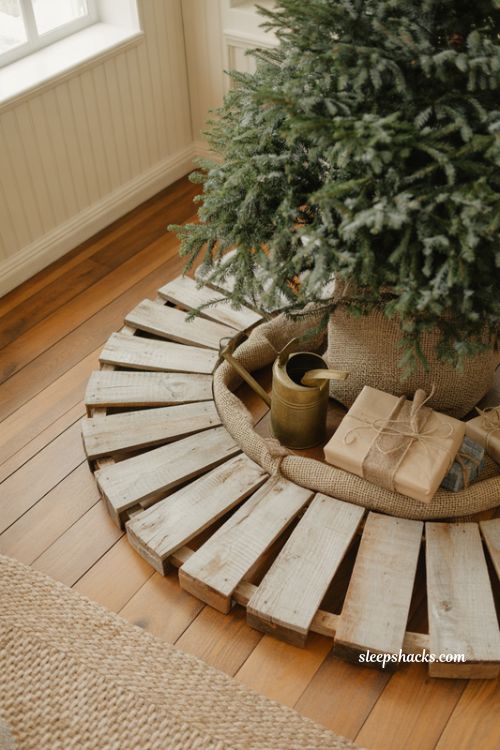
Make a square wooden collar from four boards that slope slightly outward at the top, like a short fence around the tree base. The slats hide the stand and make a neat frame for gifts. A strip of burlap tucked inside softens the edges.
This idea replaces fabric skirts, and it won’t slip or bunch up like cloth does. It takes about two hours and suits rustic and farmhouse rooms. Measure the stand carefully, and leave room for water access. Sand every edge smooth, because bare feet and pets will brush the wood often.
7. Pallet Wood Christmas Tree Fence

Surround a real tree with a low fence made from pallet boards, with each panel hinged or tied to the next so you can fold it flat for storage. The fence keeps pets and toddlers away from the lower branches and keeps presents in one place. A bow on each corner makes it look festive.
Stand each panel about twenty-four to thirty inches high, with slats spaced close enough to stop small paws squeezing through. It takes about three hours and suits families with curious pets. A hinged design is easier to store than a fixed square. Test the fence before you put the gifts out.
8. Whitewashed Pallet Wood Tree
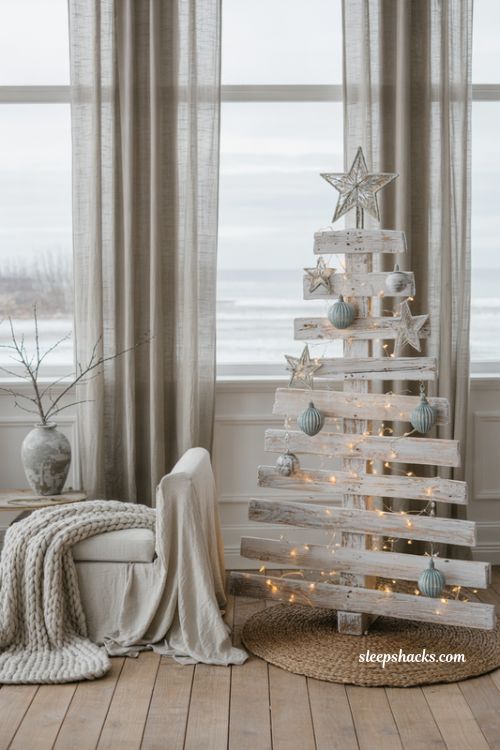
Brush a thin layer of white paint over the stepped boards, then wipe most of it away with a rag so the grain shows through. The tree looks soft, frosted, and slightly weathered, like driftwood in winter. Silver stars and pale blue baubles suit it well.
Water-based paint dries fast, and a small tin covers a whole tree. It takes about an hour plus drying time. This idea suits coastal and Scandinavian rooms. Seal the wood with a clear matte spray if the tree will stand outdoors, since bare paint chips quickly in damp weather.
9. Green Painted Pallet Tree With Stencil Details

Paint each board a different shade of green, from pale sage at the top to deep forest at the bottom, then stencil white snowflakes or tiny stars on top. The ombre effect looks like a real tree seen through frosted glass. The grain still shows faintly beneath the paint.
Choose a few small pots of craft paint, which are cheaper than a full tin. It takes about two hours with drying time. This suits crafters who enjoy colour and detail, and kids can help with the stencils. Let each coat dry fully before adding the next, so the stencil edges stay sharp.
10. Stacked 3D Pallet Wood Tree for the Porch
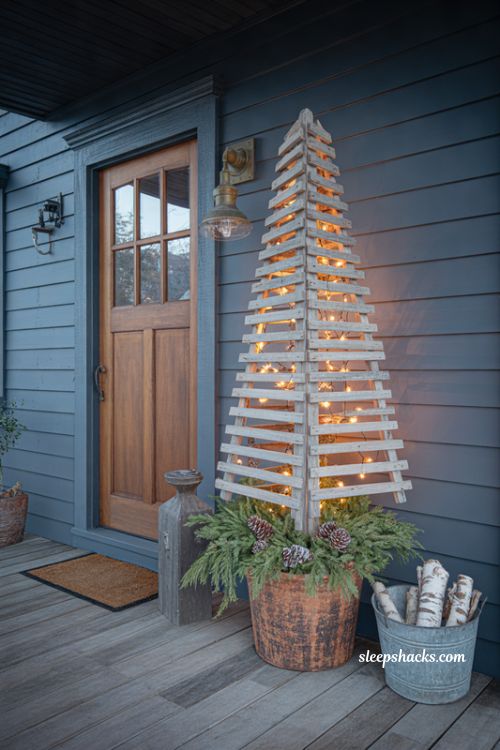
Build a freestanding tree from slats leaned together into a tall triangle, with a wide base and narrow top, and fasten them with a long centre pole. The open frame lets you wind lights through the gaps. Place it beside the front door, and it looks like a sculpture.
Use exterior screws and weather-resistant wood sealer, since the tree will face rain. It takes half a day and some muscle. This idea suits porches and gardens, and anyone with a lot of spare pallet wood. Anchor the base to the ground or a heavy planter so strong winds can’t knock it over.
11. Pallet Wood Tree Pattern With Cut-Out Stars
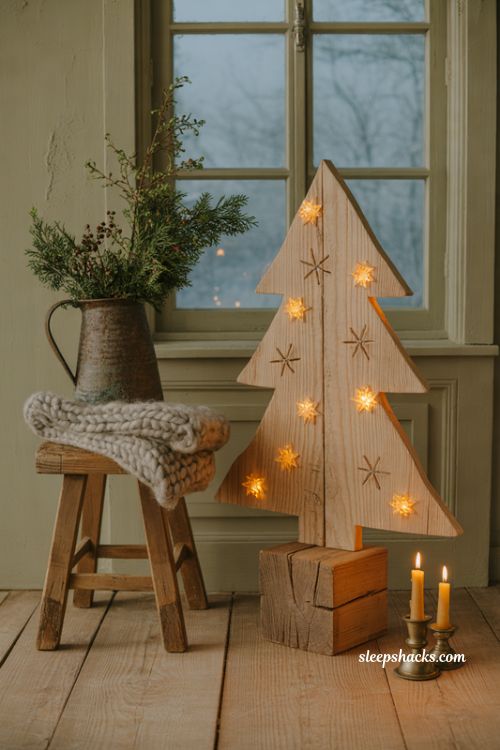
Print a simple tree pattern, trace it onto a large pallet board, and cut it out with a jigsaw, then drill small star-shaped holes through the middle. Light shines through the holes at night. A simple wooden stand holds the cut-out upright.
A jigsaw makes curves easy, though a handsaw works for straight lines. The project takes about two hours and suits people who enjoy detail. The holes can be round if stars feel too fiddly. Sand each edge carefully, and clamp the board while cutting for a clean finish.
12. Decorating a Pallet Wood Christmas Tree With Ornaments
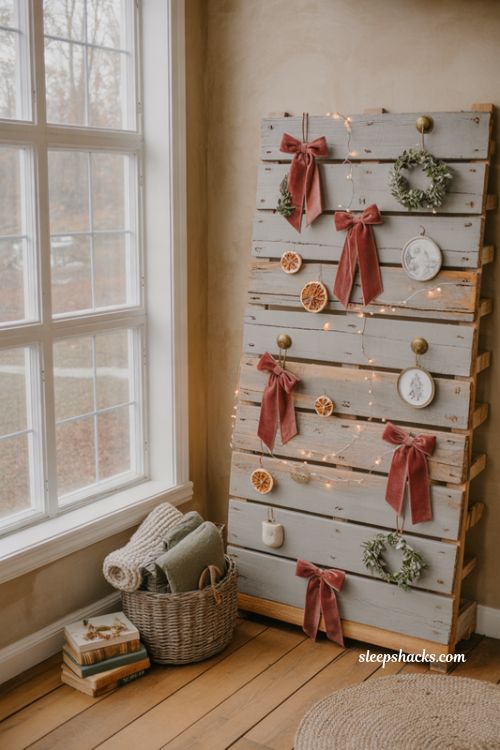
Screw small cup hooks or cut-off nail heads along the boards, then hang lightweight ornaments, ribbon bows, and mini wreaths from them. A few dried orange slices and a strand of fairy lights add warmth. The rough wood makes a lovely background for delicate pieces.
Keep ornaments light, since thin boards can’t hold heavy glass. It takes about thirty minutes once the tree is built. This idea suits families who want a tree that can be redecorated each year. Pencil-mark where each hook should go before you drill, so the spacing looks even.
13. Pallet Wood Tree Porch Display With Lanterns and Gifts
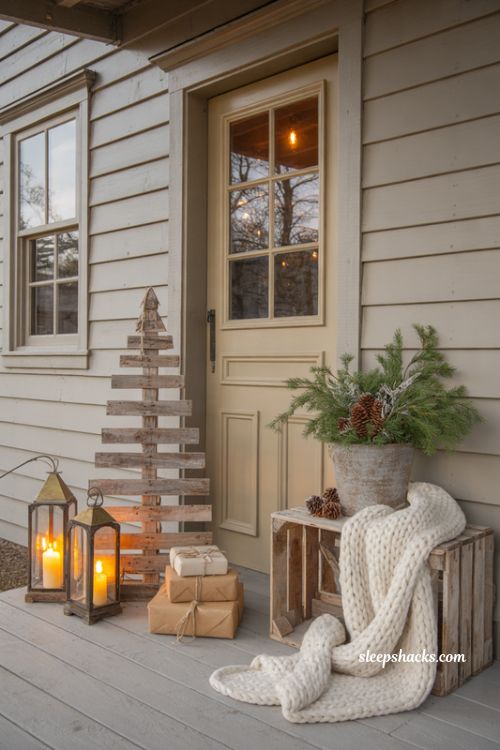
Place a pallet tree beside the door, flank it with two lanterns holding flameless candles, and stack a few wrapped parcels at the base. A woollen blanket draped over a crate beside it adds a cozy touch. The scene looks like a welcome to everyone who arrives.
Use battery candles with timers so nothing needs lighting, and bring the gifts inside if rain is forecast. It takes about thirty minutes and suits houses with a covered porch. The wood will weather naturally over the season, which only adds to the look.
Final Thoughts
Most of us spend December buying things. A tree made from a rescued pallet turns that around. You take something that was headed for a skip, give it an afternoon of your time, and end up with a piece that nobody else has.
That is a quiet kind of satisfaction. The saw dust, the crooked board, the star you nailed on slightly off-centre, they all end up as part of the story. And every year you take the tree out of the shed, you will remember who made it.
Frequently Asked Questions
Q: Is it safe to use pallet wood for a Christmas tree?
Choose pallets stamped HT, which means heat treated, avoid ones marked MB, and sand every board before use.
Q: How tall should a pallet wood Christmas tree be?
It depends on your space, but a free-standing tree usually runs from about two to six feet, with tabletop versions around a foot.
Q: How do I stop pallet wood from splitting when I build the tree?
Drill small pilot holes before adding screws, and use screws rather than nails.