

There’s something about a Halloween movie night that lingers with you — the flicker of shadows on a wall, the shapes that seem to move just at the edge of your vision. That same eerie magic is exactly what a good window silhouette brings to a front porch.
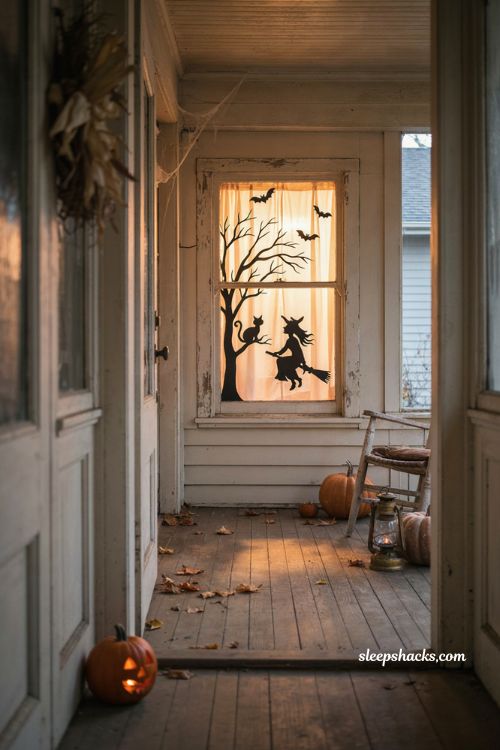
It’s one of the cheapest, most effective Halloween tricks out there, and it works whether you’re a first-timer with a poster board or someone who’s been refining the same design for six years. Here are fifteen ideas to help you bring that spooky glow to your own windows this October.
1. Classic Ghost Cutouts
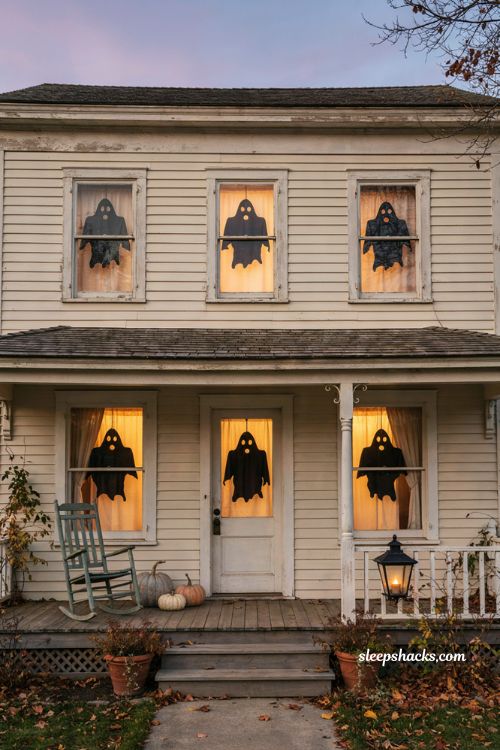
Freehand ghost shapes cut from black poster board remain one of the easiest starting points for anyone new to window silhouettes. There’s genuinely no wrong way to draw one — a wavy bottom edge and a couple of dark eyes is all it takes to read as unmistakably spooky. Tape a shape to each street-facing window for a coordinated haunted-house effect across the whole front of the house. Label each cutout on the back before storing it, so next year’s setup takes minutes instead of starting from scratch.
2. Backlit Fabric Curtain Panels
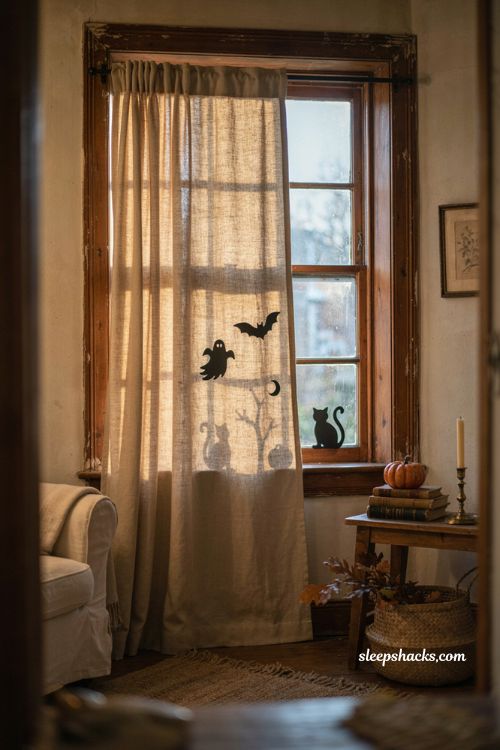
Instead of taping silhouettes straight to the glass, hang a light-colored fabric panel across the window first, then tape your cutouts to the back of the fabric rather than the front. This softens the shadow’s edges and makes the whole scene glow rather than look like a flat sticker, especially once the interior lights are on. Cheap curtain panels cut to size work well here and can double as everyday window coverings once November arrives. The farther the fabric sits from the glass, the blurrier and more ghostlike the silhouette becomes.
3. Colored Tissue Paper Glow
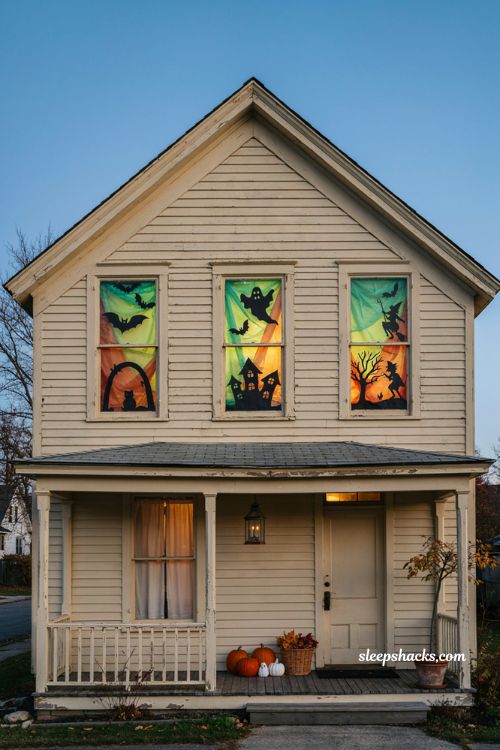
Layering two sheets of neon green or orange tissue paper behind black poster board cutouts creates a genuinely eerie colored glow once the room light switches on. From the street, the small overlaps between tissue sheets are basically invisible, so there’s no need to worry about a perfectly seamless fit. This is one of the most budget-friendly versions of the effect, often costing under twenty dollars for several windows. A basic dollar-store tablecloth in the same color works as a sturdier alternative if tissue paper feels too delicate for a multi-week display.
4. Black Light Poster Board Layering
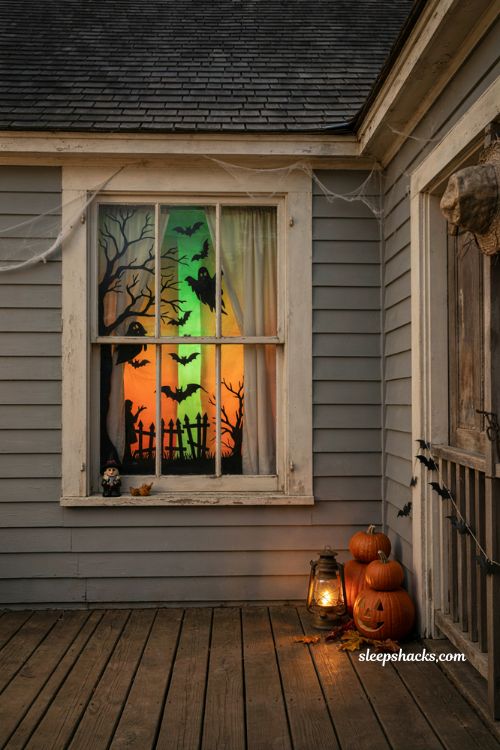
Gluing black cutout shapes onto a sheet of bright green or orange poster board, then aiming a black light at the layered piece from inside, produces a glowing effect that looks almost otherworldly after dark. This version skips backlighting through fabric entirely and instead relies on the black light to make the base color pop against the darker cutout shapes. It’s a slightly more technical setup than simple tissue paper, but the payoff is a display that looks genuinely different from most other houses on the block. Positioning the light source matters here, so it’s worth testing the angle a night or two before Halloween.
5. Green Light Silhouette Wash
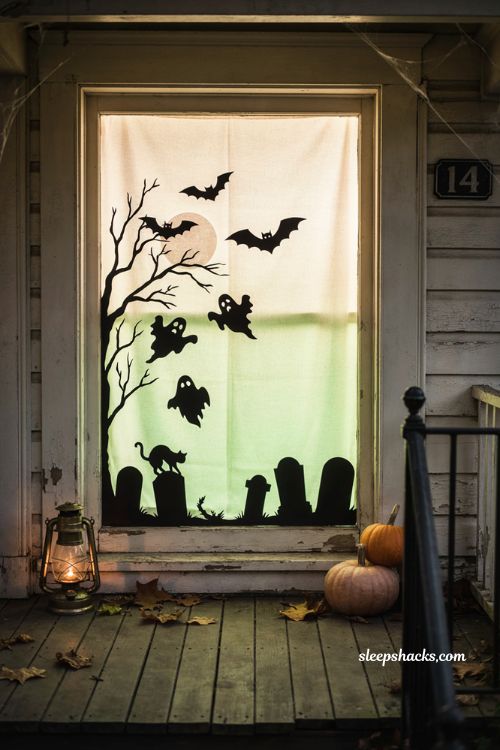
Rather than using colored material at all, shining a green-gelled light through a plain white sheet or shower curtain hung behind your cutouts achieves a similar glow without sourcing specialty fabric. This method scales well for larger or oddly shaped windows, since a single sheet can be cut to fit almost any opening. If pieces need to be joined for a wider window, designing the silhouette shapes to fall directly over the seam helps hide the connection point. Swapping the gel color is also the easiest way to change the whole mood of the display from year to year without buying new materials.
6. Custom Shower Curtain Silhouettes
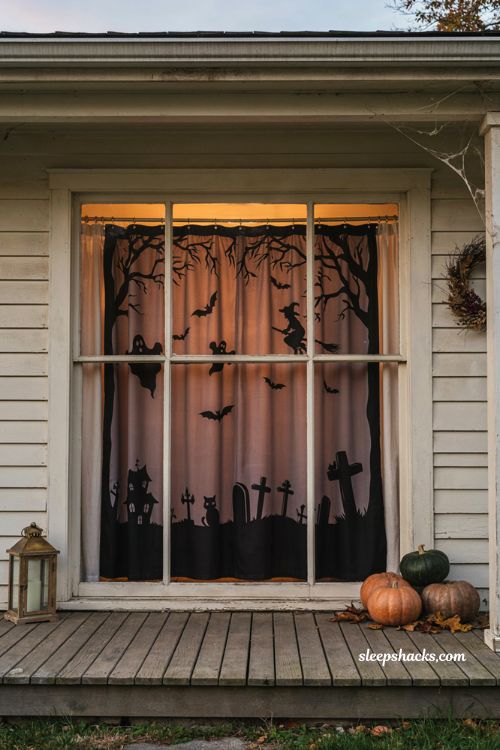
Uploading your own silhouette graphics to a print-on-demand shower curtain gives you a clean, reusable, and precisely positioned design without any freehand cutting at all. Larger windows can use the full curtain, while narrower ones might need the design split in half across two panels. Hanging the finished curtain on command hooks means setup and teardown both take just a few minutes each season. Backlighting with colored bulbs behind the curtain finishes the effect and avoids any risk of a hand-cut edge looking uneven.
7. Skeleton Window Scene
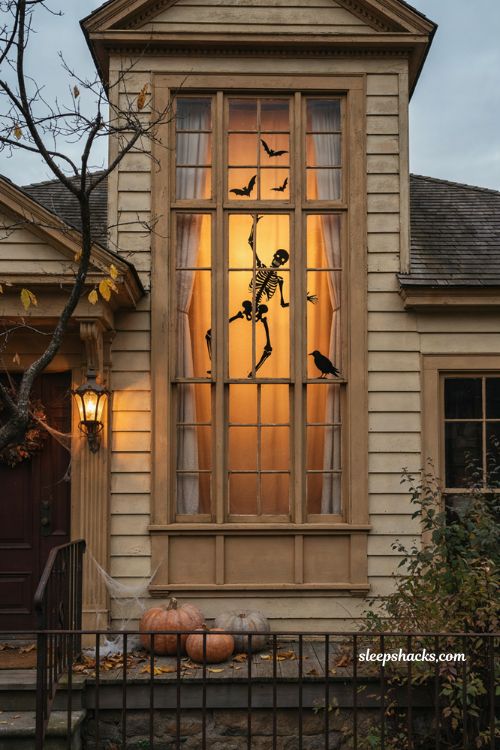
Instead of a single ghost shape, a full skeleton silhouette — arms reaching, one leg mid-stride — turns a window into more of a scene than a static shape. These work particularly well on stairwell or two-story windows, where the extra height gives the skeleton room to feel like it’s actually climbing. Pairing a skeleton cutout with a smaller crow or bat silhouette nearby adds a sense of scale and story to the display. This is a good option if you want something that reads as spookier than a simple ghost without needing full-blown gore.
8. Witch and Cauldron Tableau
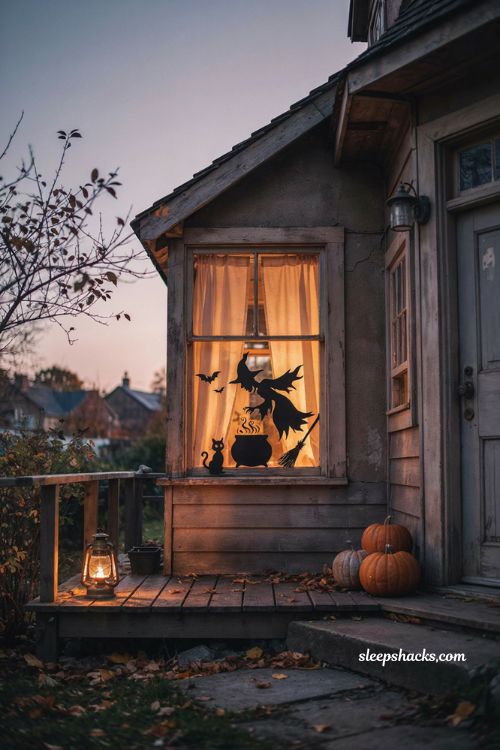
A witch silhouette bent over a cauldron, maybe with a curl of “steam” rising above it, brings a storytelling element that flat single-shape cutouts don’t quite achieve. Positioning the witch off to one side of the window rather than dead center gives the scene more visual movement and depth. This design pairs especially well with a warm orange or amber backlight rather than green, since it reads more like firelight than eerie glow. It also tends to be a crowd favorite with kids, since it leans more “storybook spooky” than genuinely frightening.
9. Bat Swarm Silhouette
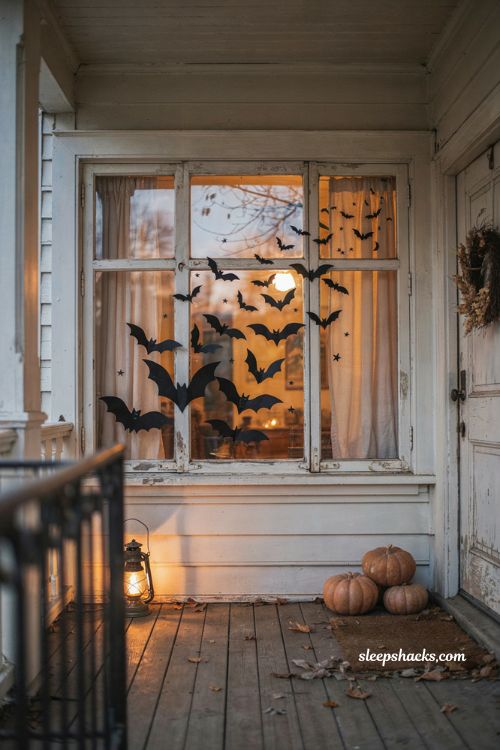
A cluster of bat cutouts scattered across the window in varying sizes, some larger near the bottom and smaller ones trailing upward, creates the illusion of a flock genuinely taking flight. This design is more forgiving than a single large silhouette since imperfect bat shapes still read clearly from a distance. It also works well combined with almost any other silhouette on this list, layered in as a secondary detail rather than the main event. Because the individual pieces are small, they’re easy to store flat in an envelope from one Halloween to the next.
10. Jack Skellington and Friends
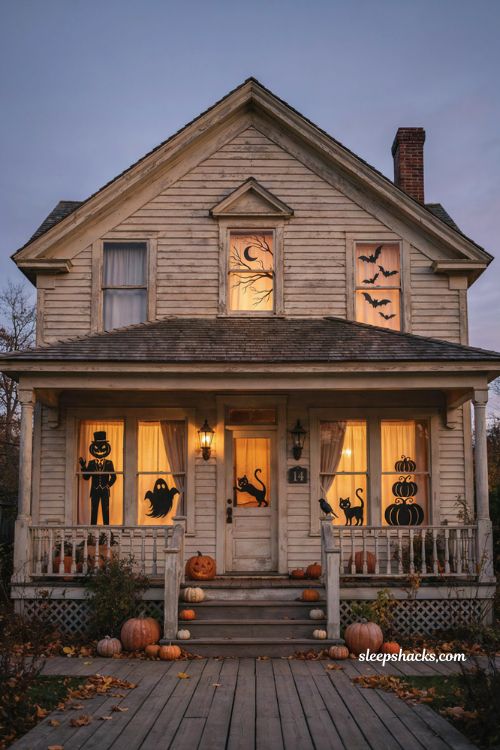
For families who love a specific spooky-but-friendly animated character, tracing a recognizable silhouette like a pumpkin king figure gives the display real personality and instant recognition from neighbors. These typically take more time to get right than a freeform ghost, so working from a printed reference image traced onto the poster board helps keep proportions accurate. Rotating through a small cast of characters across different windows tells a loose story as people walk along the front of the house. Many families build out one new character each year until they have a full collection to reuse on rotation.
11. Monster Silhouette Set
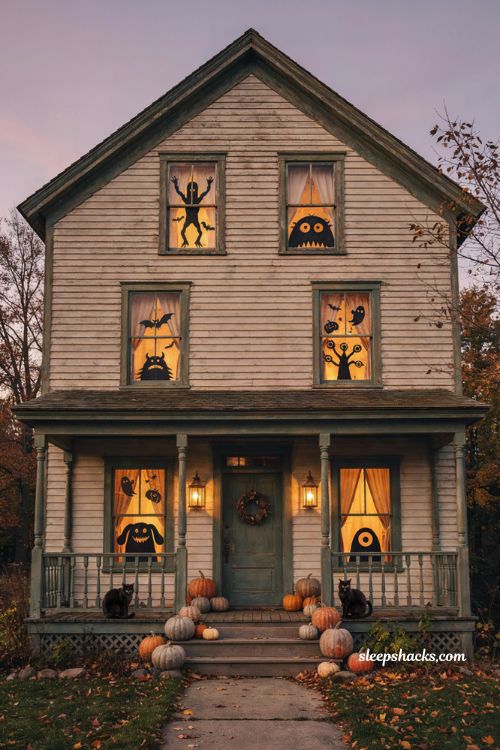
Cartoon-style monster shapes, googly eyes, jagged teeth, odd proportions, give a display personality that’s fun rather than frightening, which makes this one of the better options for younger trick-or-treaters. Because the designs don’t need to be realistic, they’re also one of the easiest styles for kids to help design and cut out themselves. Mixing a few different monster shapes across separate windows keeps the display feeling varied instead of repetitive. This style photographs well for social media too, since the shapes read as clearly intentional and a little bit silly.
12. Projector-Cast Window Scene
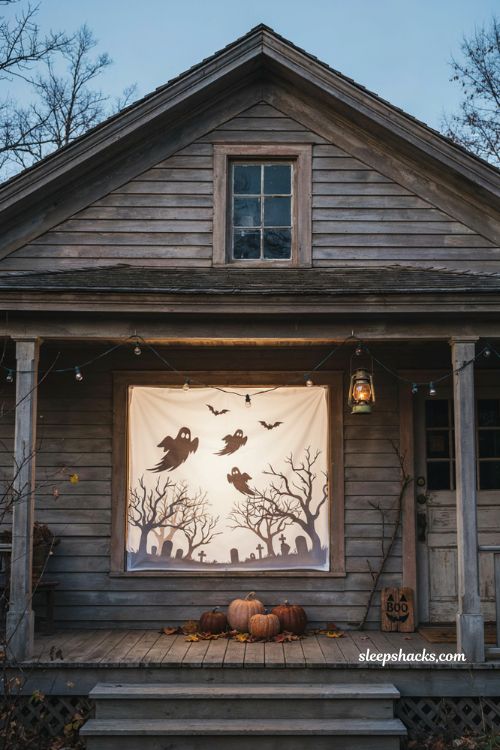
Aiming a projector at a window covered with a plain white sheet or specialty projection film brings full-motion silhouettes into play, ghosts drifting, shadows shifting, without any cutting or taping required at all. This is the most flexible option on the list since the “silhouette” can change completely from one night to the next just by swapping the video file. It also requires the least storage of anything here, since the whole setup packs down into a single small projector unit. Testing brightness and placement a couple of nights beforehand is worth doing, since porch lighting nearby can wash out a projected image if it sits too close.
13. Layered Two-Tone Silhouettes
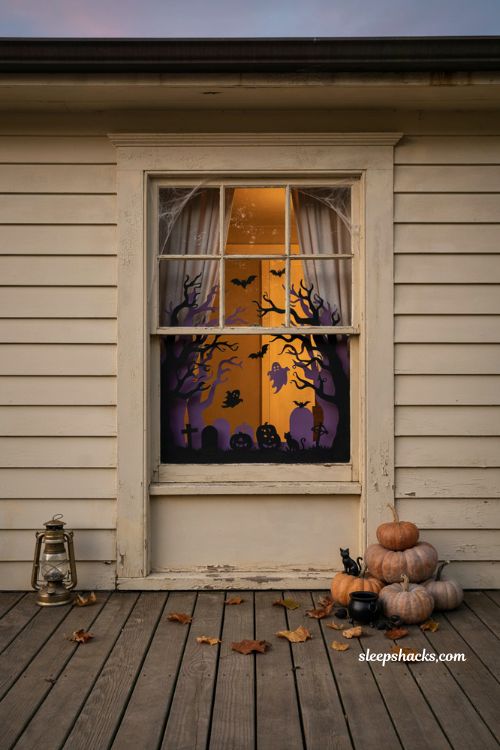
Using two shades within a single scene, deep purple layered behind black, for instance, adds visual depth that a flat single-color silhouette can’t achieve on its own. This works by cutting the same or slightly overlapping shapes from two different colored materials and offsetting them just slightly when taping them up. From a distance the layering creates a subtle sense of dimension, almost like the shape has its own shadow. This is a nice option for anyone who’s mastered the basic single-layer technique and wants to push the effect a little further.
14. Silhouette String Lights
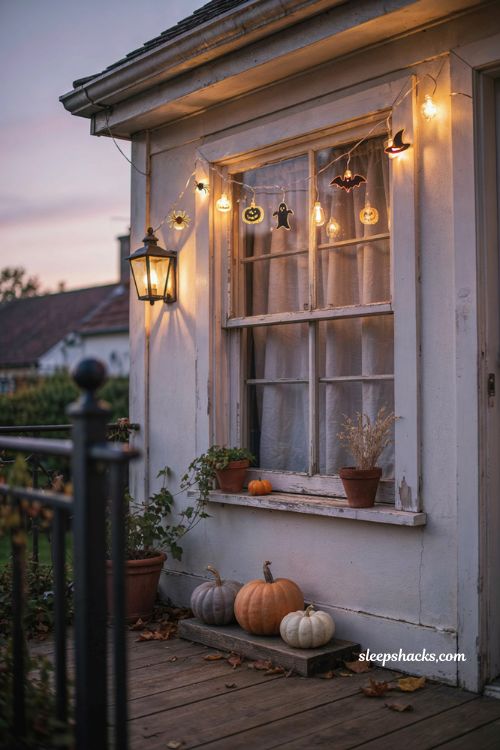
Pre-made silhouette light fixtures, spiders, ghosts, witch hats, cast a glowing shape directly onto the glass or nearby wall without needing any cutting or backlighting setup at all. These plug in and work immediately, which makes them the most beginner-friendly option if DIY cutting isn’t appealing. Several strung along a windowsill or hung from hooks above the frame create a repeating pattern that reads well from the street. Because they’re weatherproof in most cases, they also work equally well for an outdoor porch window as an indoor one.
15. Rotating Yearly Theme Collection
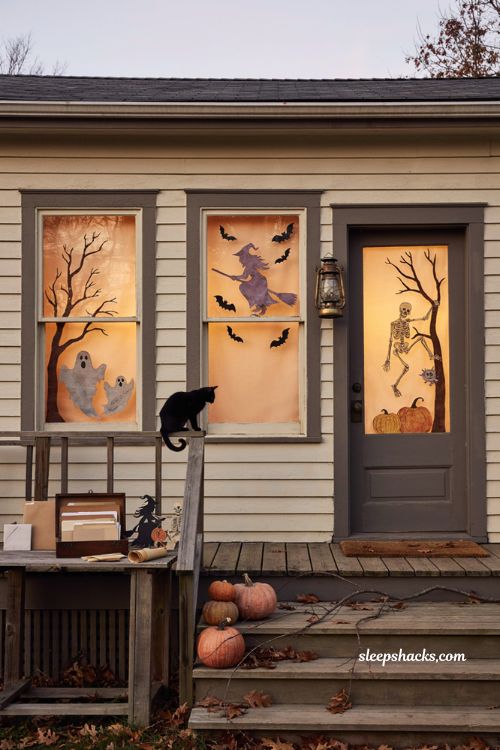
Building one new silhouette design each Halloween, then storing and reusing the whole collection on rotation, turns window silhouettes into a genuine long-term tradition rather than a one-time project. Labeling and dating each piece as you go makes it easy to mix and match old favorites with new additions every year. This approach also spreads out the time investment, since you’re only tackling one new design annually instead of building an entire display from scratch each season. Families who’ve kept this going for several years often end up with a genuinely impressive archive of past Halloweens to pull from.
Final Thoughts
The real secret to a great window silhouette display isn’t the drawing skill, it’s the shadow. Play with light before you commit to a final design; where you place the backlight, how far it sits from the fabric, what color you choose, changes the whole feeling more than the cutout itself ever will. Once you find a setup you love, it barely takes any effort to maintain year after year. Not bad for a decoration that costs less than a fast food meal.
Frequently Asked Questions
Q: What materials work best for Halloween window silhouettes?
Black poster board or contact paper for the cutouts, paired with a light-diffusing material behind them like a bedsheet, curtain panel, or thin tablecloth for backlighting.
Q: Do you need lights on for window silhouettes to show up?
Yes, most versions only become visible from outside once light passes through from inside the house or from a bulb placed behind the design.
Q: Can you make colored window silhouettes without buying colored fabric?
Yes, shining a colored light or gel through plain white fabric behind your cutouts achieves the same glow without needing to source specialty colored material.